
My buddy Aamir Lakhani wrote a guide on how to install a Secure Onion setup with Snort and Snorby. You can find the original on his blog at www.drchaos.com or HERE
Security Onion is a Linux distribution for intrusion detection, network security monitoring, and log management. It’s based on Ubuntu and contains Snort, Suricata, Bro, Sguil, Squert, Snorby, ELSA, Xplico, NetworkMiner, and many other security tools. Security Onion is a platform that allows you to monitor your network for security alerts. It’s simple enough to run in small environments without many issues and allows advanced users to deploy distributed systems that can be used in network enterprise type environments.
In this guide we will walk you through on how to download, install, and configure Security Onion. We will configure Snort to monitor our network and use Squil to manage and view our alerts. In my lab I am using a Mac Mini, and I am running Security Onion in a virtual machine using VMWare Fusion. These instructions can be modified to work on similar systems. Additionally, I have two network cards: one for management, and one for monitoring. My monitoring interface is connected to a SPAN (network mirroring) port on my switch.
Part I: Installing Security Onion
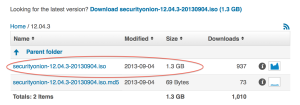
1. Download Security Onion from http://securityonion.blogspot.com/. I used the direct download link from Sourceforge.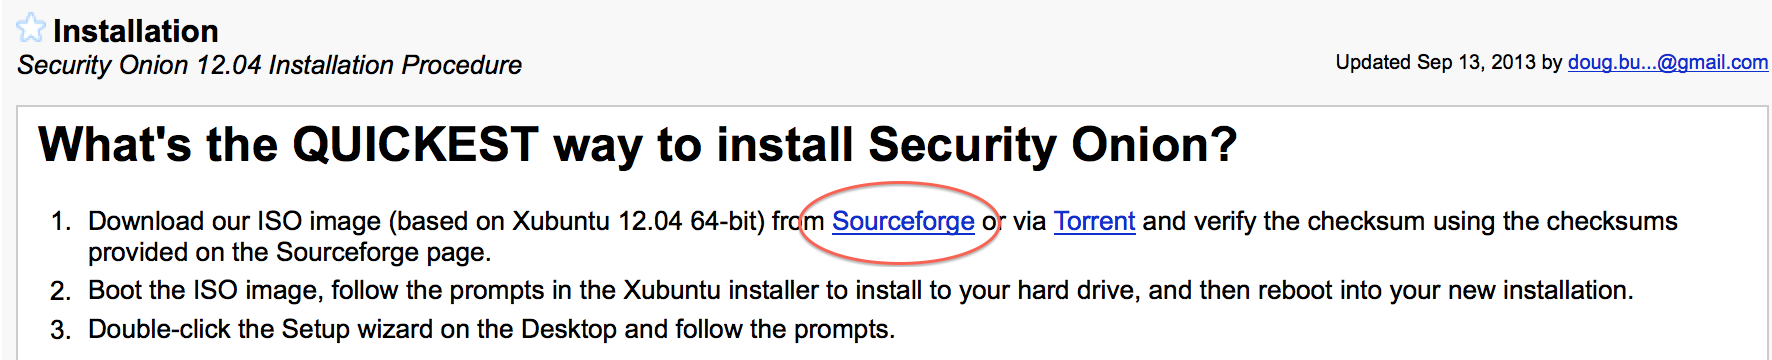
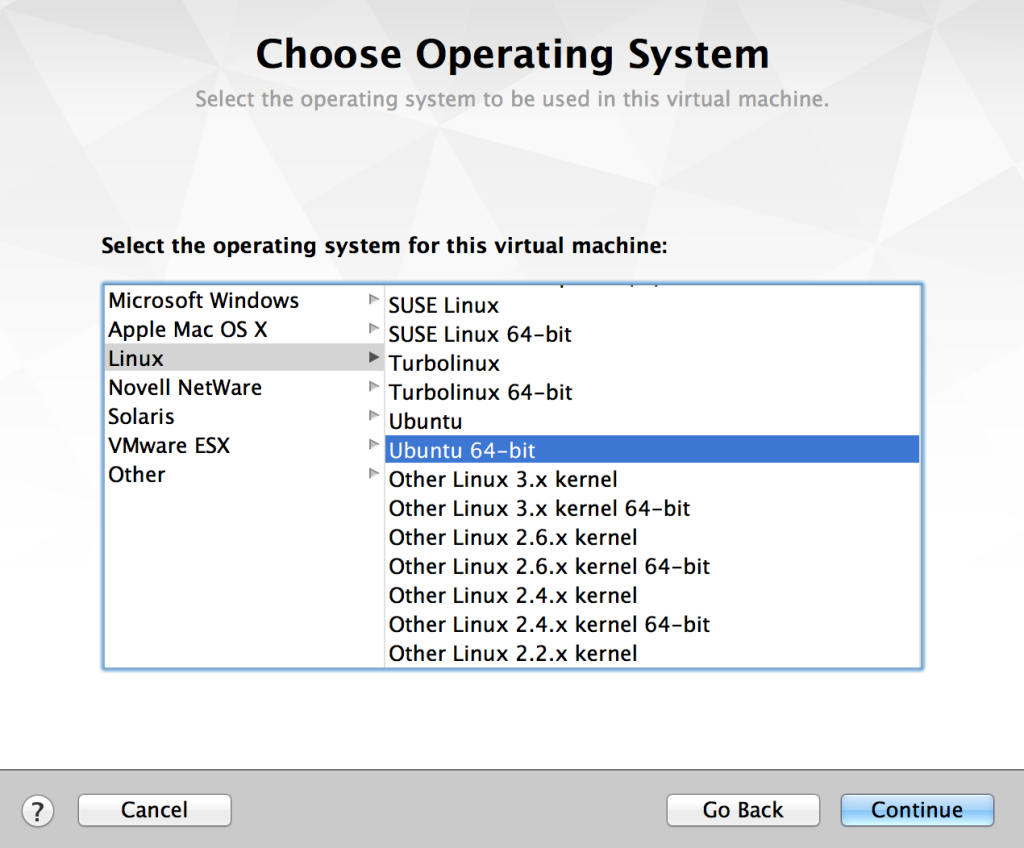
2. I used VMWare Fusion to install Security Onion. Security Onion is based on Ubuntu 64-bit, so I chose this when VMWare asked what type of OS you are installing. Ensuring you are selecting a 64-bit architecture is important.
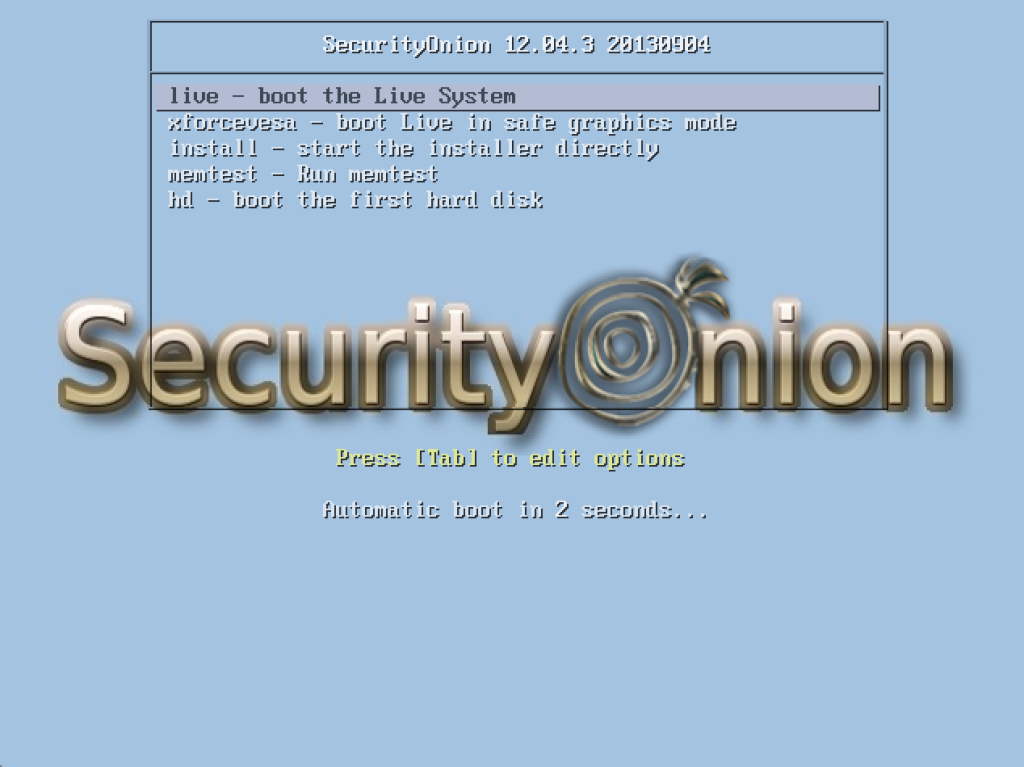
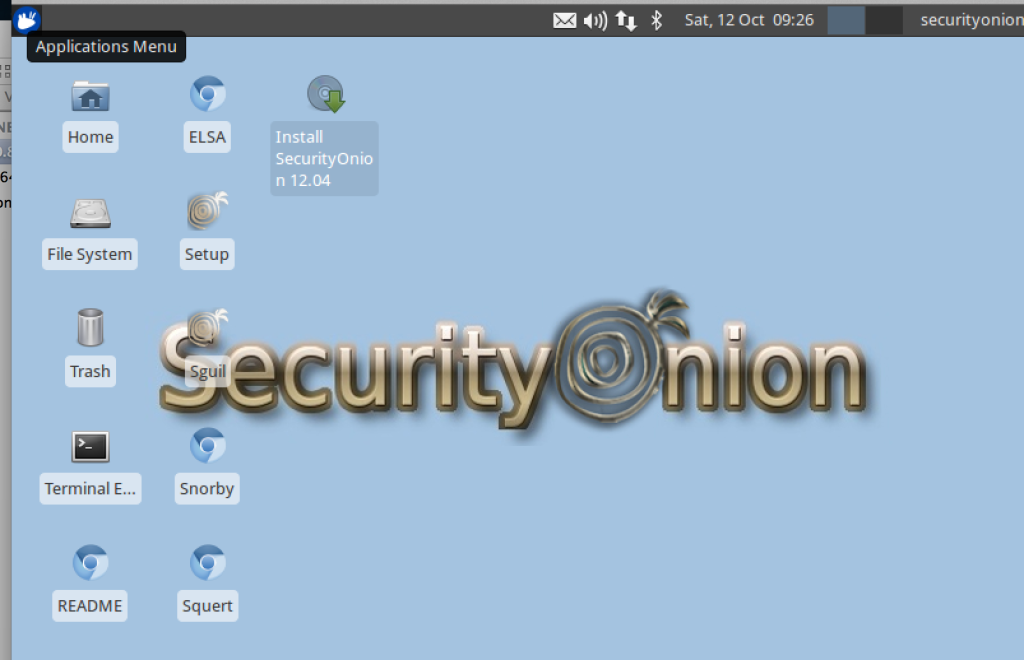
3. When the system boots for the first time, select option 1 for Live System. This way we can play around with the system first. We can also install it directly to our hard drive (or virtual hard drive) when the system boots.
4. When you are ready to install the system, select the install script on the desktop. The install script will walk you thru a series of steps on installing the system permanently.
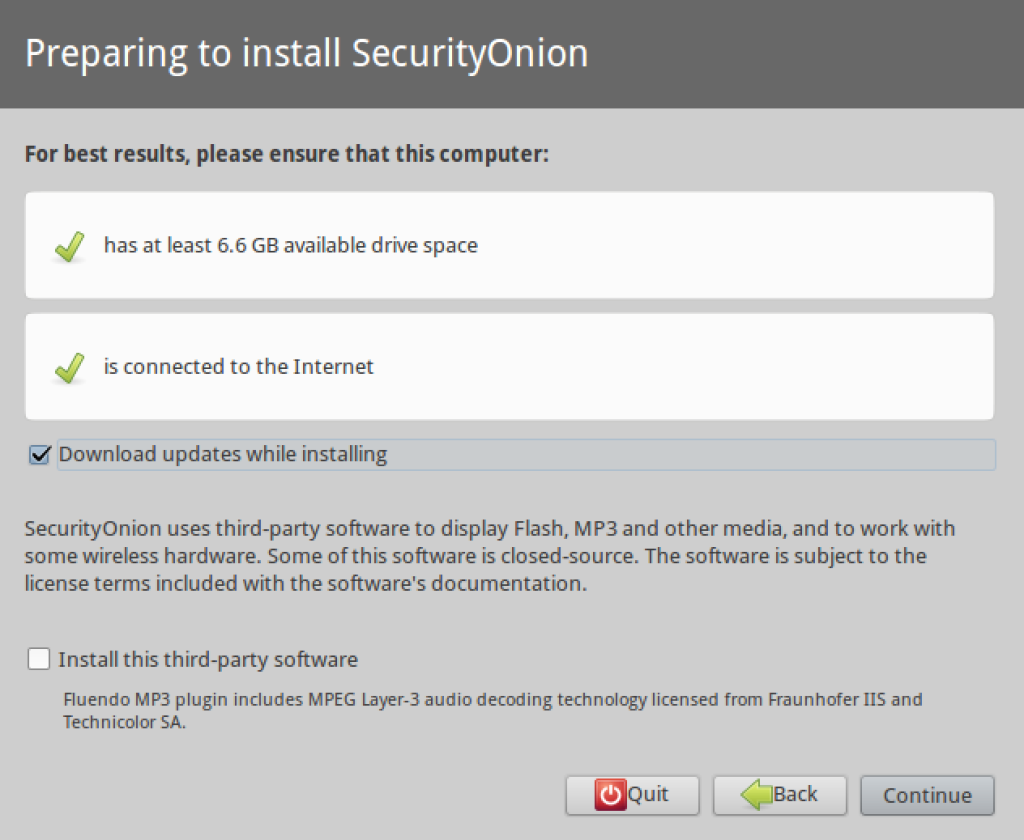
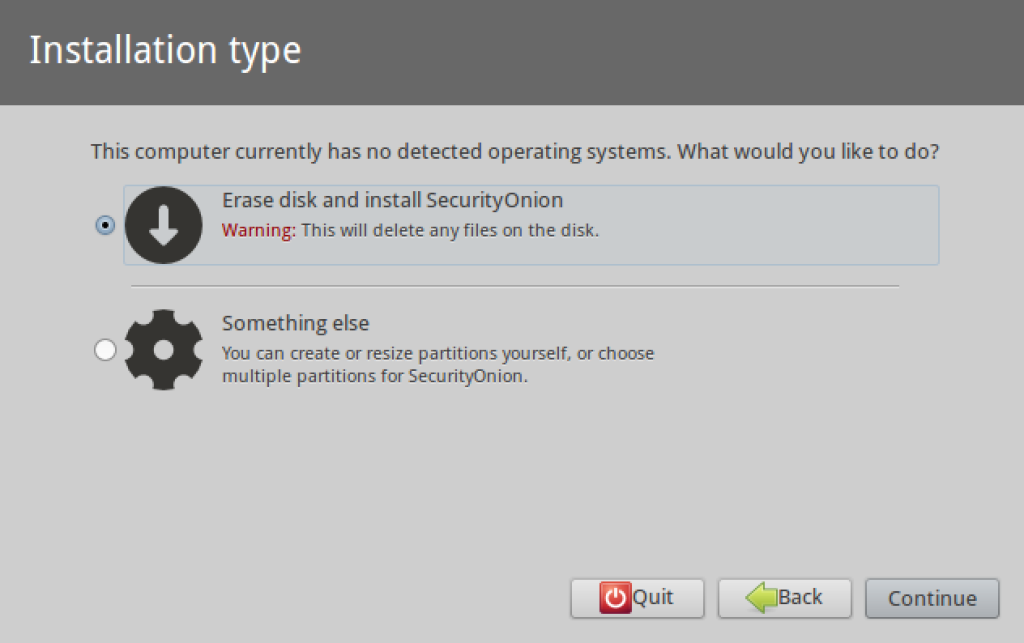
5. The installer will prompt you on how you would like to partition the hard drive. Since this is a virtual machine, I will let the installer format my virtual disk and use it in its entirety.
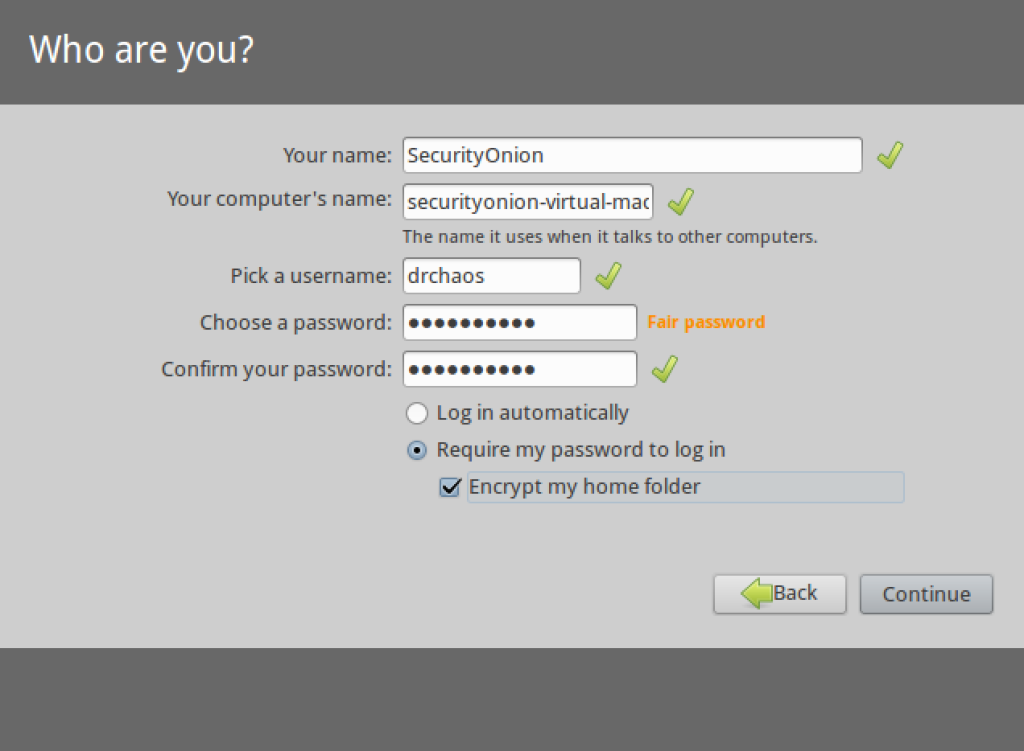
6. Remember the username you chose when installing the system. The system does not cache your username on reboots.
I also selected the option to encrypt my home folder (it’s a security platform). I received some feedback that the installer would not complete if this option was selected. I could not recreate this issue, but you may want to keep this in mind.
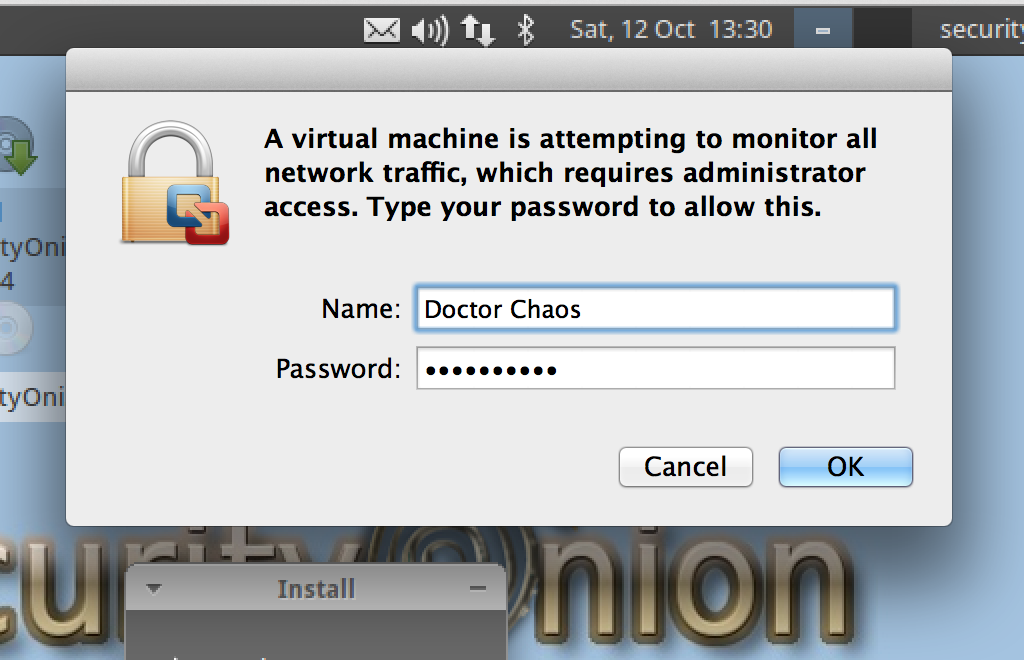
7. Security Onion will attempt to put a network interface in monitoring mode so it can monitor security events. In some cases, you may be prompted by your native OS to authenticate this process.
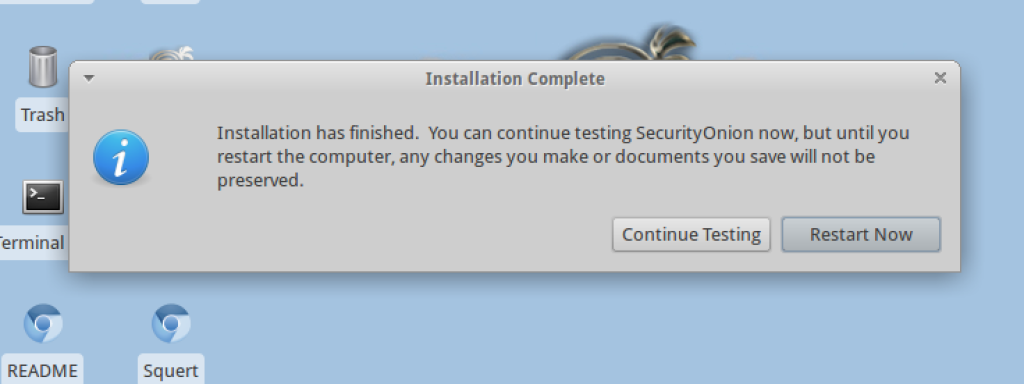
8. When the installation is complete you will be prompted to reboot your system.
Part II: Updating the Security Onion
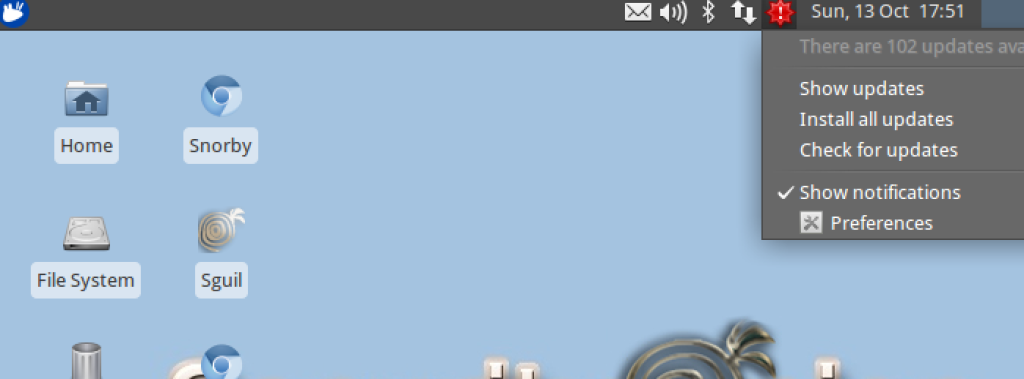
When the installation is complete and the system reboots, you will need to update the Ubuntu OS components as well as the Security Onion components.
1. On the menu bar, select “Check for updates”. When the process is complete, go back to the menu bar, and select “Install all updates”
It is not uncommon that you may need to perform this step several times before all updates are downloaded and installed.
When all updates have finished installing, restart the system.
Part III: Installing VMWare Tools (Optional)
I personally prefer to install VMWare tools on my system. Installing VMWare tools on Security Onion is no different than installing VMWare tools on any other Linux guest OS. Detailed instructions can be found here: http://www.vmware.com/support/ws5/doc/ws_newguest_tools_linux.html
You may need to reboot your system after you install VMWare Tools.
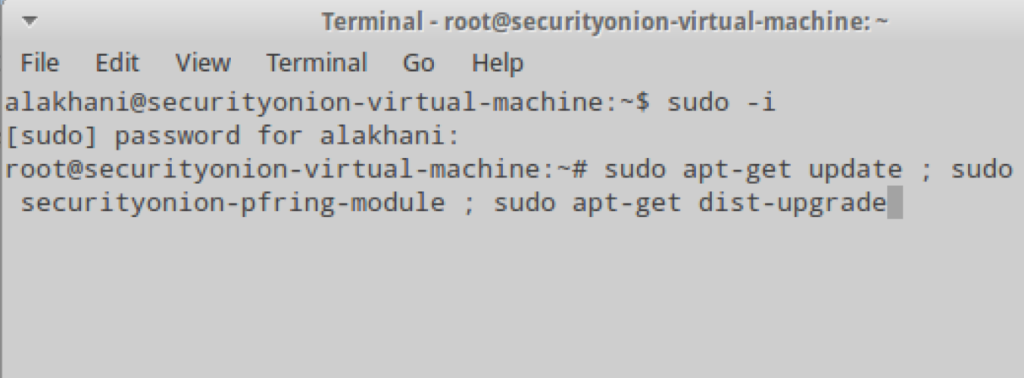
NOTE: I used the sudo -i command to gain root privileges to system. You will need to ensure you are root when from this point forward.
Part IV: Updating Security Onion
1. Now we will update the Security Onion components. This will update the latest scripts and security tools used inside the Security Onion platform.
Since all of packages are in a standard Ubuntu Launchpad PPA, you can use standard Ubuntu package management tools to update ALL packages (Ubuntu and Security Onion). However, there are some caveats to be aware of:
- MySQL – if you’ve already run Setup, please see the recommended procedure for updating the MySQL packages.
- PF_RING and new kernel packages
You may be prompted to update your kernel packages and PF_RING at the same time. If you do so, the PF_RING kernel module will get built for your current kernel and not for the newly installed kernel and upon reboot services will fail. To avoid this, you should install just the PF_RING kernel module by itself and then install the kernel and any other remaining package updates. Here’s a one-liner that will do that:
sudo apt-get update ; sudo apt-get install securityonion-pfring-module ; sudo apt-get dist-upgrade
If you accidentally install both the kernel and PF_RING packages at the same time and then reboot and find out that PF_RING services (Snort and Suricata) are failing, you can reinstall the securityonion-pfring-module package:
sudo apt-get install --reinstall securityonion-pfring-module
NOTE: I used the sudo -i command to gain root privileges to system. You will need to ensure you are root when from this point forward.
The update procedure will take a few minutes.
Part V: Setting up Security Onion
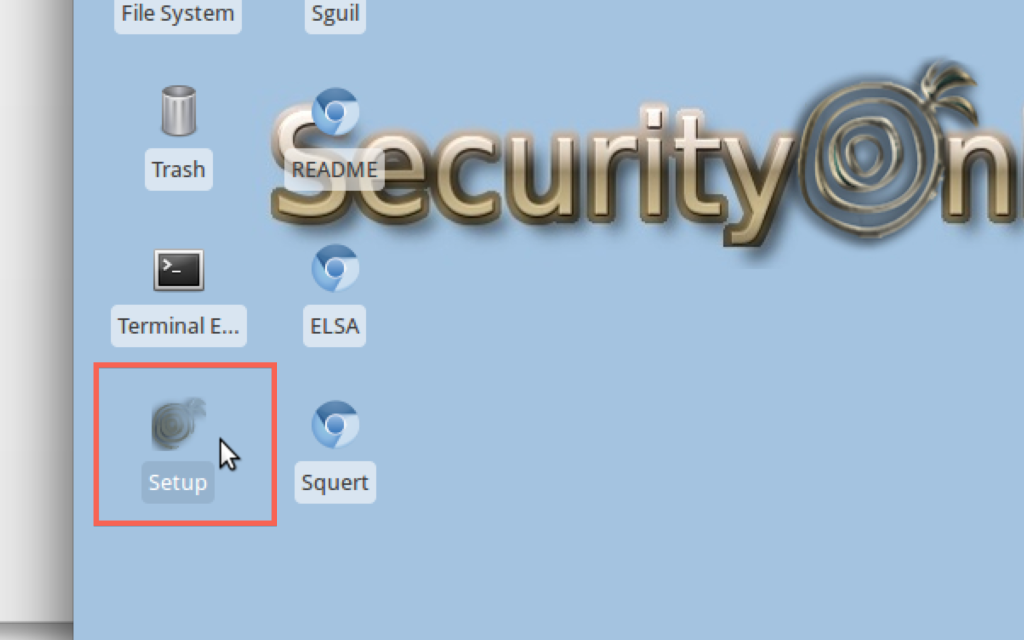
1. Double click on the install script on the desktop.
2. Enter your root password.
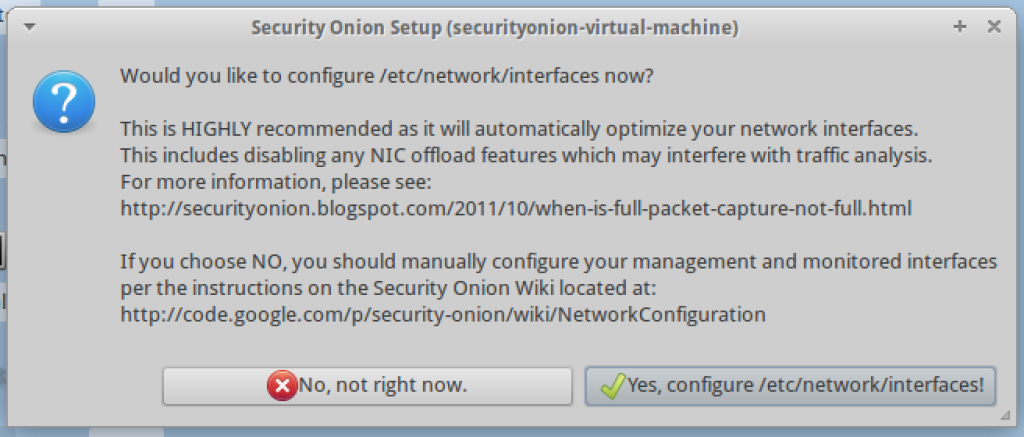
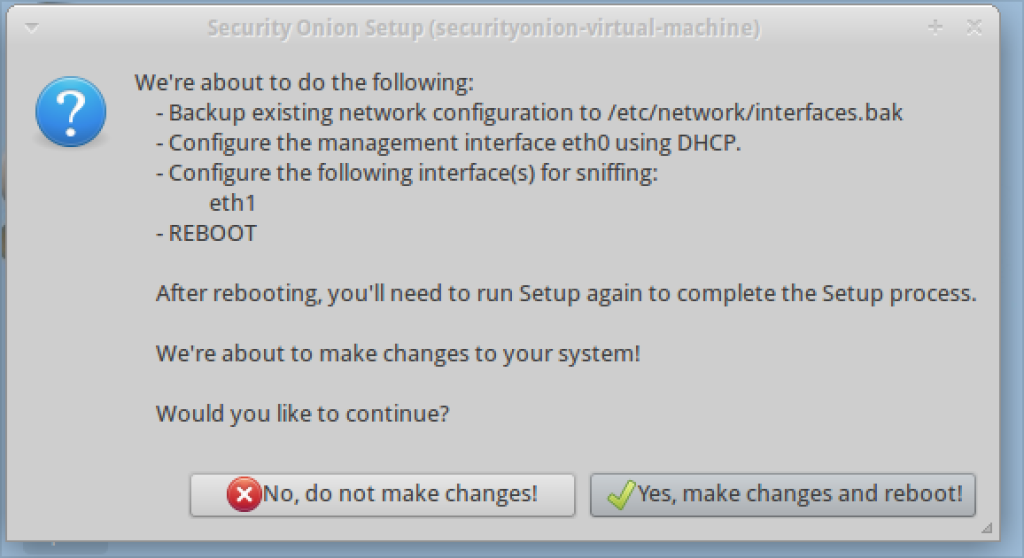
3. You will prompted to configure network interfaces. Select yes.
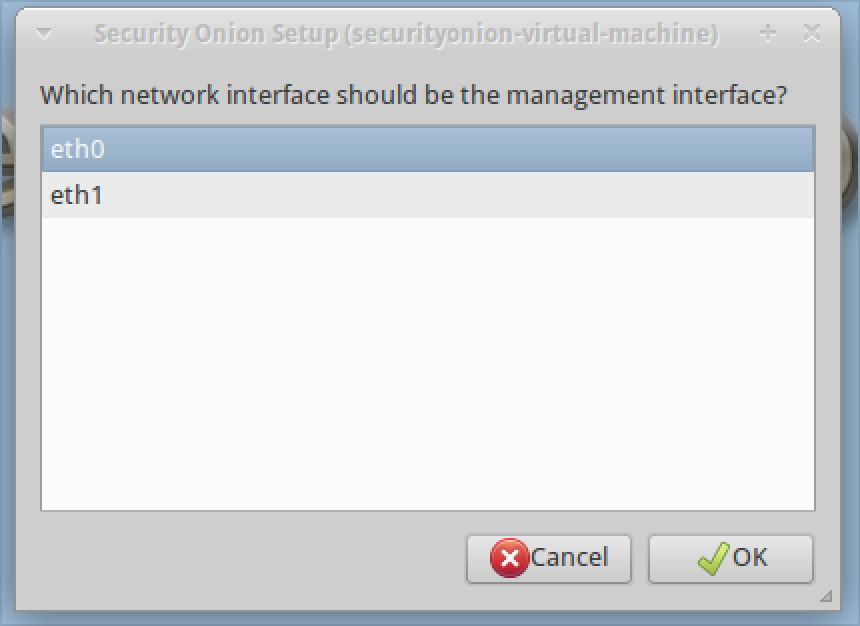
4. You will be asked to chose your management interface. This is the interface that will have an IP address and be used to manage the system.
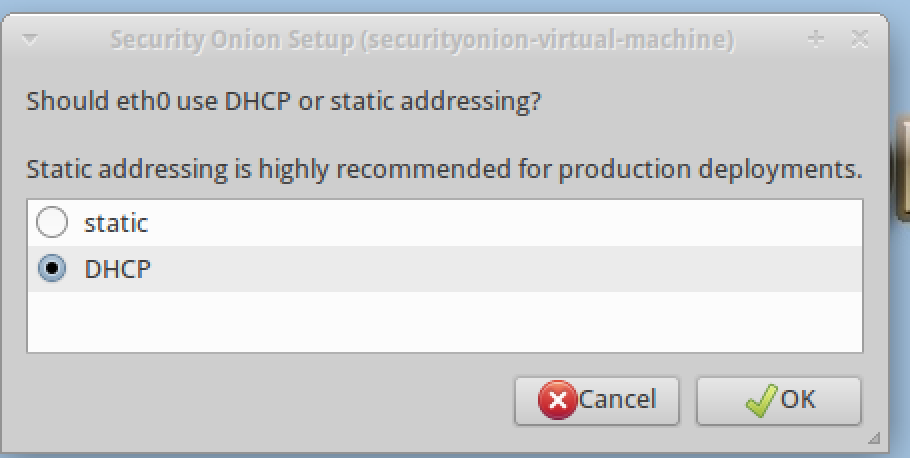
5. You will be asked to configure the interface for static IP settings or DHCP. In most cases you will want to configure static IP addresses. However, in my lab environment I configured DHCP.
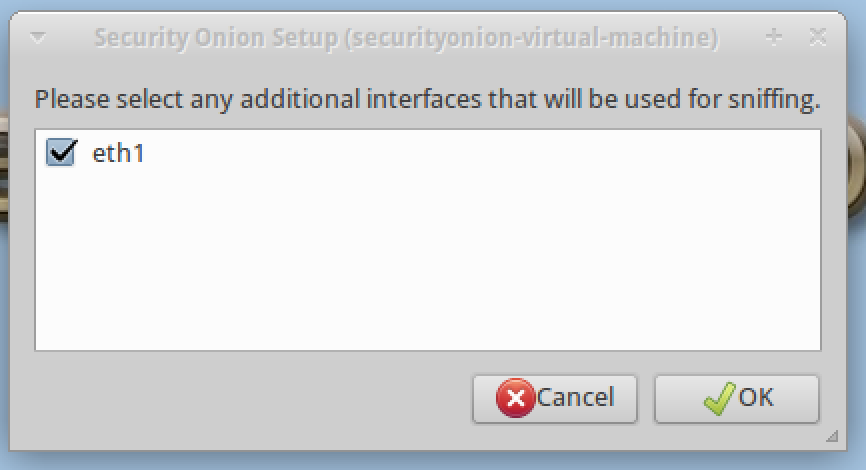
6. You will be asked to configure a monitoring interface. This is the interface the security tools will use to monitor network traffic.
7. The system will prompt you to reboot when complete.
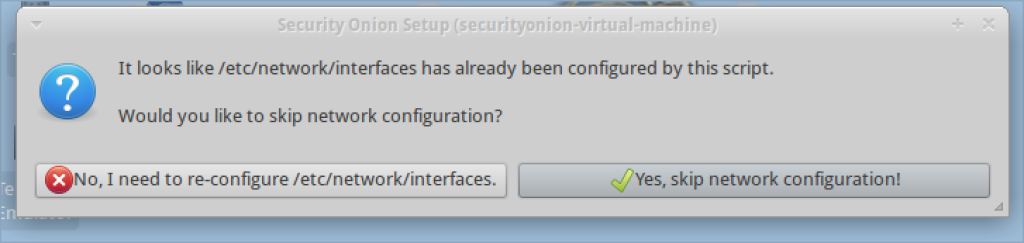
8. When the system reboots, click on the setup icon on the desktop again.
9. You may Skip the network setup since it is already completed.
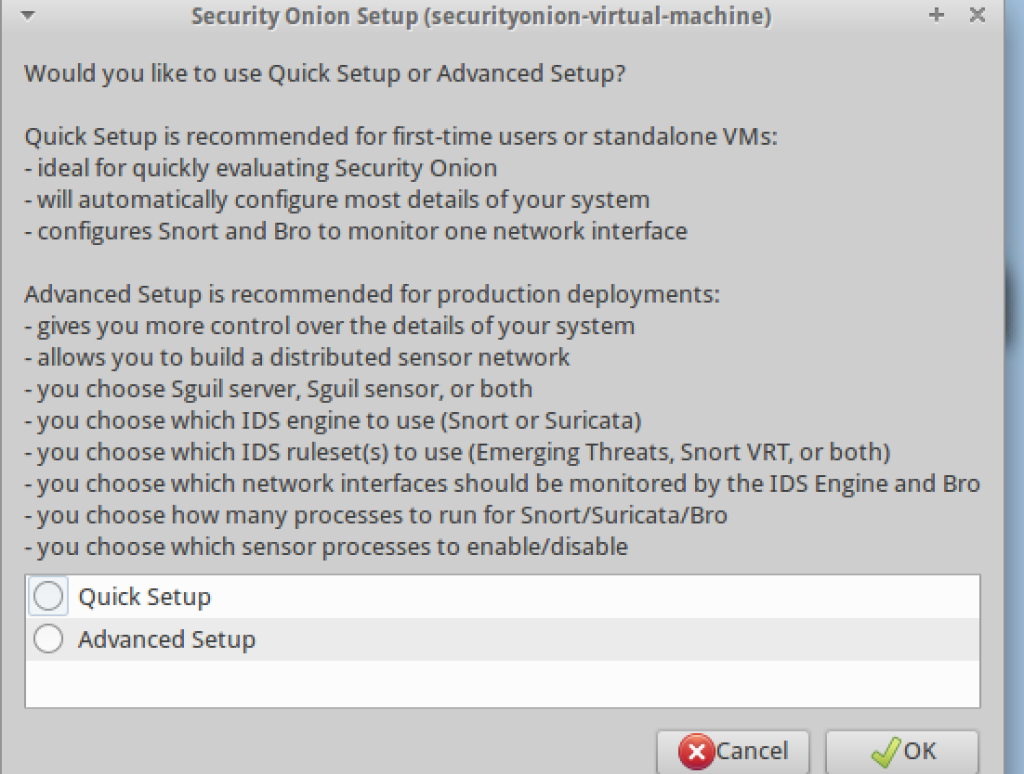
10. You will need to select to install Security Onion as a distributed system or chose the Quick Setup option. We will select the Quick Setup option.
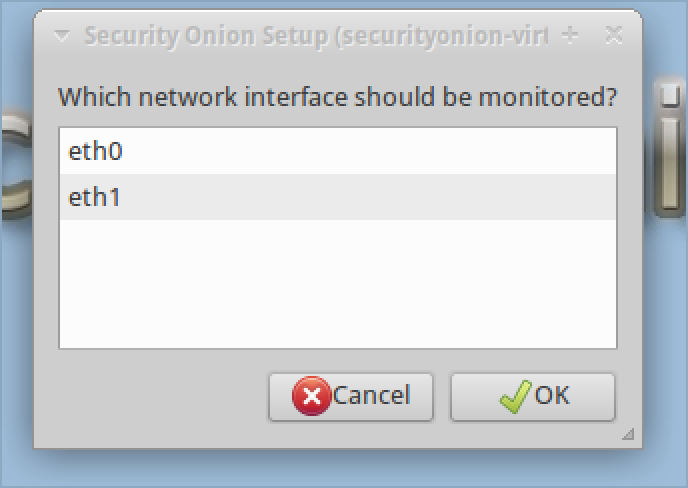
11. You will be asked to select which interface is the monitored (non-management) interface. Select the appropriate interface.
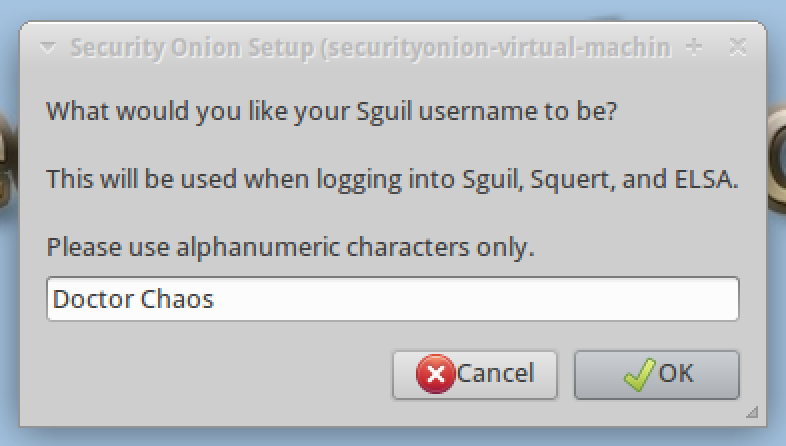
12. You will need to create a username that will be used to log into and use the Sequill, Squert, and ELSA tools.
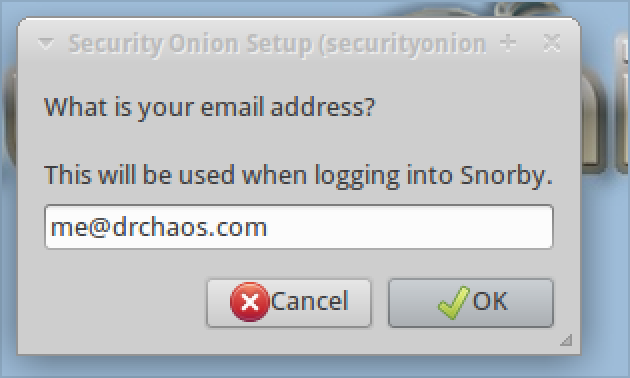
13. You will be asked for an email address. This is the username you will use to log into Snorby. Snorby is going to one the primary interfaces we will use to monitor Snort.
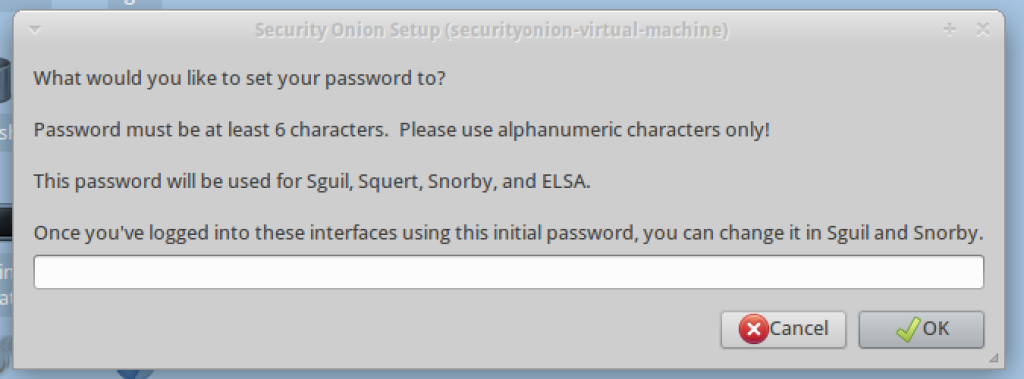
14. You will be asked to create a password. The system only accepts alphanumeric passwords, so you cannot use special characters.
15. Enable ELSA
16. The system will finish configuring Security Onion tools
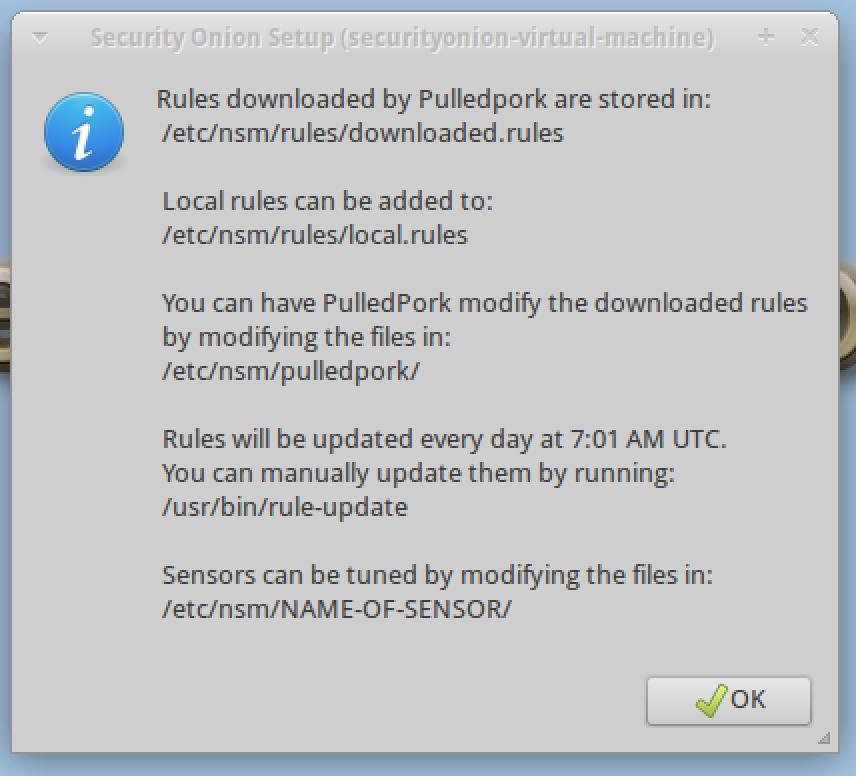
Not the location of the local rules, we will show you how to tune the rules in a future article.
Although the rules will update automatically, it is a good idea to update them manually after installation. We will update the rules manually later in this article.
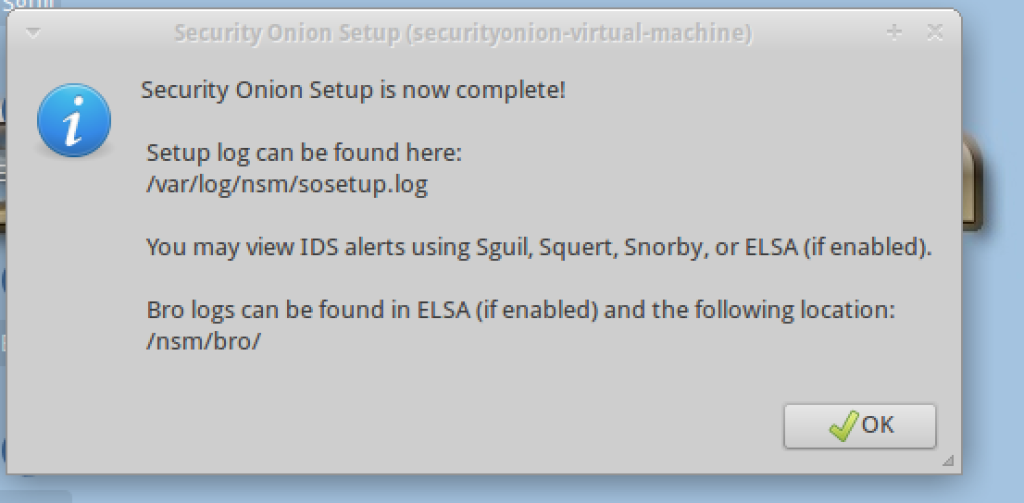
Congratulations you have installed Security Onion
Part VI: Using Security Onion
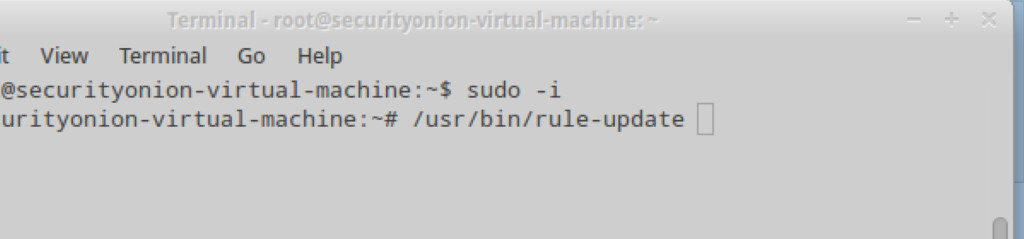
The first thing we will want to do is update the Snort rules in Security Onion. Open up a terminal window and enure you have root privileges. We used the sudo -i command to change over to root.
The command /usr/bin/rule-update will update the rules.
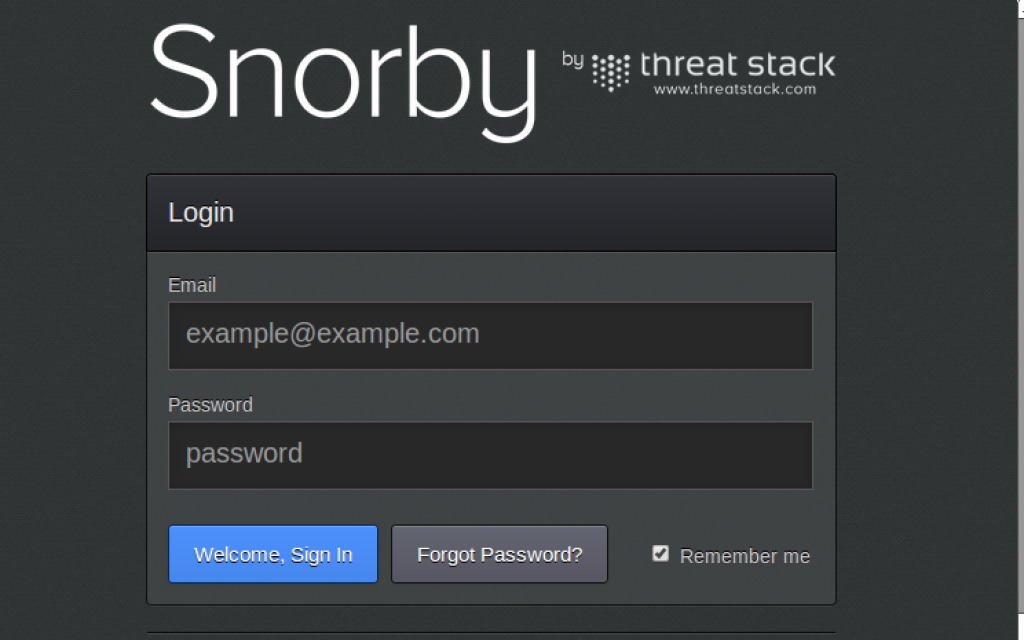
Next, we will launch Snorby. You can simply double click on the Snorby icon on the desktop. You will use the email address and password you created during the setup script in Part V to login.
You may not have many alerts at this point, however, if you navigate to the “Events” menu bar, you should start seeing some traffic (assuming your monitoring interface is setup correctly).
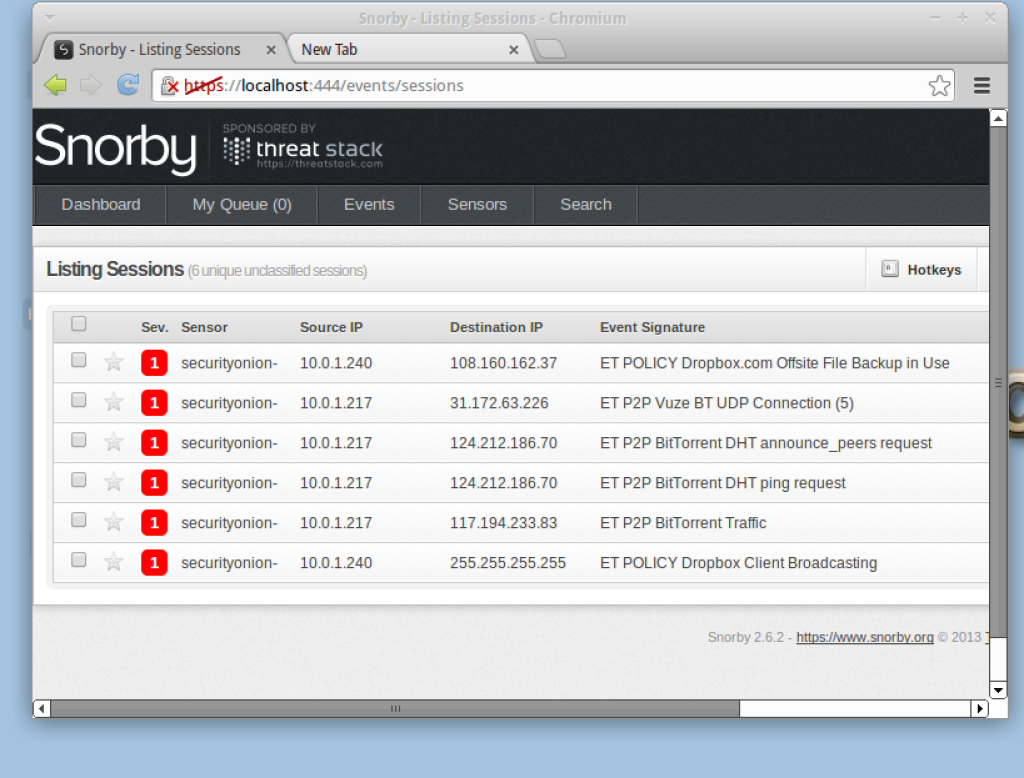
The alerts are based on Snort rules. The rules can be modified or disabled. Security incidents can be created based on rules (or multiple events). In this scenario you can see we have Dropbox and BitTorrent traffic. In some cases we may want to disable a rule, or change the alert threshold.
Congratulations, you have successfully setup Security Onion, configured Snort to monitor your data, and are using Snorby to view alerts.
In the future, I will write a detailed guide on how to tune Snort in Security Onion and how to use some of the other tools within the platform.


Good Tutorial , I didn’t try this yet. But will try and post doubts and feedback.