Cisco acquired Sourcefire in 2013 as part of a strategic move to enhance Cisco’s security portfolio. Sourcefire’s catalog covers IPS/IDS, Application Security and Control, Firewalling, Malware Detection and a slew of open source tools such as SNORT, ClamAV, and Razorback.
One key piece to the Sourcefire puzzle is the management of the various solutions. This is done through Defense Center or FireSIGHT, which is the centralized management tool used for visibility of security and network events across the entire network. This post will provide a overview of using Defense Center / FireSIGHT from a administrative viewpoint.
Sourcefire login screen
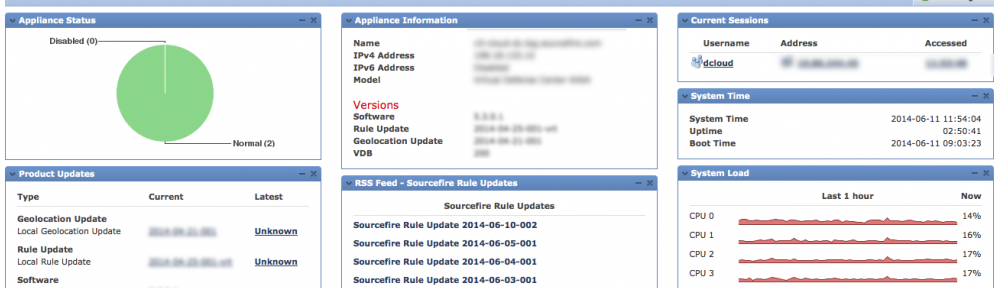
Defense Center is accessed using a standard browser as shown above. Once you log in, you will hit the main dashboard view. There are focused Summery dashboards for network, threat and intrusion events as well as options to create whatever variation of customize dashboard you desire making it easy for an administrator to identify the top things to focus on.
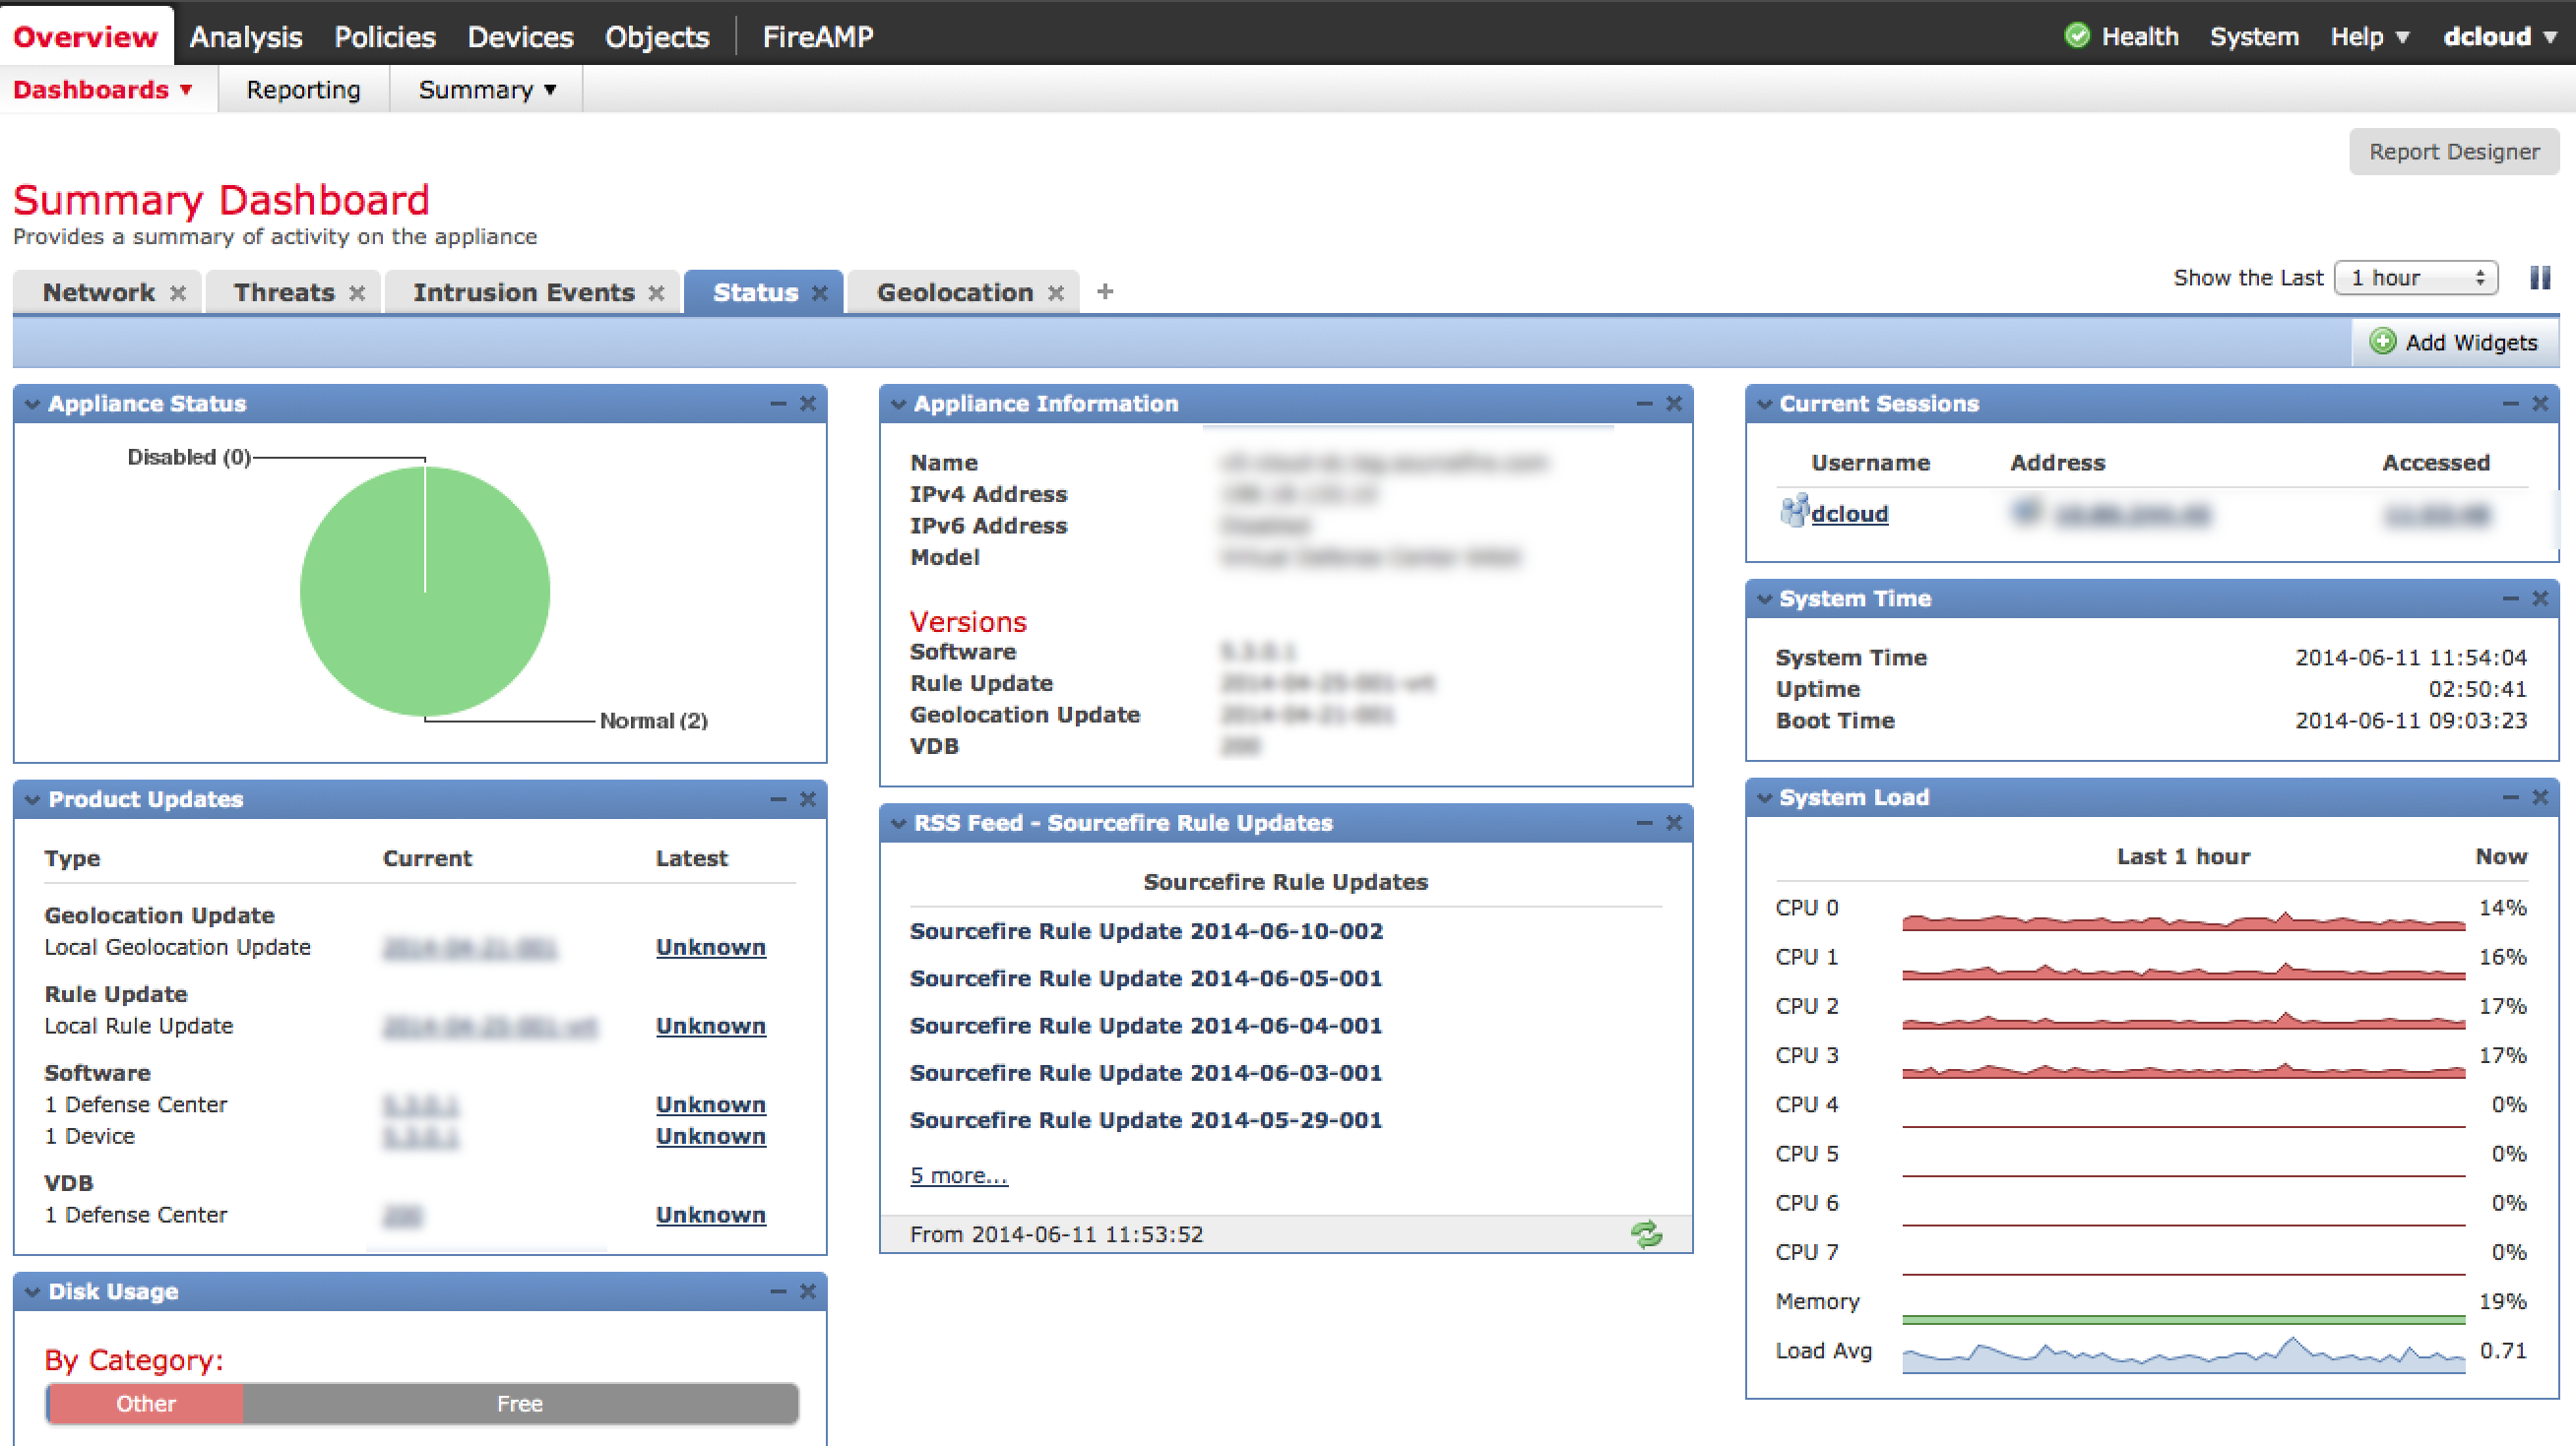
Defense Center Summary Dashboard
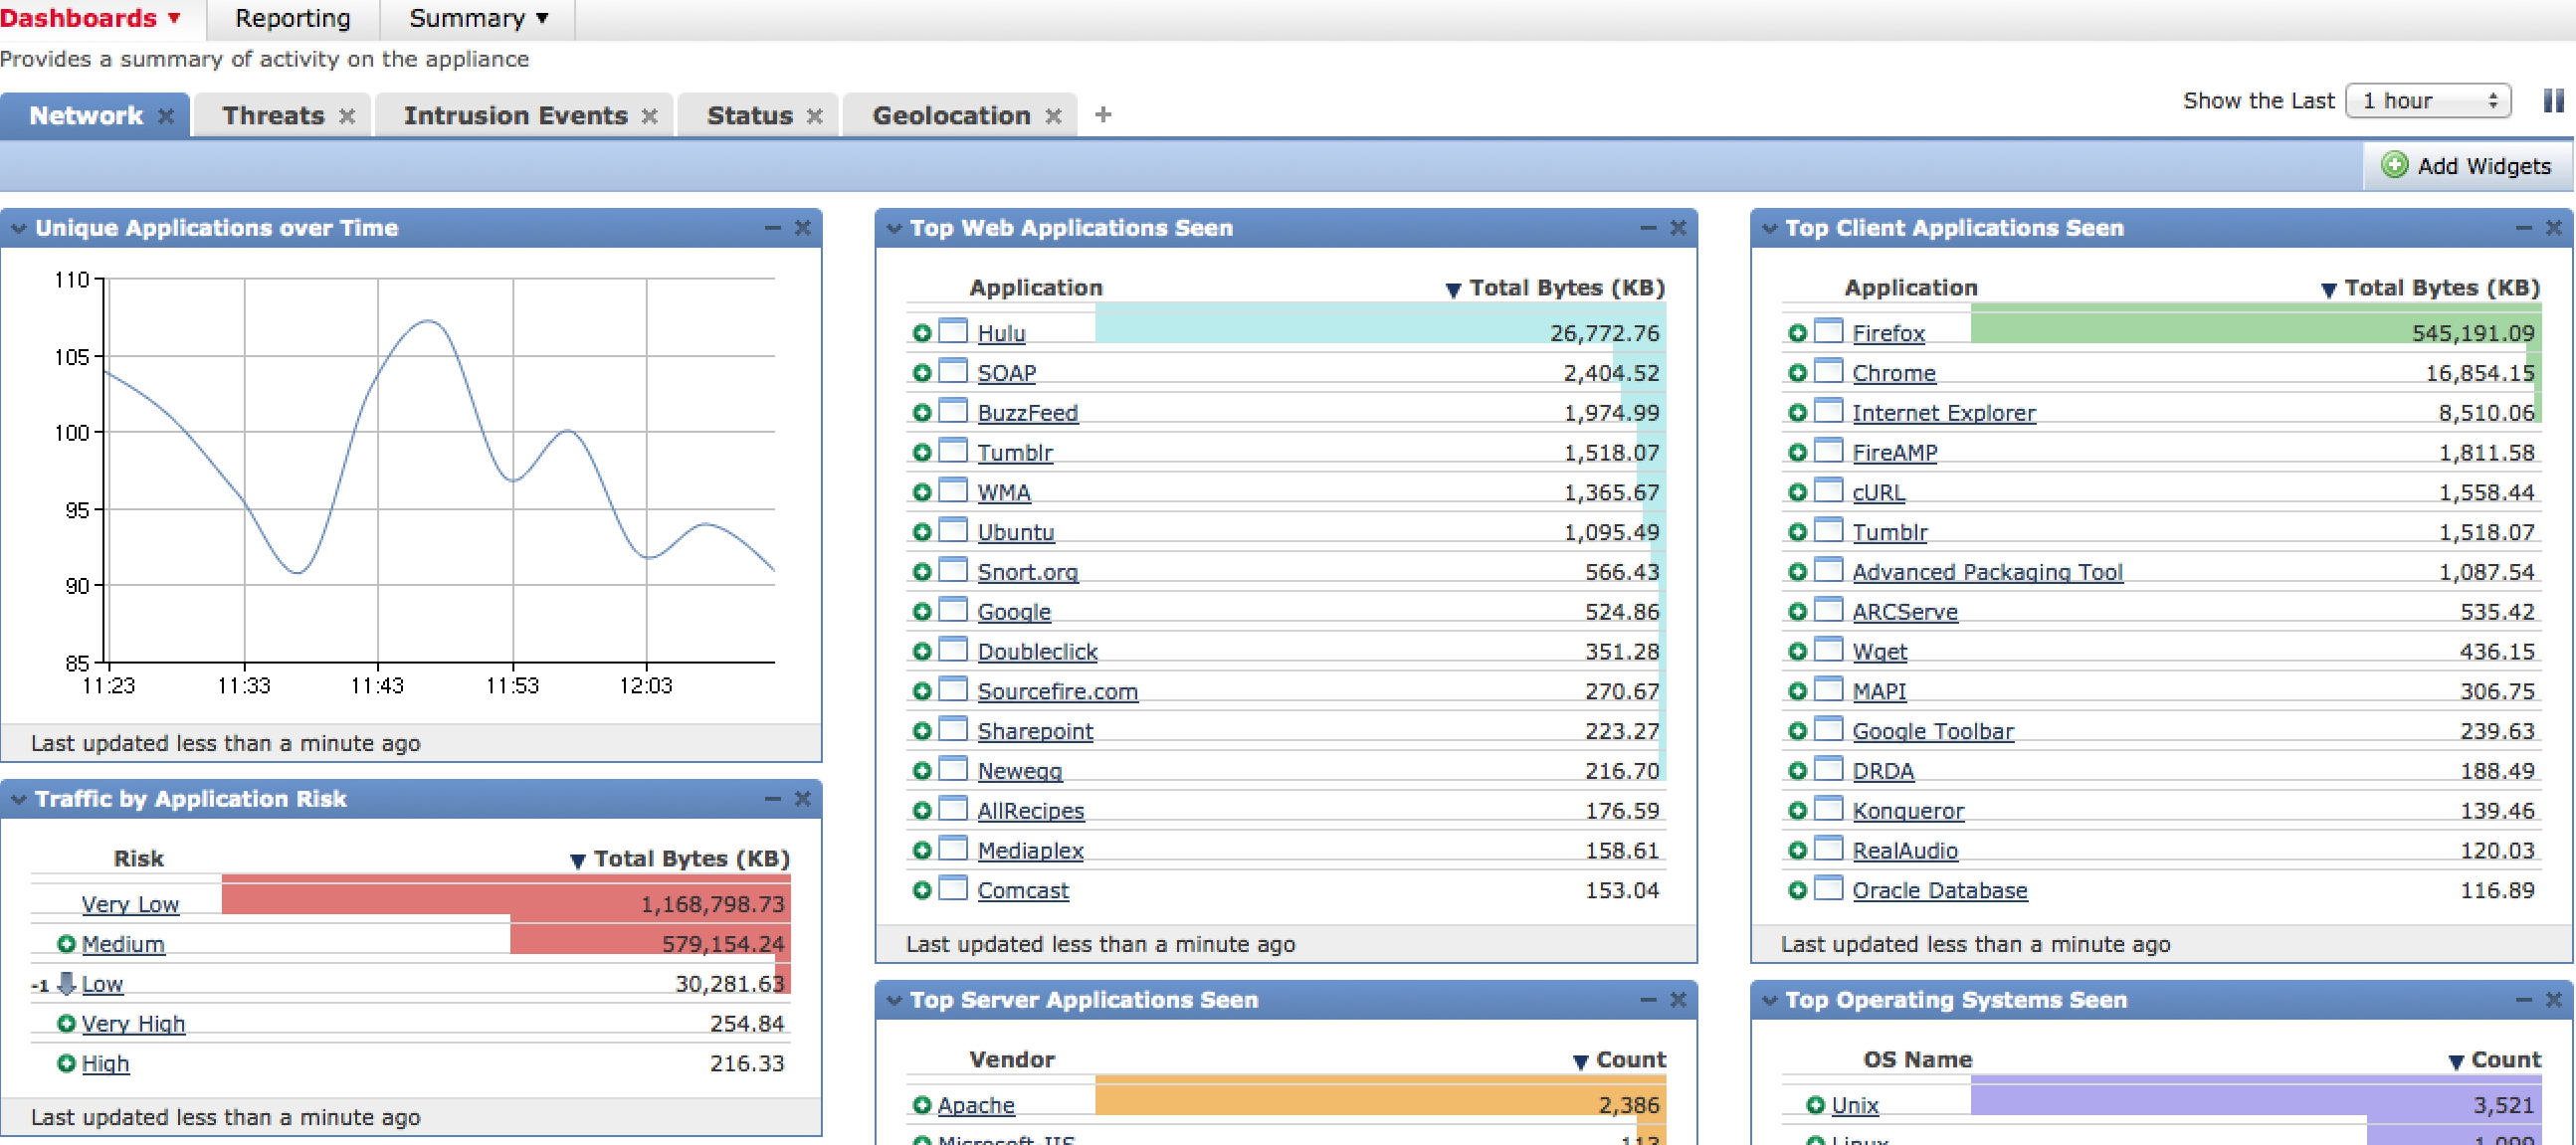 Defense Center Network Dashboard
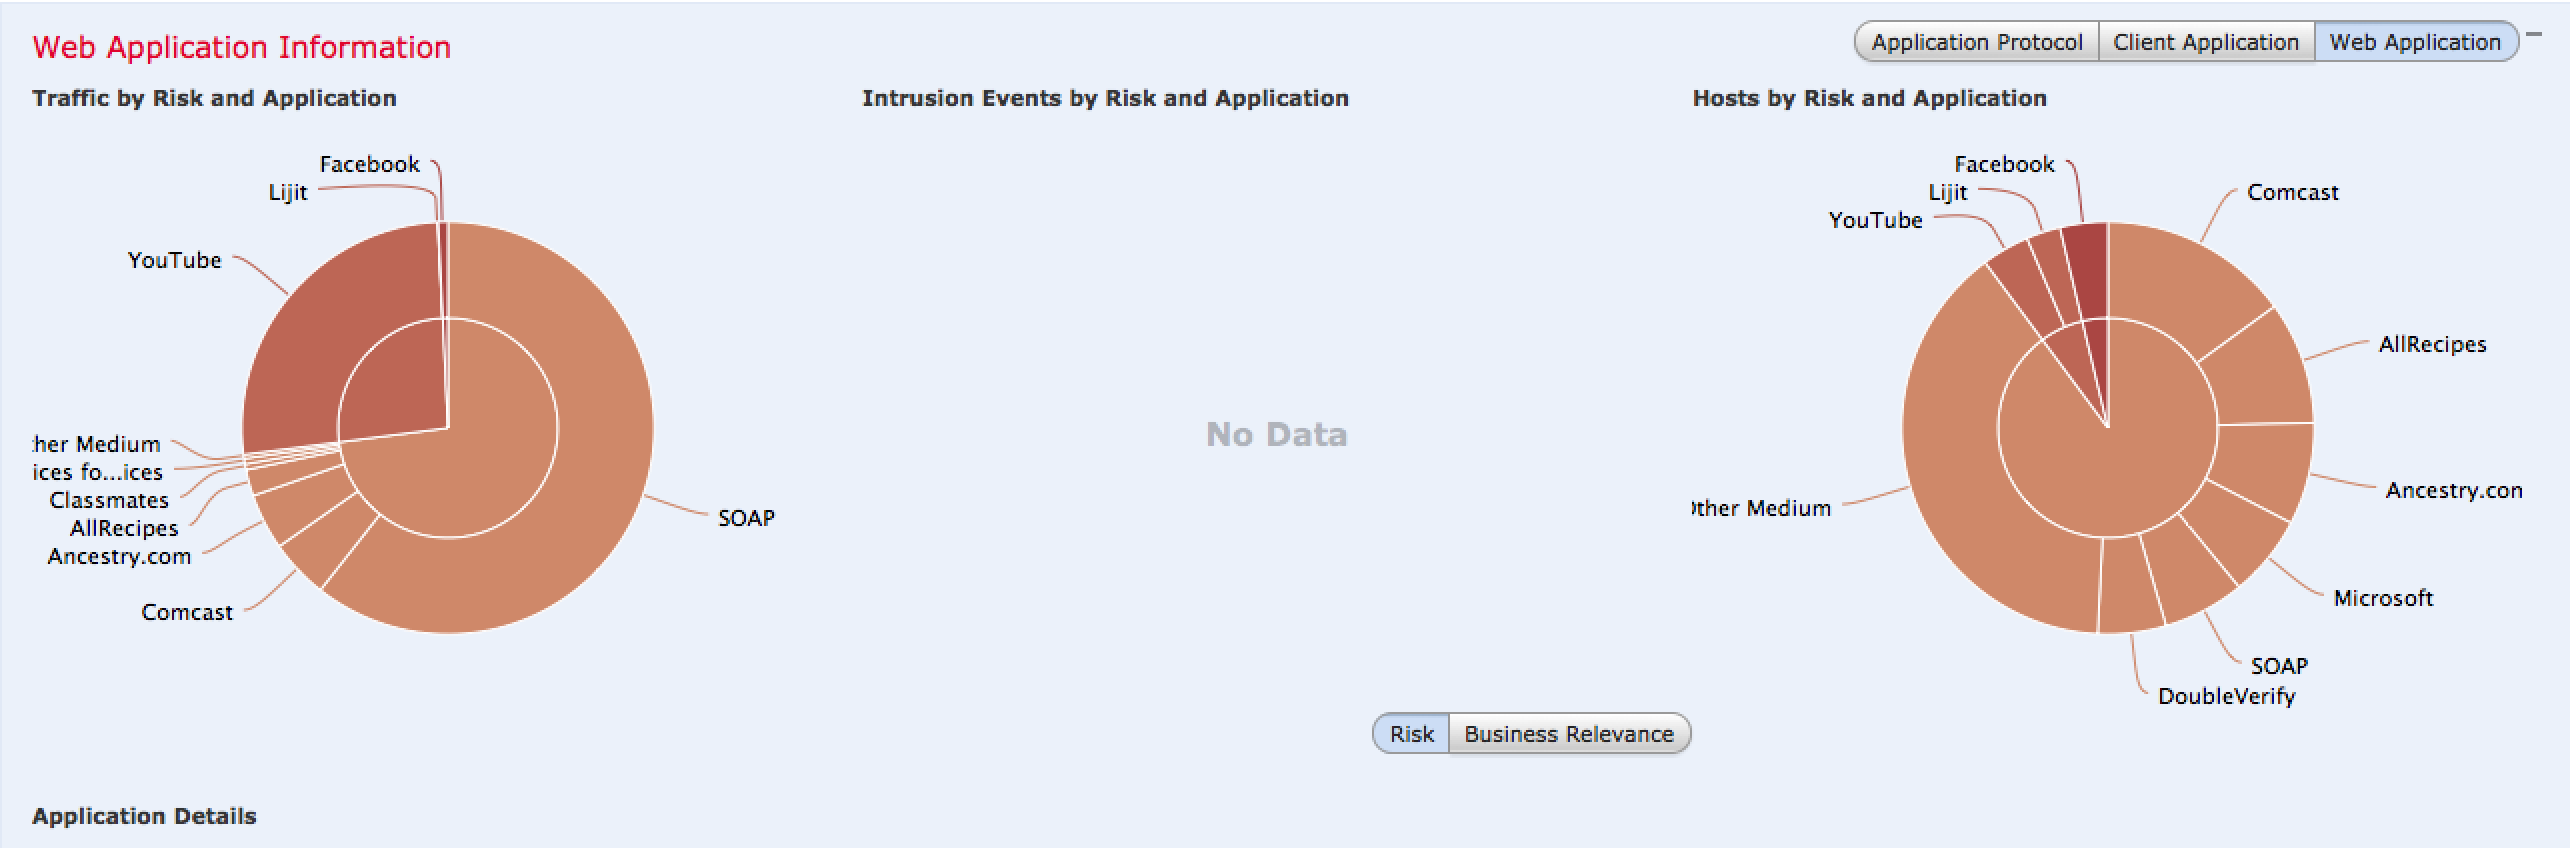
One very cool dashboard is the Context Explorer found under Analysis > Context Explorer. This provides interactive content modules summarizing what is on the network, what applications are being accessed, current threats, types of traffic and so on.
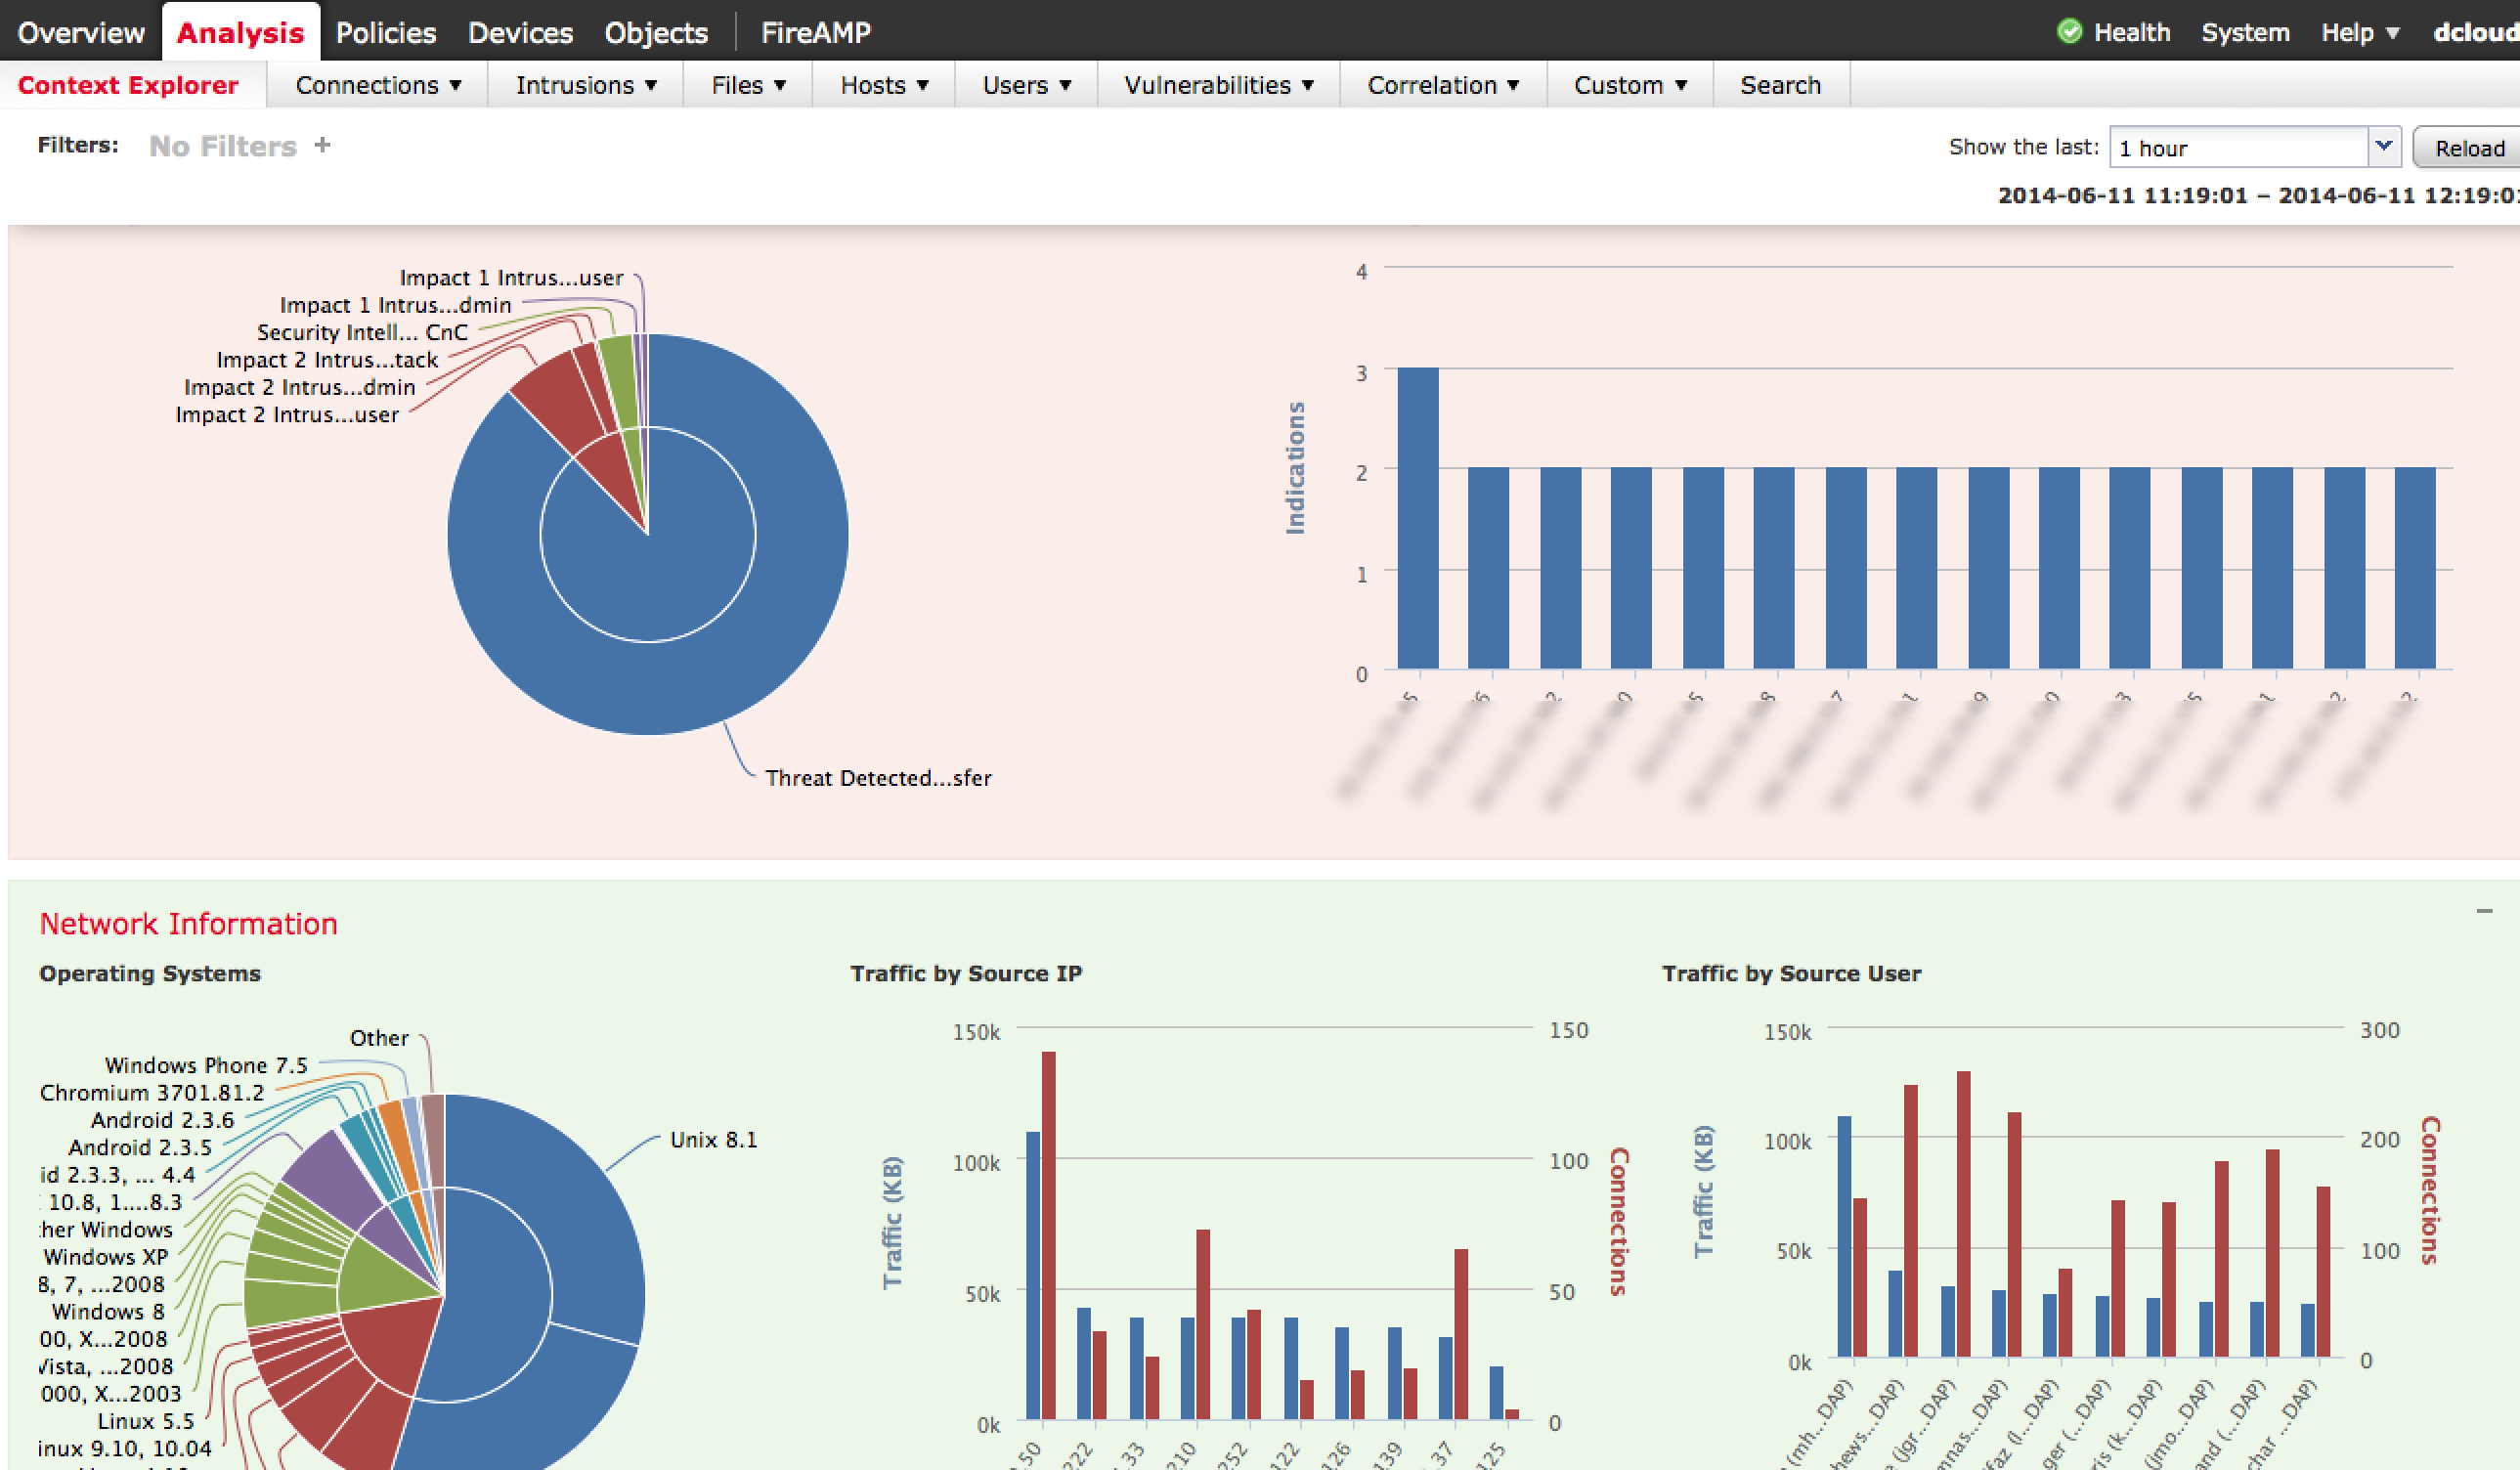
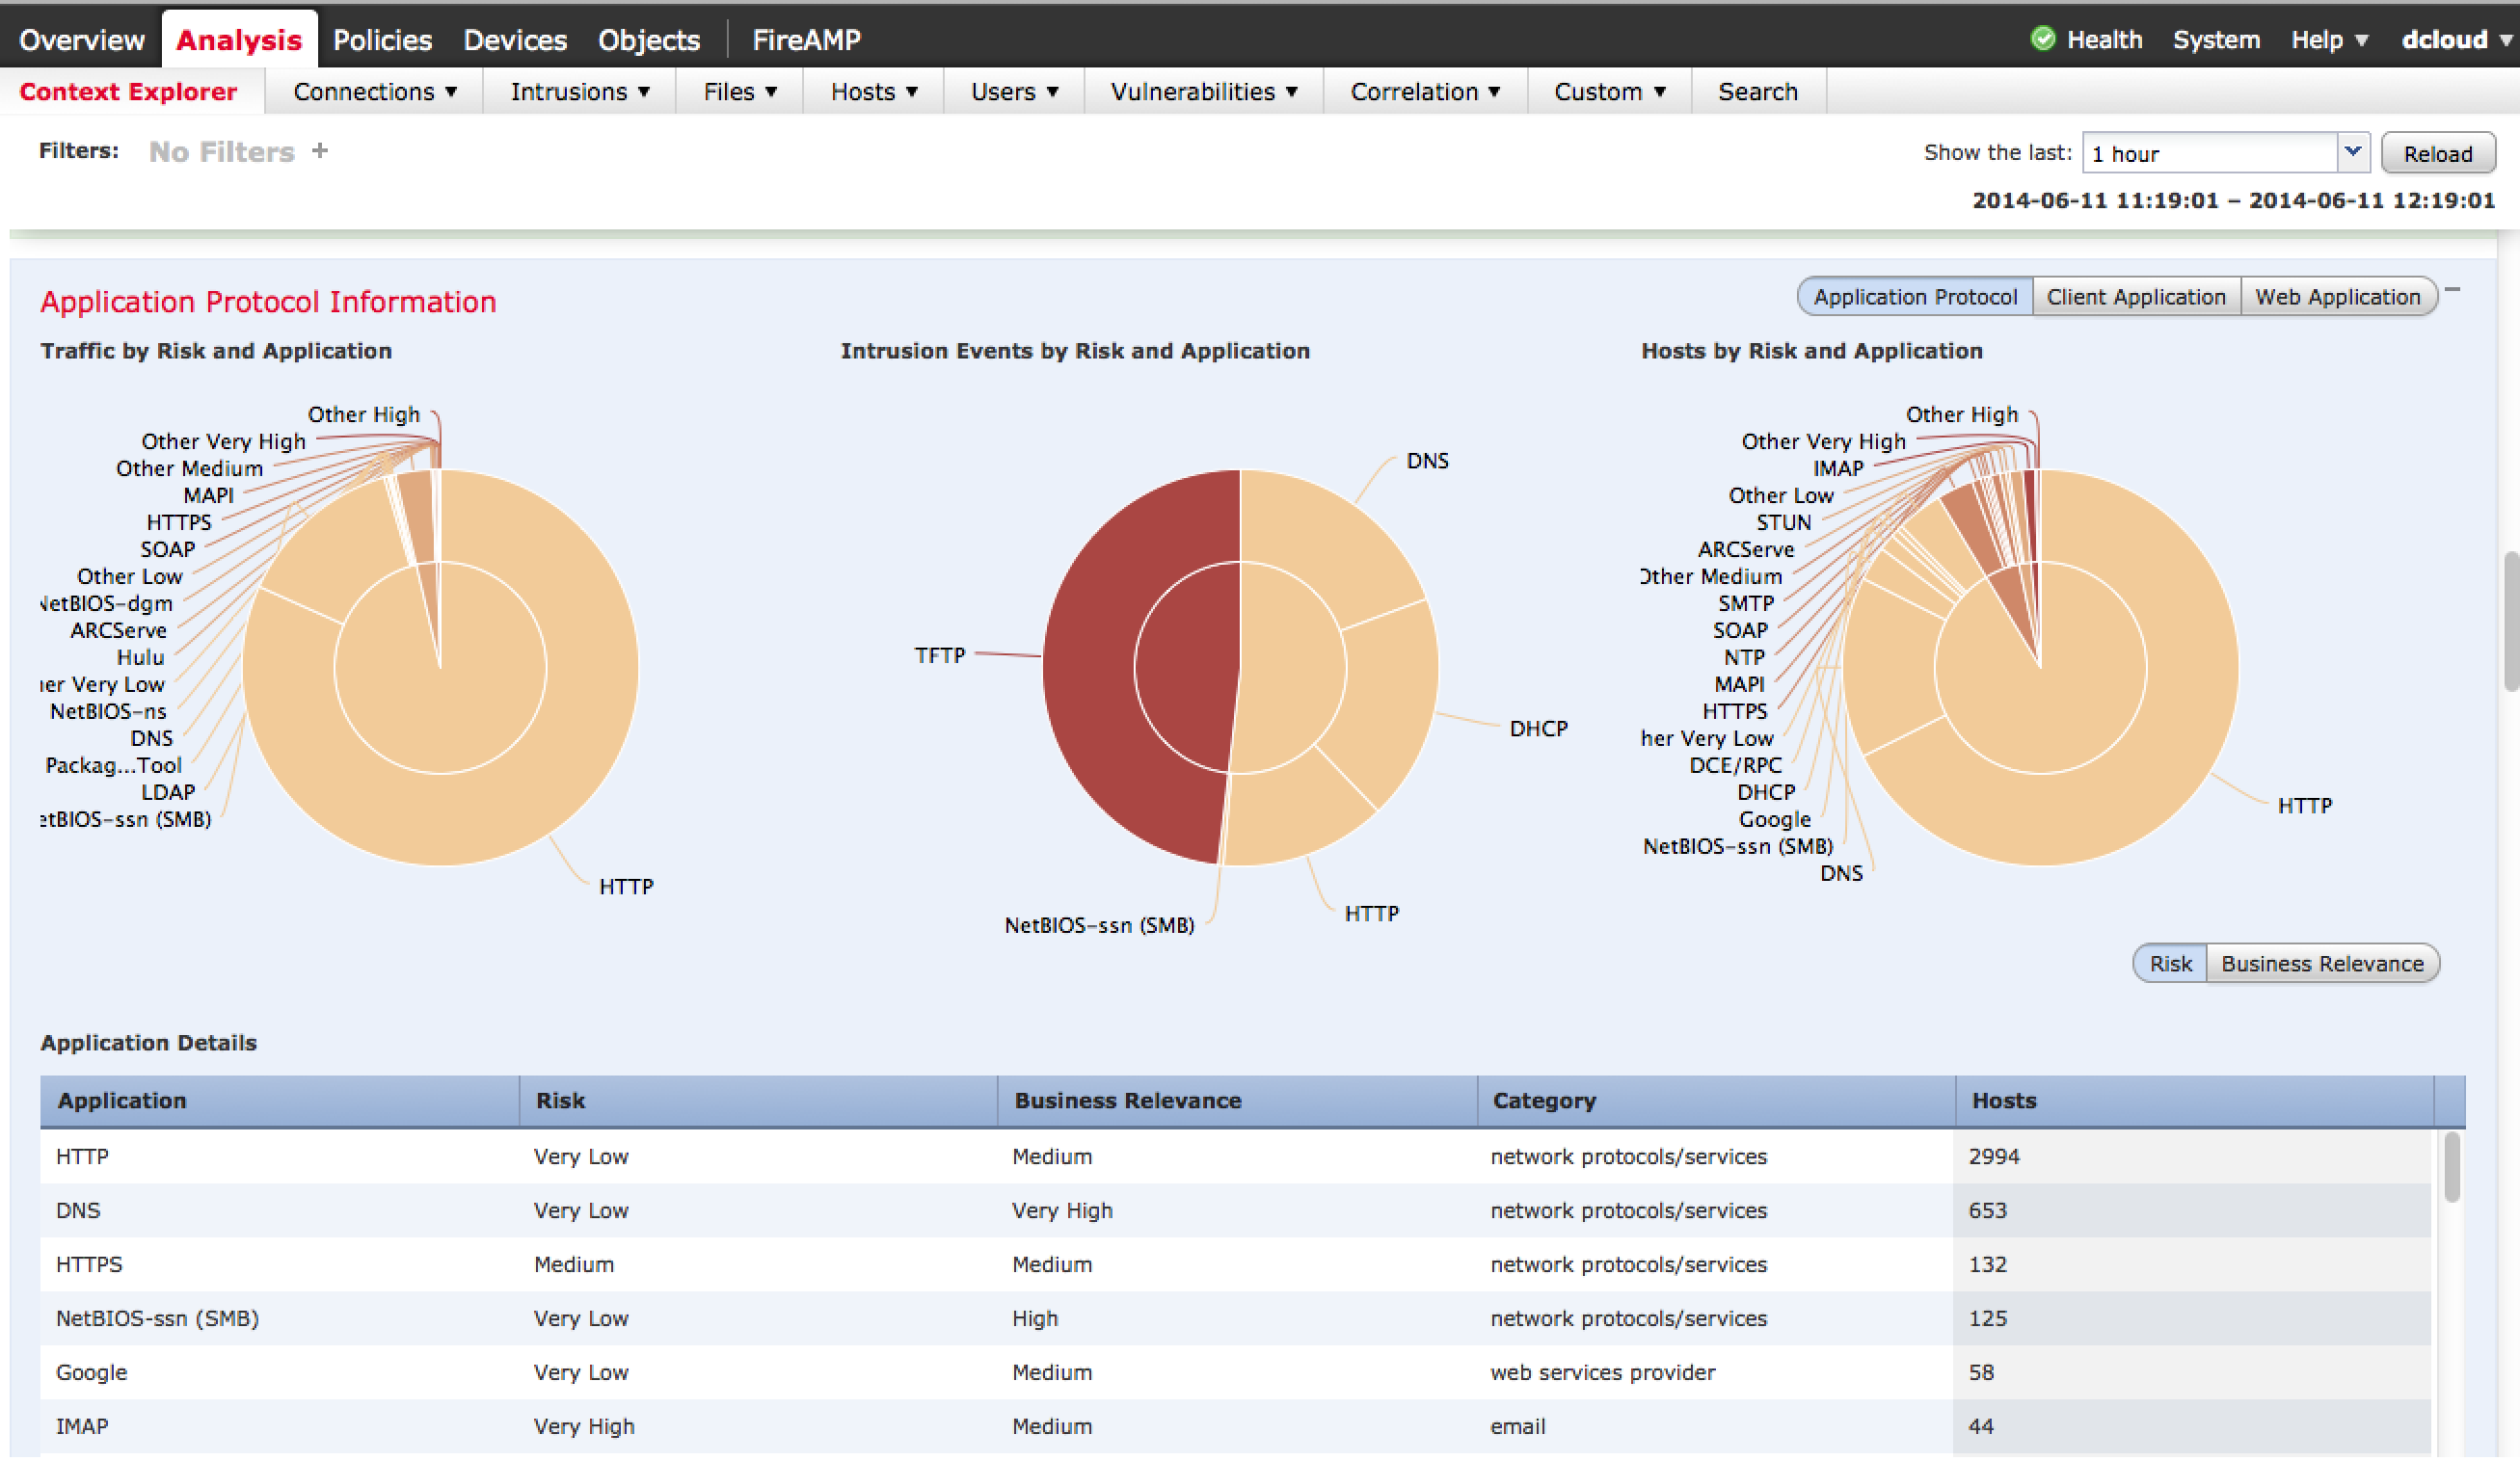
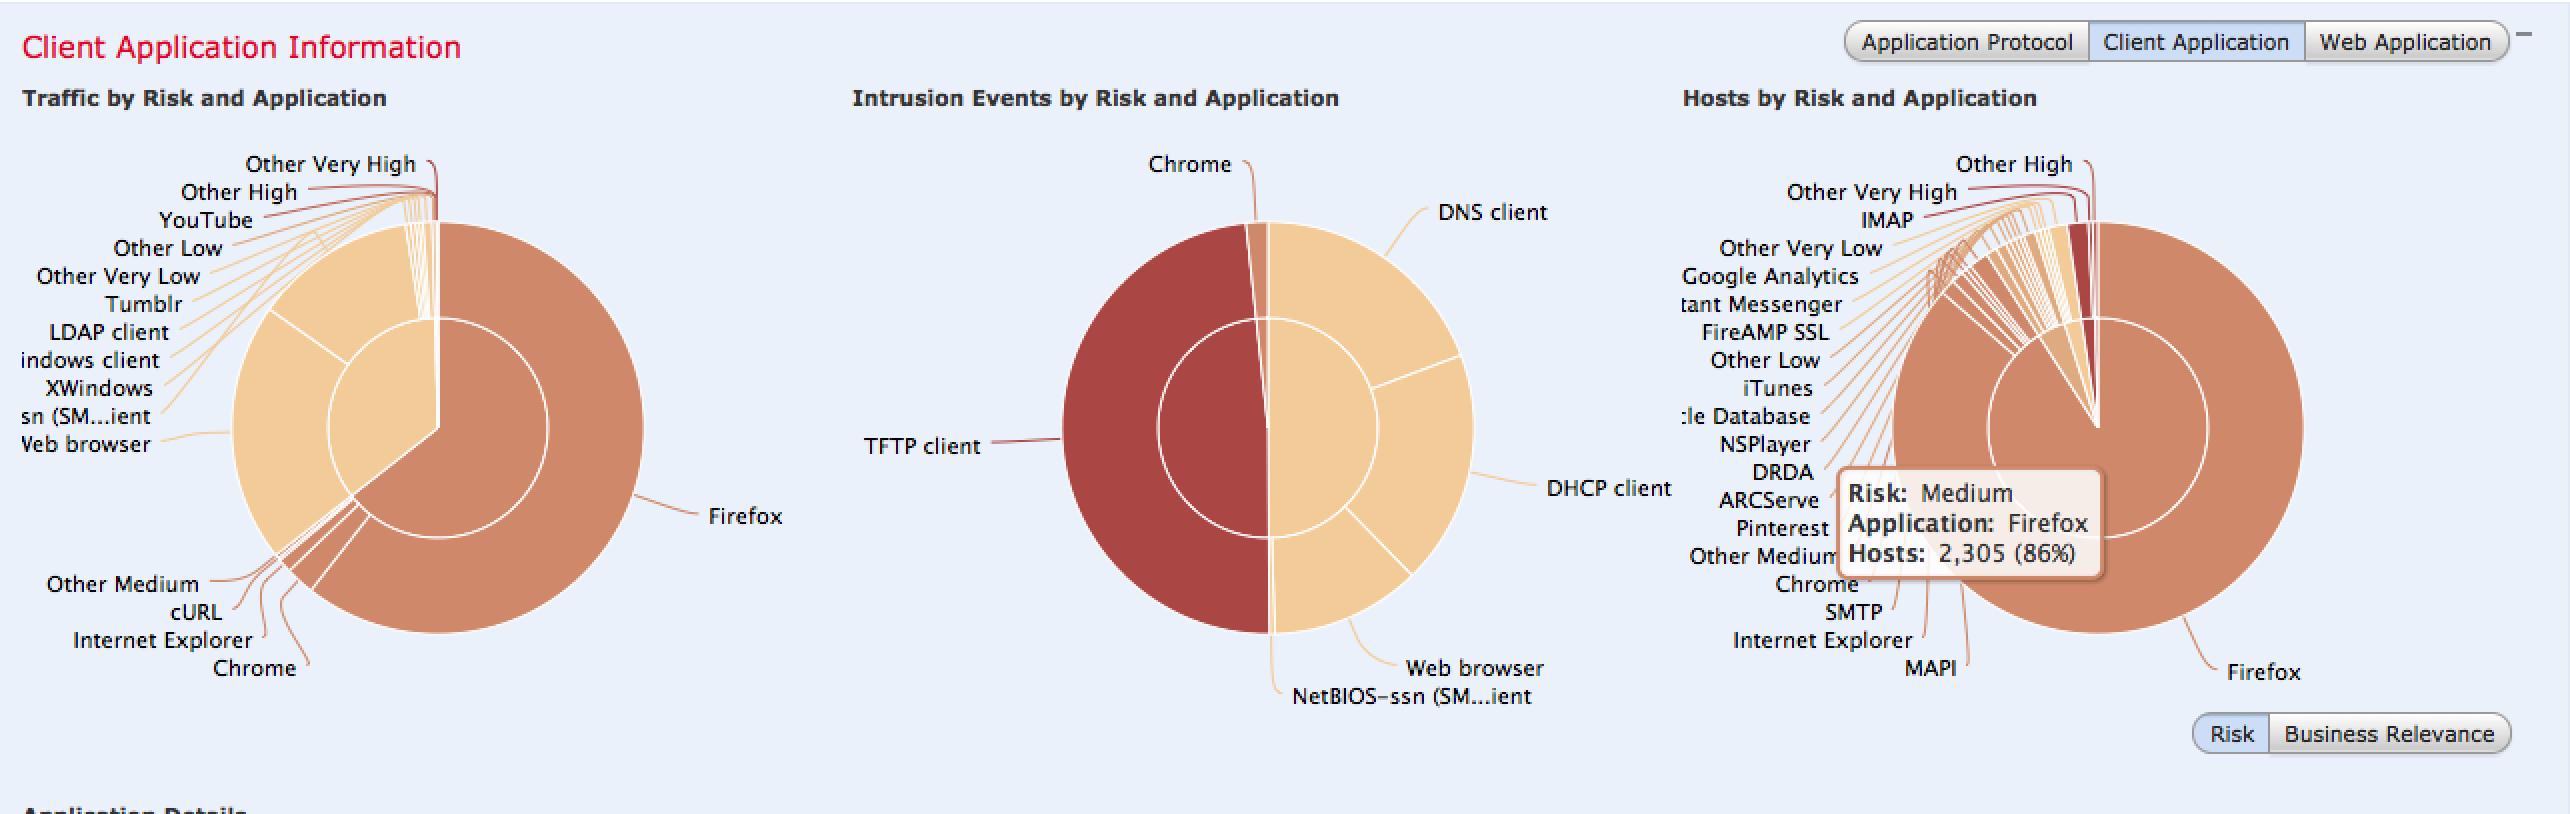
There are many variations of the data displayed as well as buttons that tune the focus of the data such as targeting Business Relevant Applications rather than to High Risk applications. Most diagrams can be clicked to dig deeper into the data. The next screenshot shows focusing on client applications that are a possible risk.
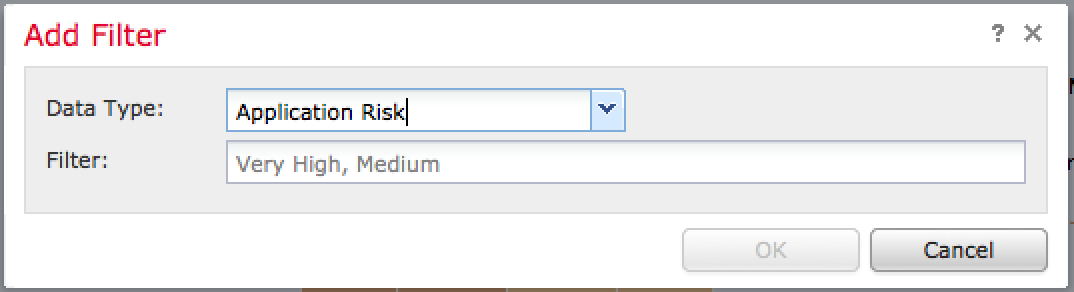
Administrations can add filters to focus in on desired data points. For example, the next image shows adding a filter to only view high or medium risk application data followed by the results once the filter is applied.
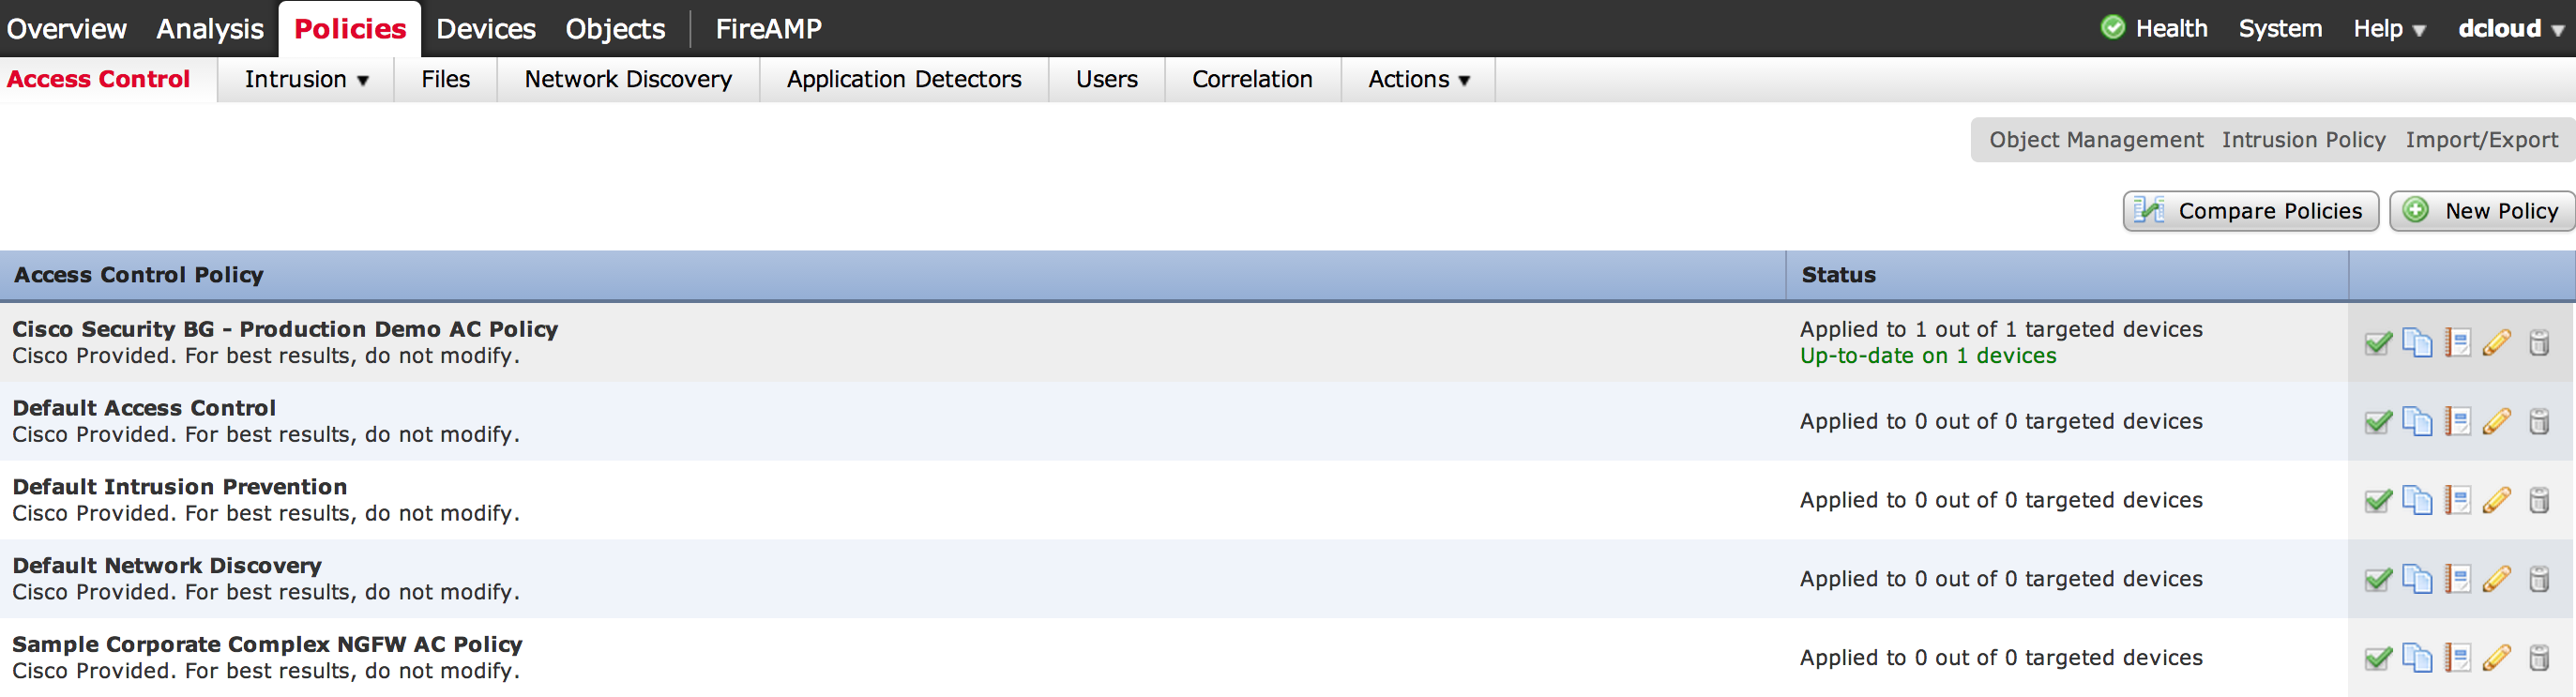
There are many methods you can use to control how traffic is handled using access policies found under Policies -> Access Control. Administrators can layer rules based on users, applications, ports, and URLs. Actions for rules can range from monitor only to completely blocking traffic including options for inspecting any matching traffic for threats. Here is a screenshot of various policies, which are groups of rules.
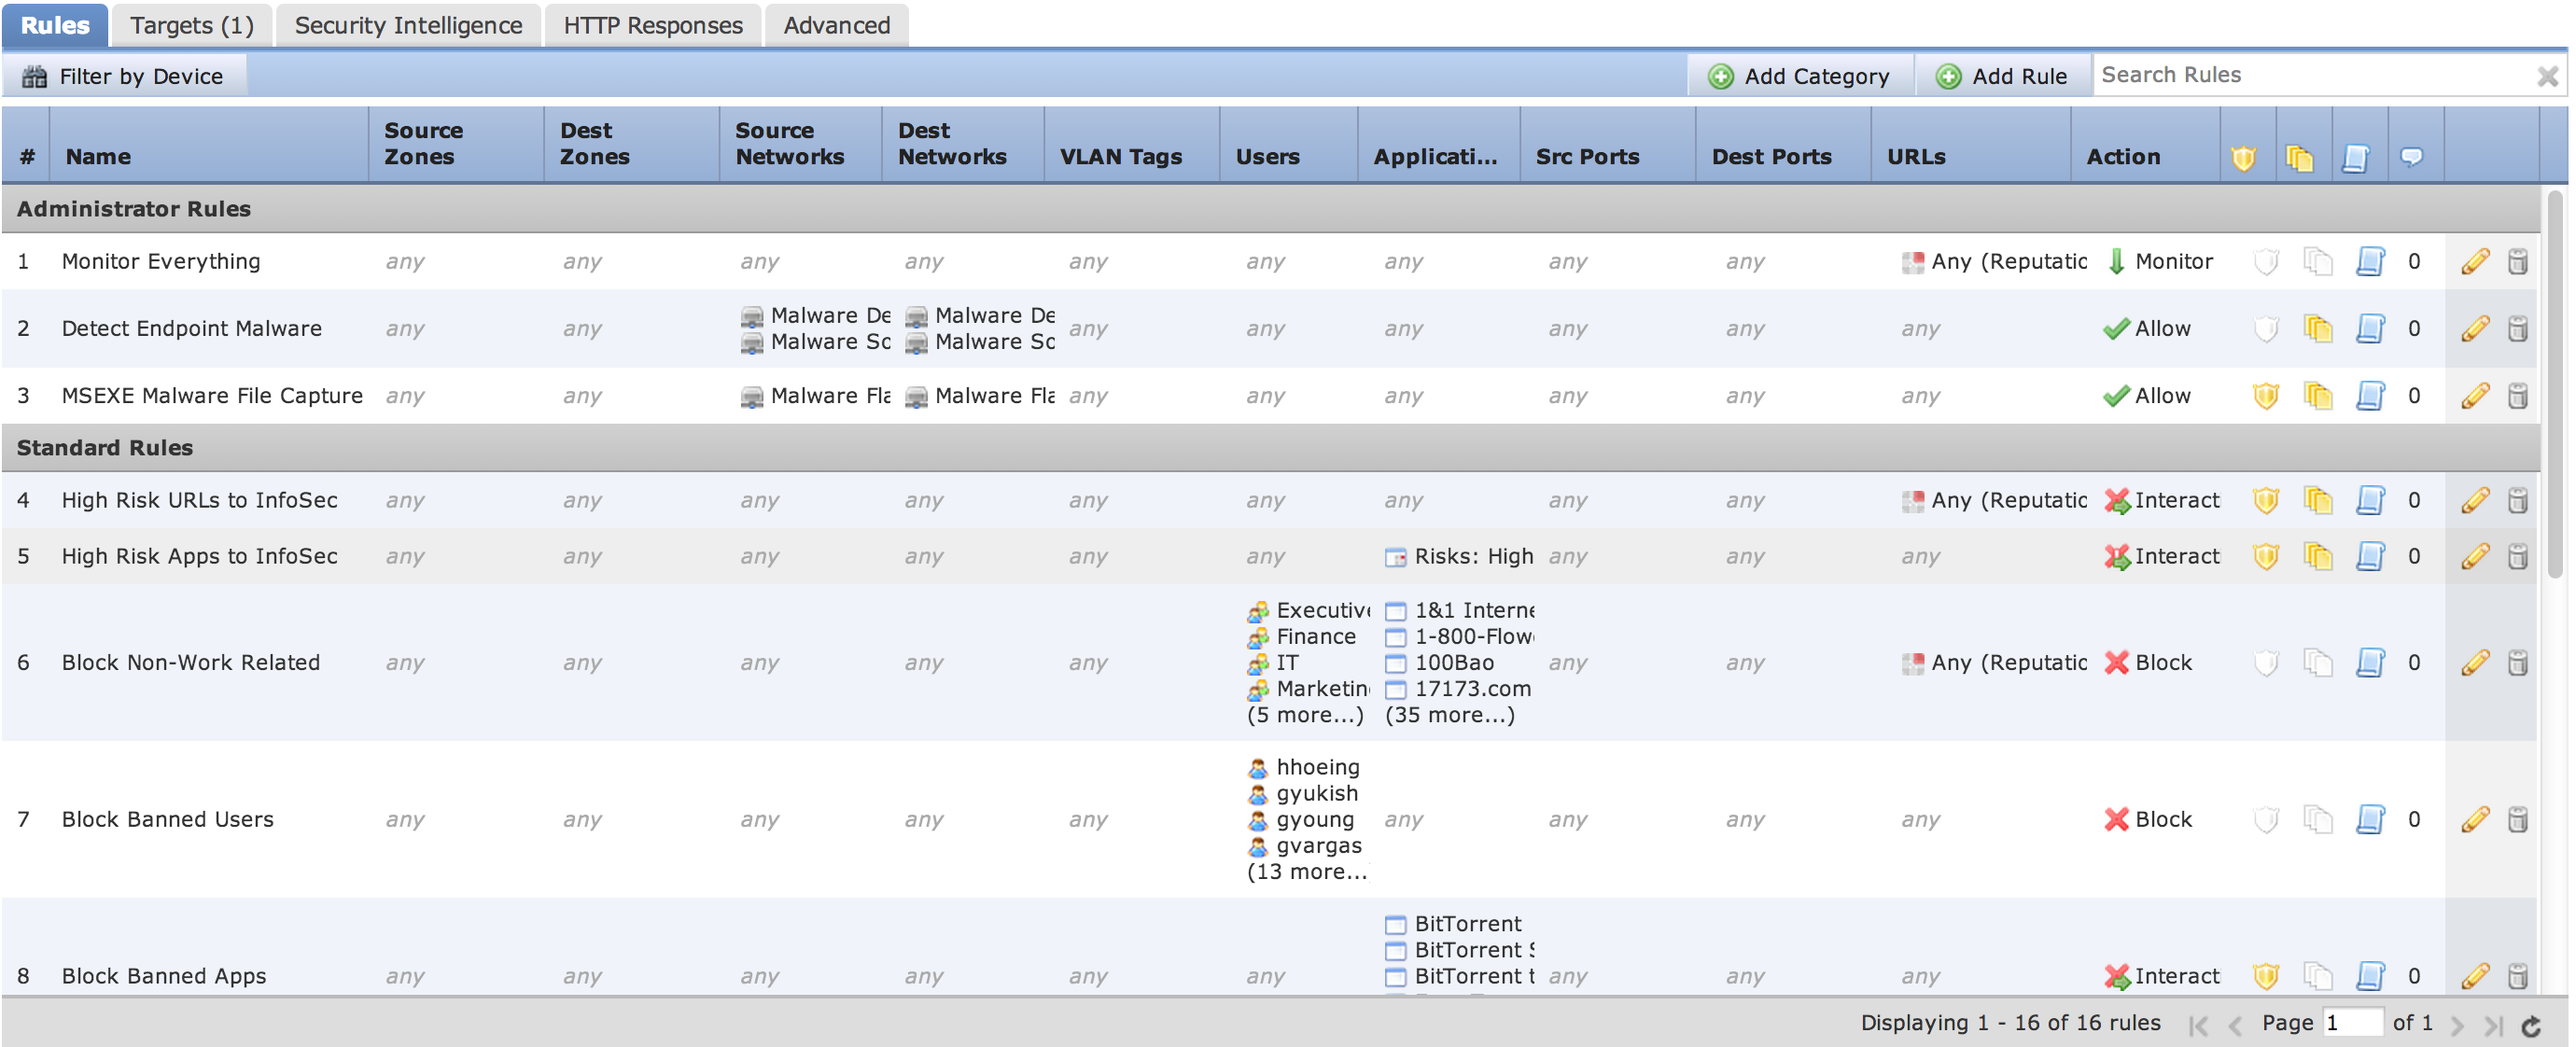
Once I click a policy, I can see the list of rules being enforced with details on how it impacts the network.
To create a rule to block Facebook games and chat, I can click Add Rule and enter the information as shown in the next screenshot. I can also assign a risk level such as in this case, its a Low alert.
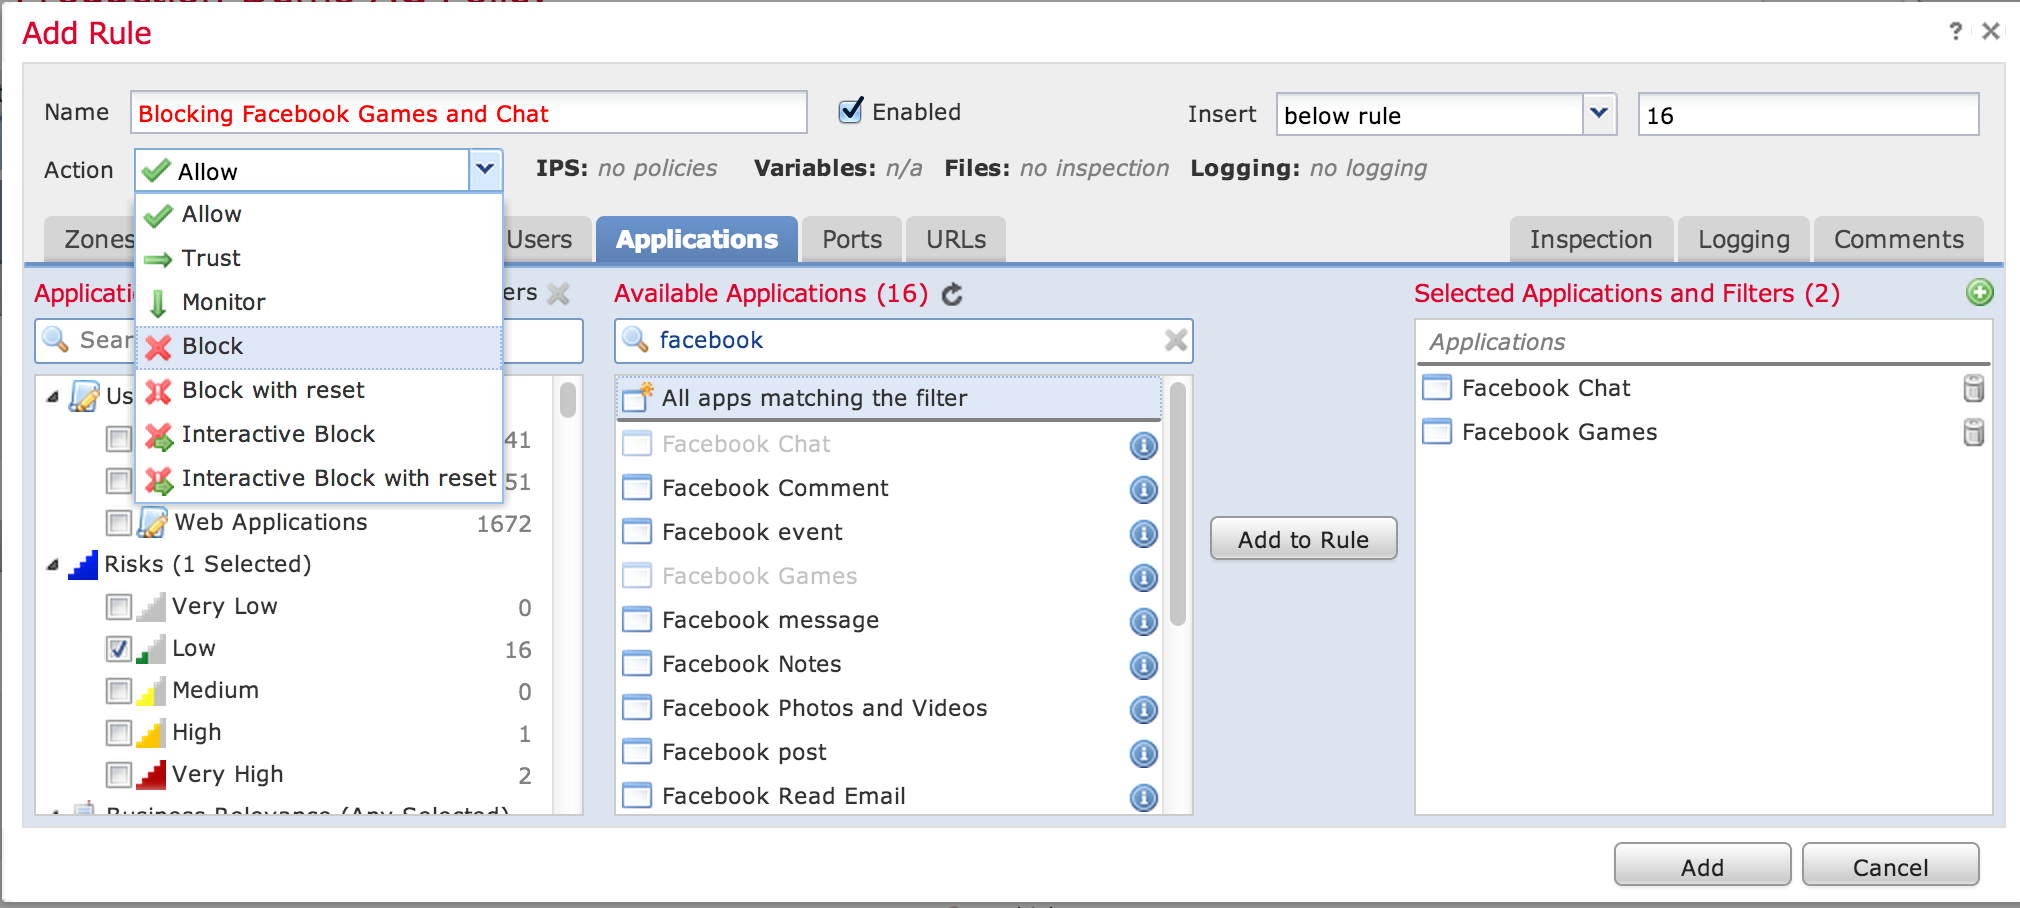 Creating a rule to block Facebook games and chat
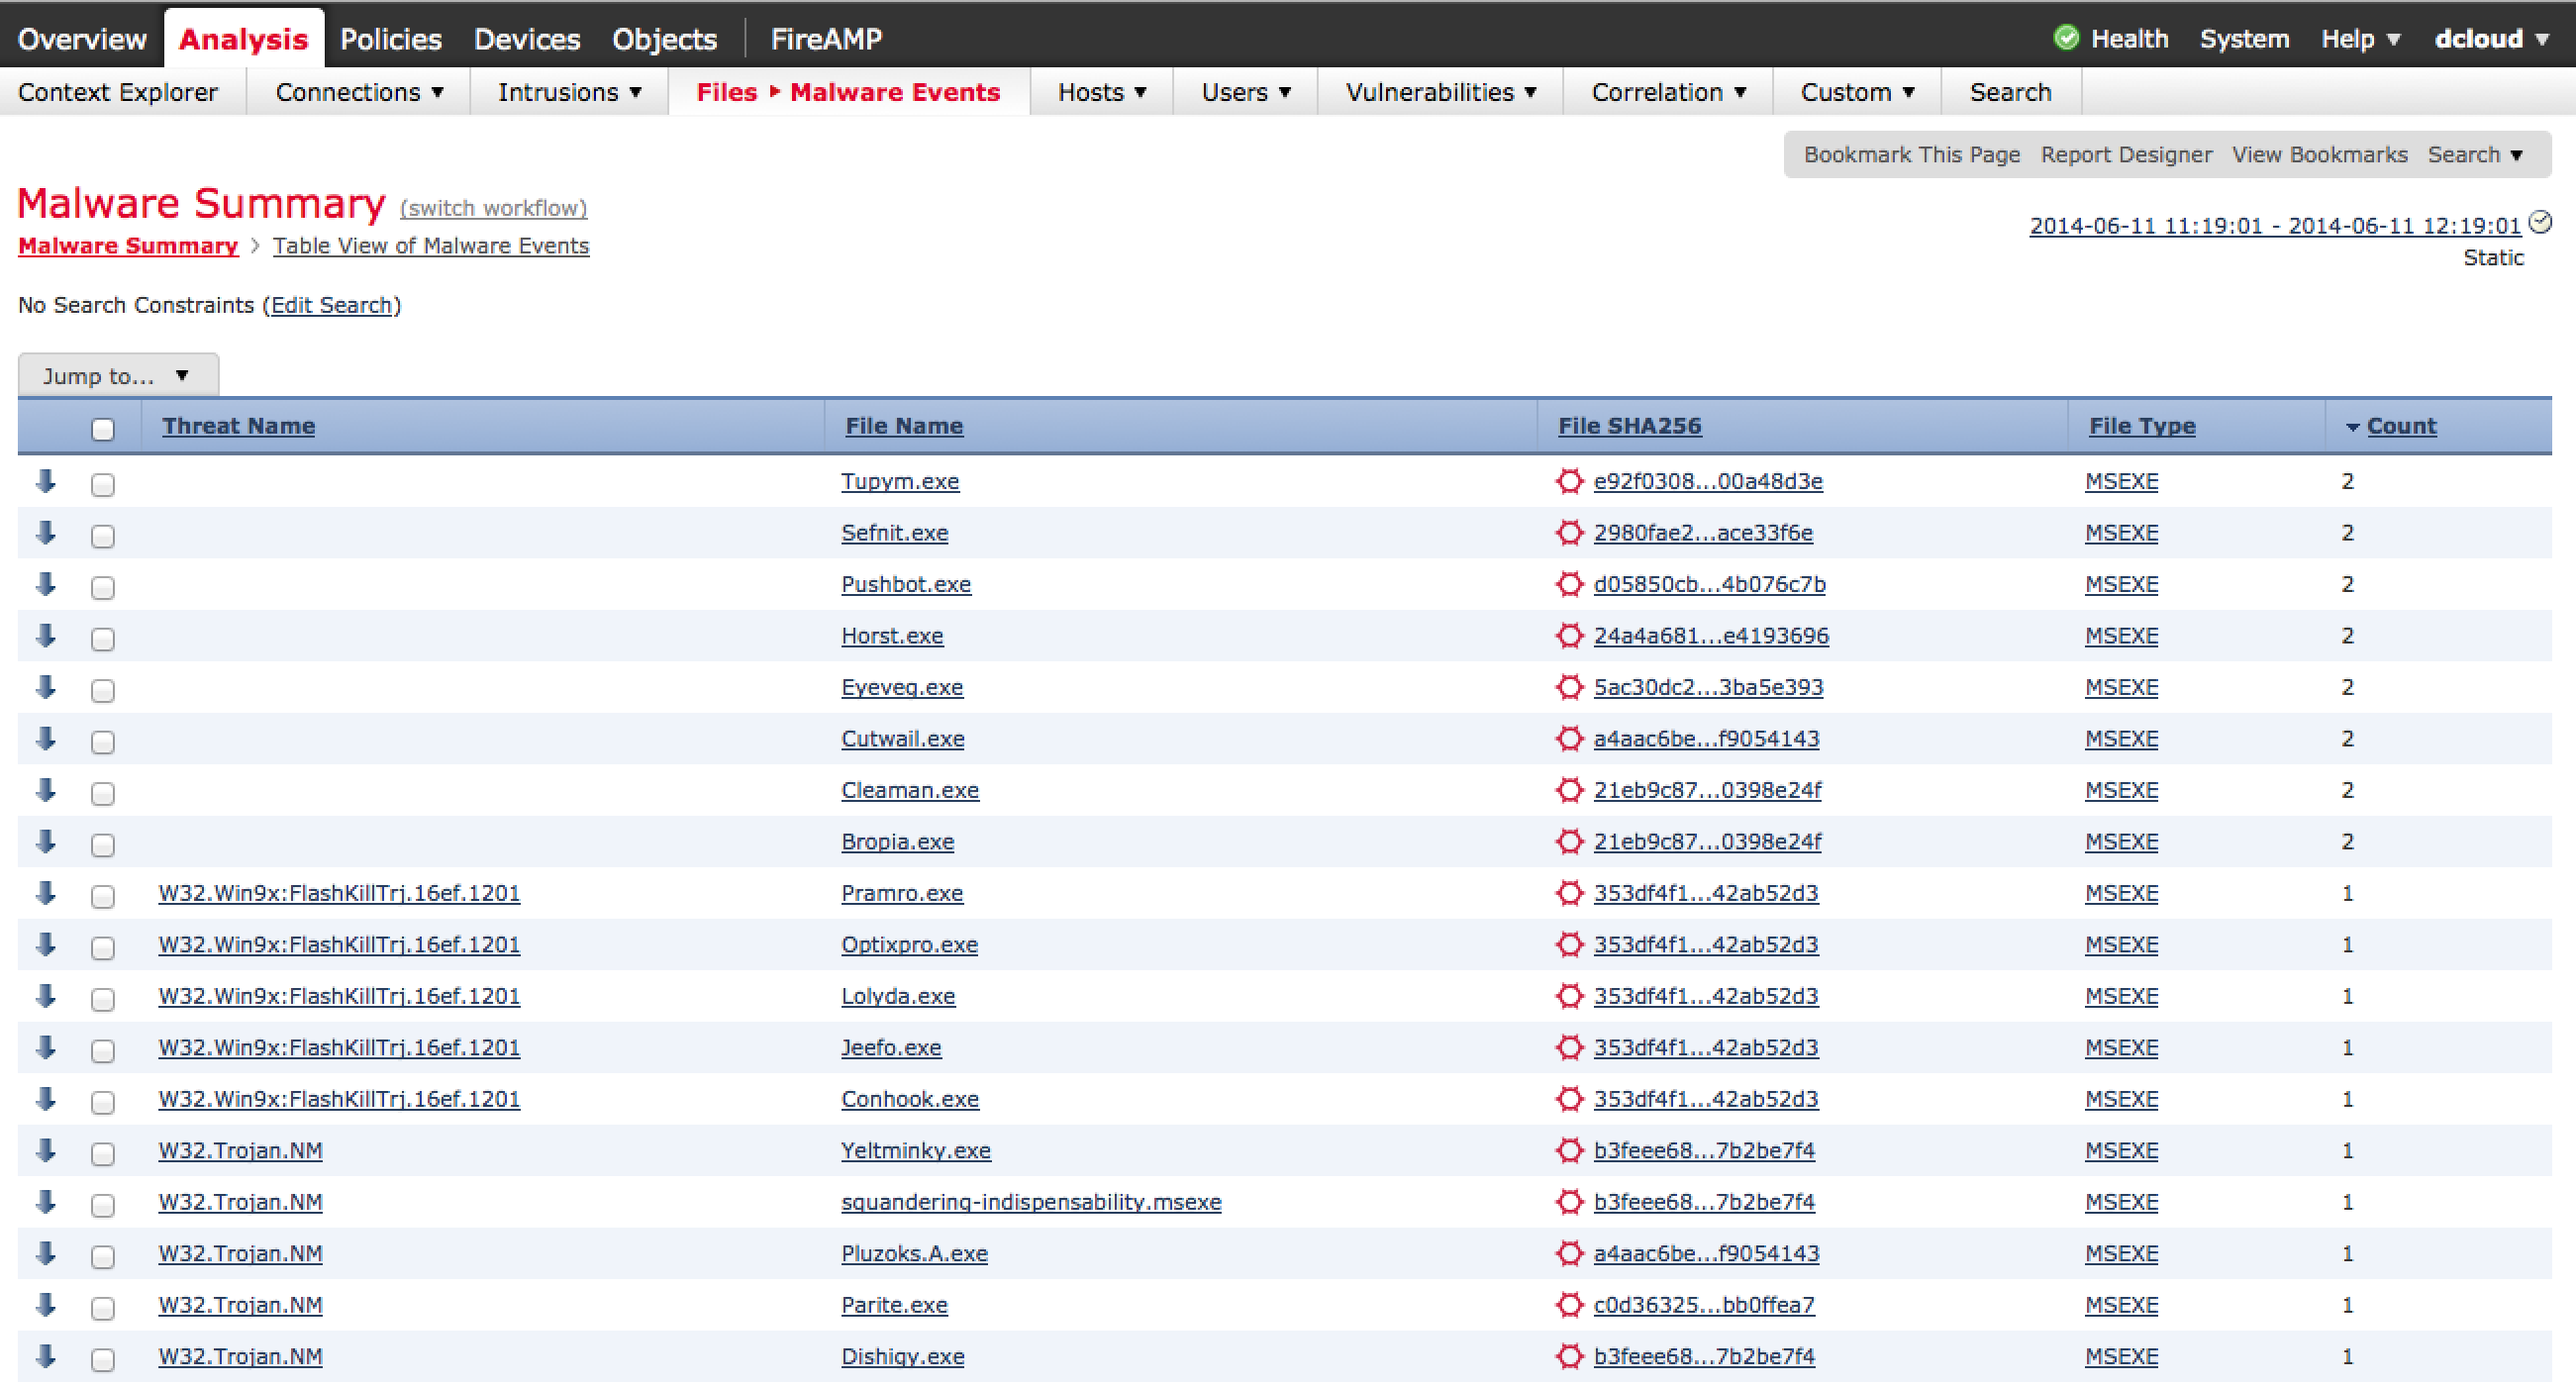
Another powerful view in Defense Center is the ability quickly identify infected systems along with any associated parties. Defense Center has a Malware view showcasing all threats including the history of the infected file. This allows administrators to not only identify “patient zero” aka the entry point of the infection but also track any interaction with the file to contain the entire breach. The next screenshot shows a list of malware identified by Sourcefire.
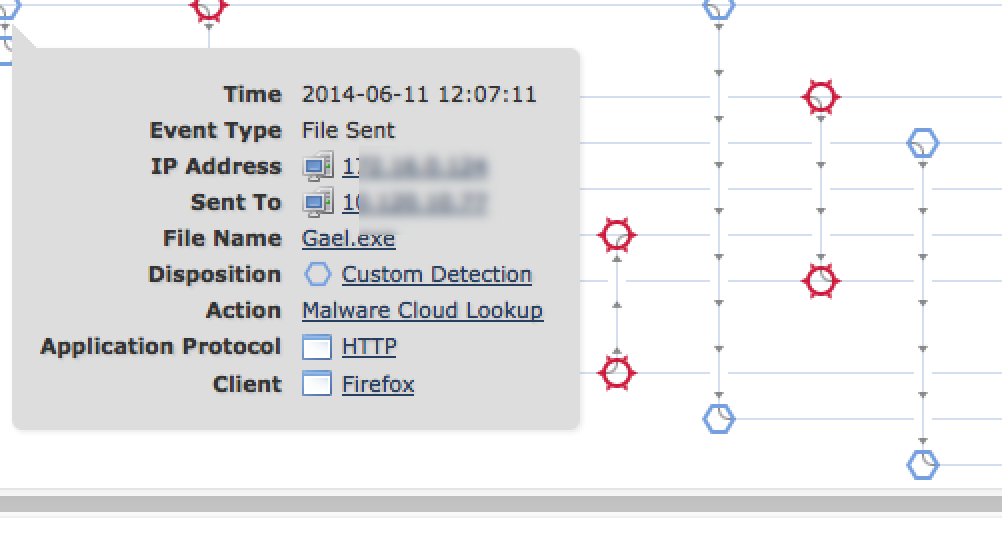
Once you click into a identified threat, you can see the entire history of that file. This is known as retrospective security meaning having the ability to track all interaction points with the infected file. Each circle is a traveling point as shown below.
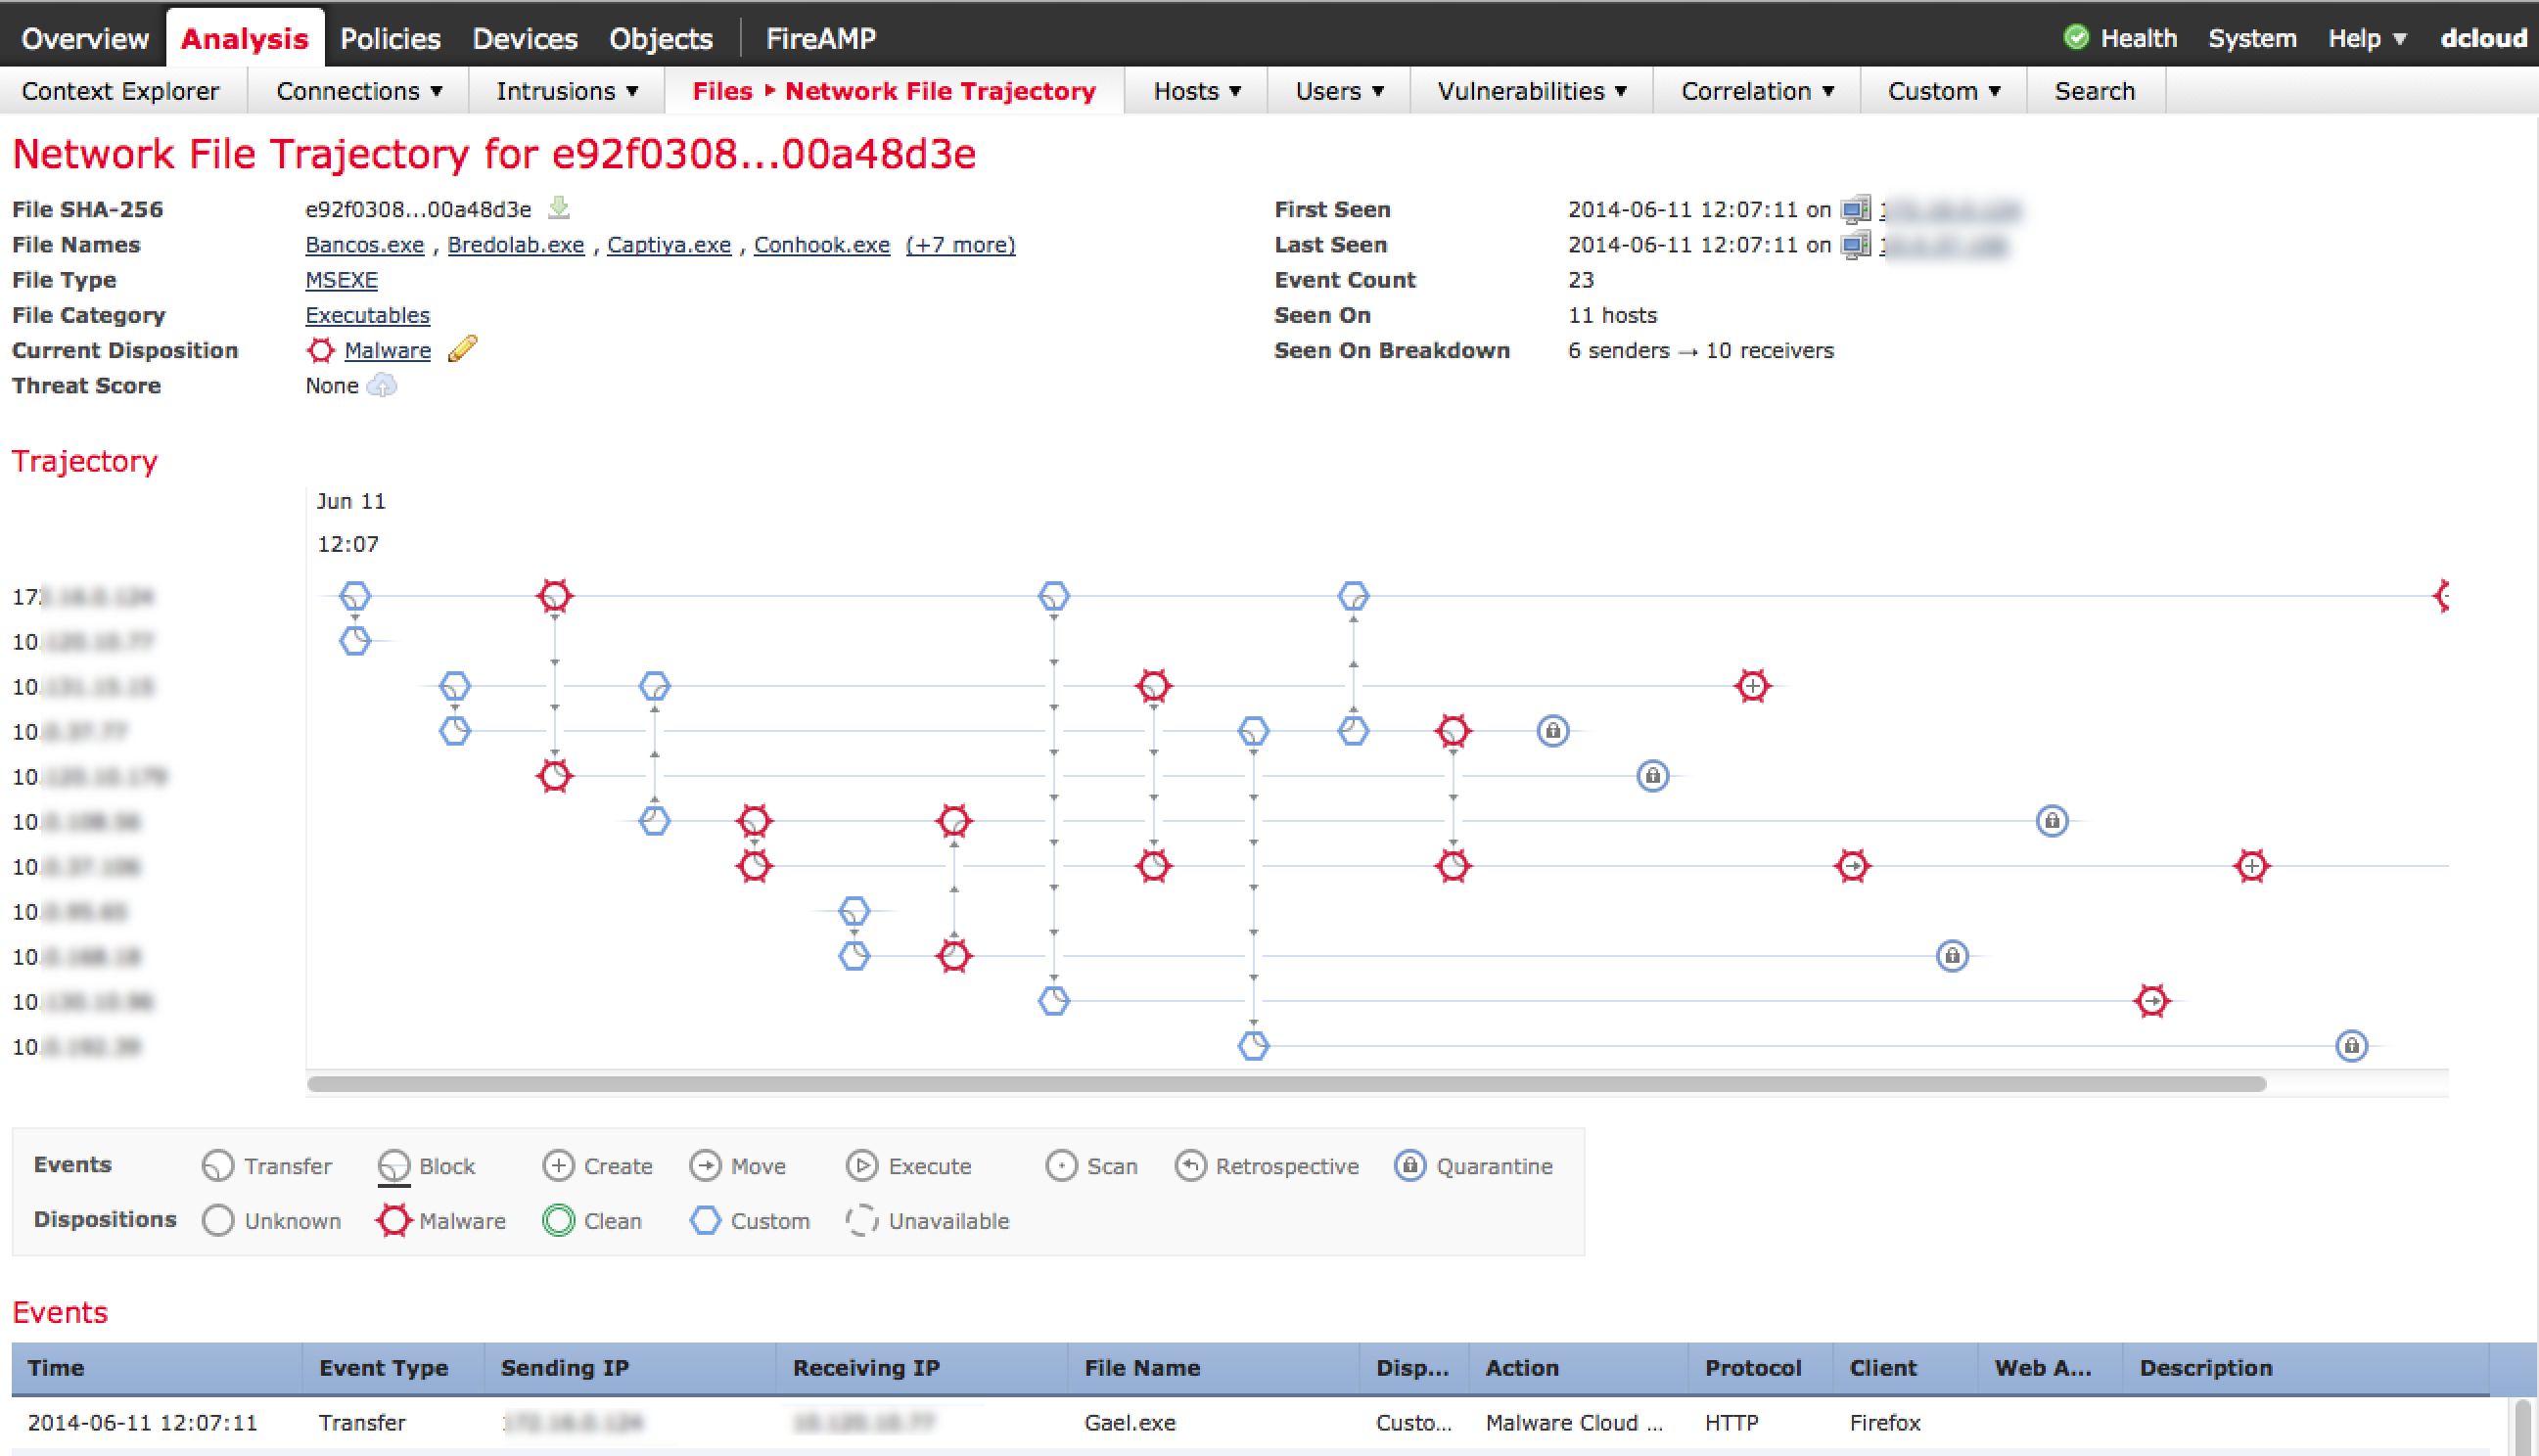
Here is an example where I clicked how the file first entered the network using the first circle. The data shows the infected file Gael.exe was downloaded by a user (IP blurred out) using Firefox on 6-11-2014 at 12:07:11. The circles show each step the file has taken since it entered the network helping administrators contain the threat. Sourcefire has a endpoint product that can be placed on hosts providing more visibility about what is installed on endpoints regarding risk of infection as well as remediation options.
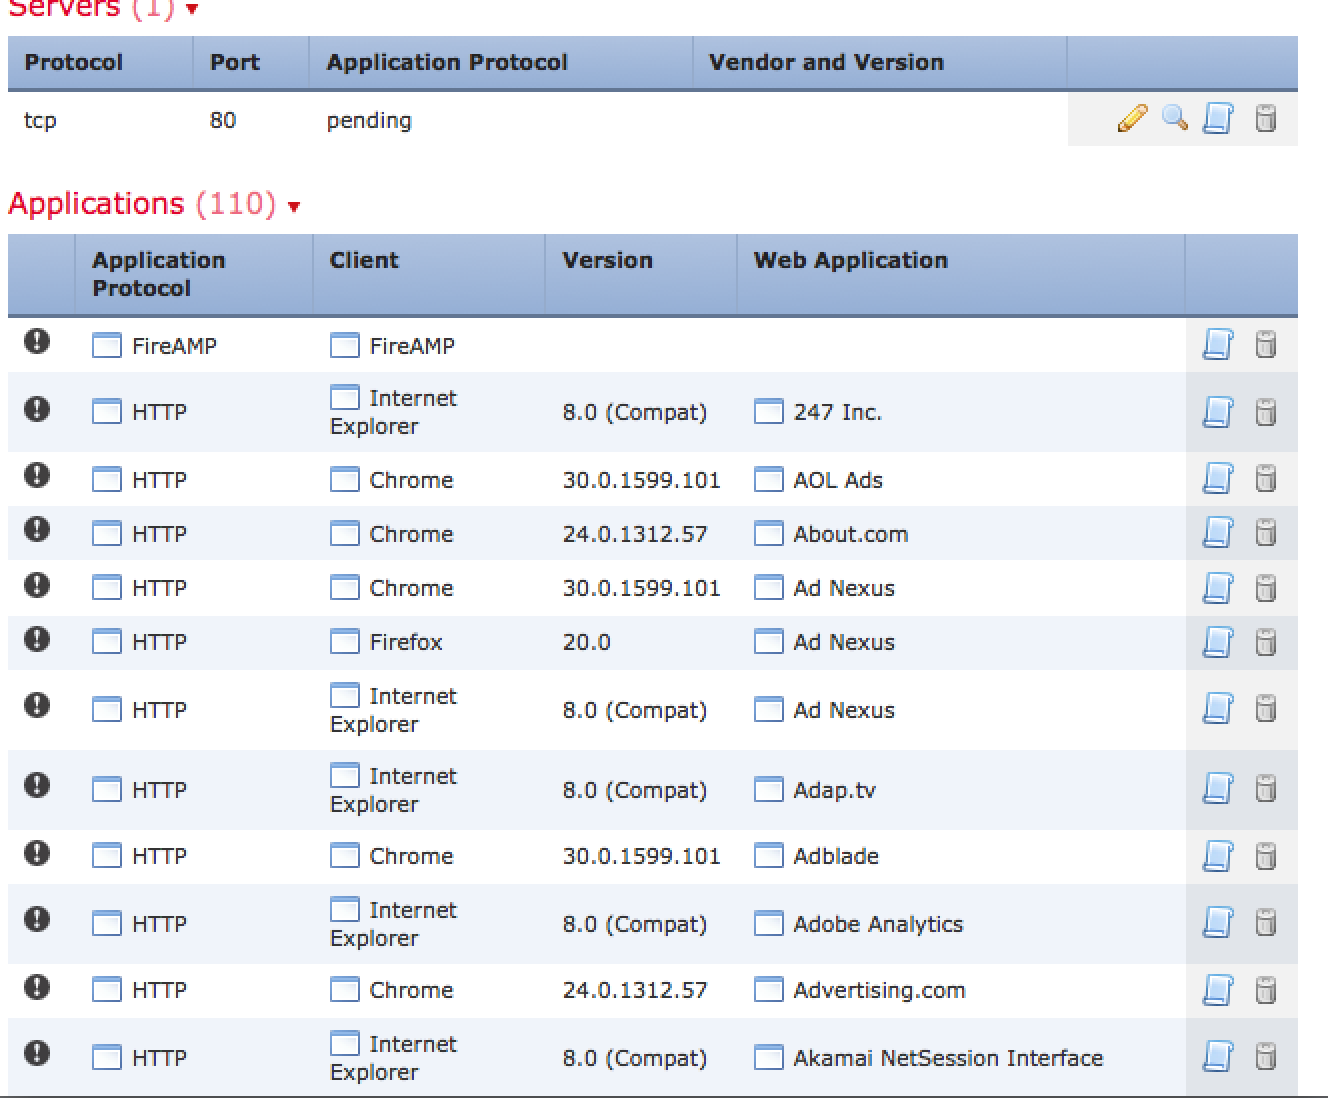
 To see the general history of a host, you click a host name or IP and see its risk, what it is, and what it has been doing on the network. So for example, I clicked one of the infected host IP addresses to see the info shown in the next screenshot. As you can see, there are indications of compromise triggering high level alarms via the red box.

That is just a general overview of the Sourcefire Defense Center management solution. Check out sourcefire.com for more information as well as information on webinars that go deeper into demoing the solution.

Hello Securityblogger, I’m going to buy an ASA with Firepower and I was wondering a couple of things that I couldn’t understand from the docs or your article:
1. is it possible, with URL Filtering functionality active, to track down where each user went and also to see the categories the user explored?
2. about filtering, is it possible to allow an URL like google.com/calendar?
Thank you in advice for your answer. Merry Christmas!
Hi Enrico,
Sorry for the delay in response. To answer your questions, yes and yes. First off, the ASA with Firepower comes with application visiblity and controls. This means you can see all ports and protocols. There is a URL license that constantly updates your URL categories for both risk and content. What this means is a new site will be identified and categorized aka a new adult site will fall into that category based on its labels, content, etc. Also, if a site is seen as malicious aka they claim to be a bank but hosted from godaddy.com, copying another website for phishing purposes, etc, it will get a bad credit score meaning you could block it based on its risk.
Regarding seeing users, you have a few options. The easiest is right clicking the IP, USER, etc and selecting host profile. This will show you everything about that user meaning what type of OS, who the person is (if in AD), every port and protocol used, who they communicated with, every website they visited and so on. If its a external source, you can do a who is look up. Another way is to click a category or search for a specific thing of interest such as all users using social media.
Regarding filtering, you can filter all ports and protocols. This means you can do things like permit gmail but only read not write. Also you can block gchat. Another example is being able to download from dropbox but you can’t upload.
Hope this helps!