
I’m speaking next week at Cisco live Berlin Germany on Forensics as well as writing my next Cisco press book on the topic. I figure I would provide a teaser post on best practices for preparing to investigate a system for a potential cyber crime. Consider this the first thing that you do before proceeding with any type of computer investigation.
You could find yourself needing to investigate a system due to HR asking you to check another employee’s laptop for sensitive data or content that violates polices. Another situation could be where you are asked to check a server for unauthorized access due to logs showing a potential breach. Maybe you are just concerned that there is a potential compromise within the network or an endpoint device. The reasons for needing to investigate something vary based on your job, IT interests and responsibilities.
I spoke at DEF CON last year about purchasing devices on eBay with the intent of finding sensitive data (associating Facebook and work profiles with eBay profiles to find the right sellers). The following steps were performed in the event illegal data was found such as child pornography. Not following these steps will most likely contaminate evidence making it unusable for any legal purposes. You can’t go back and un-corrupt something so if there is a slight chance what you are investigating could lead to something involving legal action, make sure to perform the proper preservation steps.
Step 1: Duplication
The first step and most important thing you should do is never work with original data! A first responder to a crime scene should be focused on preserving the scene and collecting evidence. Evidence should be safely transported to a secured facility where duplication can be done. This applies to all types of situations. As an example, if you are investigating another employee’s laptop, then you should make sure it is not touched during the entire investigation process. The entire chain-of-custody of any evidence should be documented and authorized before proceeding to any preservation steps.
When you have captured a device of interest and assured that you are approved to proceed with an investigation, the next step is to create a few bit level copies. This is NOT backups meaning you are copying everything. Backups will ignore certain data causing the copy to be different from the original. The same concern applies to compressing copies meaning any compression must not change the state of the data. There are many free tools available such as FTK Imager or built in tools such as dcfldd in Kali Linux. The next image shows using dcfldd to make a md5 copy of a USB drive.
![]()
Step 2: Validate The Copy
Once you have made copies of the original data, you need to validate that those are indeed bit level copies that were not corrupted during the copy process. This is accomplished by using hashing. Hashing the original data element will produce a stream of numbers representing the state of the evidence. Any copy should produce the same hash value or it is not a valid bit level copy of the data. Slight changes to data will produce a completely different hash value making this approach a very clear cut situation for validating if a copy is authentic or not. The next image shows using md5deep in Kali Linux to validate two copies are bit level copies. This example is pointing at the same file for the proof of concept.

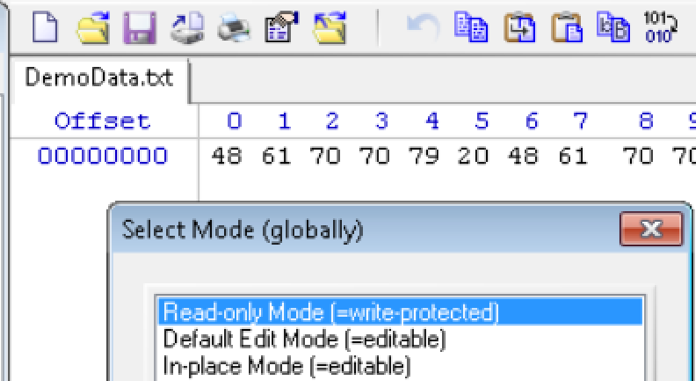
Step 3: Enable Write-Block
Once you have generated valid copies of the original, you need to enable write-block protection to prevent you from corrupting the data during your investigation. Not doing this will likely cause you to have to go back to a valid copy and repeat anything you find as your none write block protected investigation will most likely be changed from the original. Here is an example of enabling write-block protection in WinHex
 This should be the process you perform before you start investigating any evidence acquired that could possibly be used for a legal matter. I’ll briefly cover these steps next week in Berlin with more details and demos along with a bunch of attack and defend uses. Hopefully this VERY basic overview of the evidence preservation process makes sense.