I recently acquired a Cisco Firepower 1010, which is the latest version of Cisco’s unified threat management (UTM) or you could say next generation (term that I’m not a fan of) security appliance. Basically, it does the following:
- Stateful Firewall (Base license)
- Application Visibility and Controls (Base license)
- Content Filtering (URL license)
- Reputation Security (URL license)
- VPN concentrator (RA VPN license)
- IDS/IPS (Threat license)
- Antimalware / Breach Analysist (Malware License)
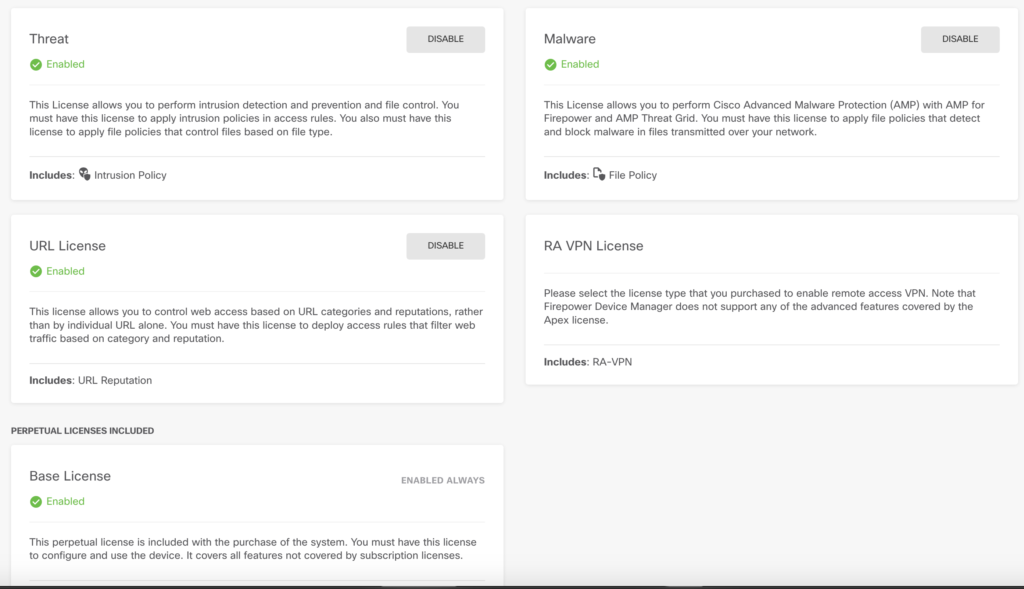
Some features come out of the box while others are based on certain licenses. The idea is you license what you need however, out of the box, you can enable everything for 90 days (which is what I did for this walkthrough). Here is a shot of the license page once enabled. Each license is explained. I tagged the features above with the associated licenses.
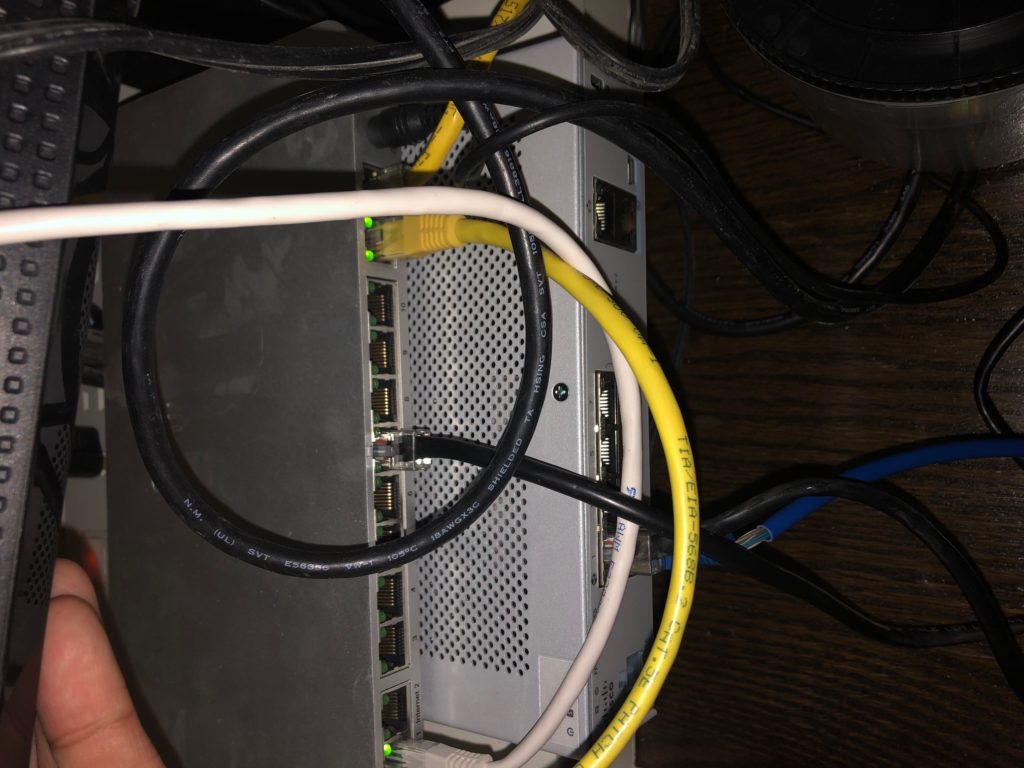
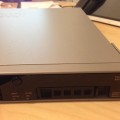
At first look, the size of the appliance is pretty nice. There isn’t a fan so its quiet. Here is an image of the Firepower 1010 placed next to my Meraki MX64. They are both about the same size however the
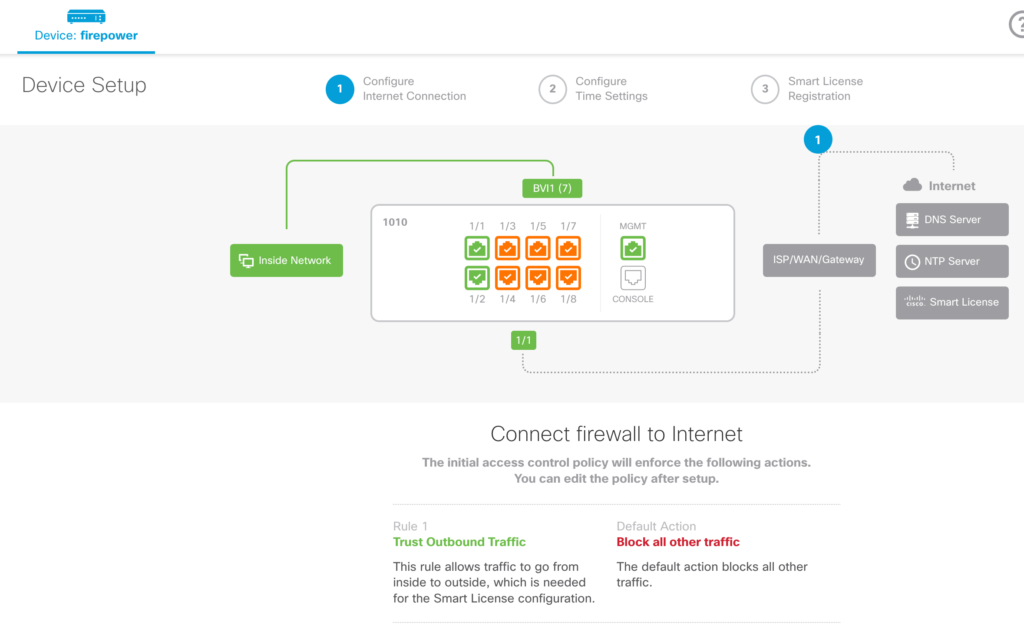
The setup for a new Firepower 1010 looks like this. The assumption is I’m using the local Firepower Device Management application (FDM) to manage this appliance. I could also use a centralized manager (Firepower manager) however, I only have one appliance so I don’t need to use an external manager. One other option is the cloud management option known as Cisco Defense Orchestrator (CDO). For this post, its FDM.
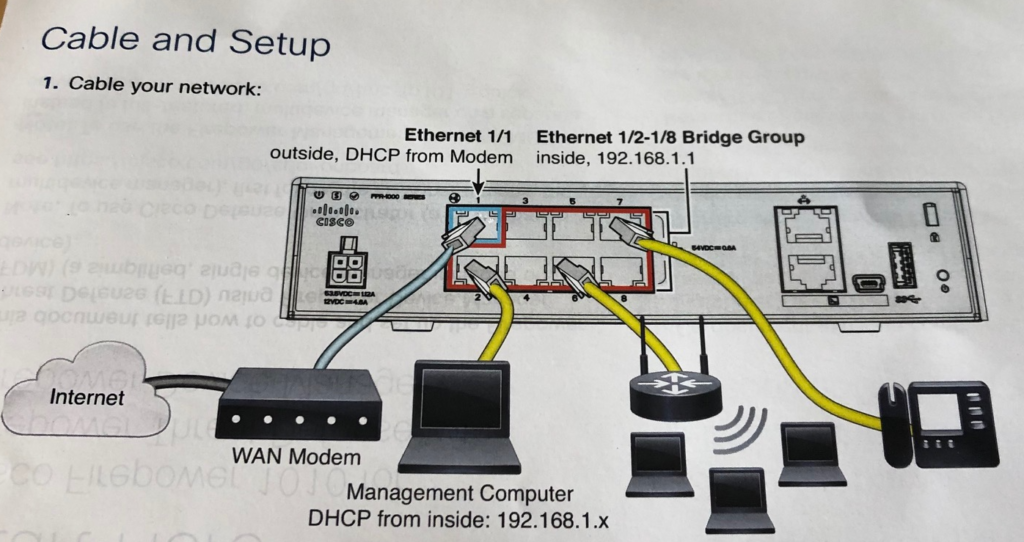
I plugged in the Firepower 1010 behind my Meraki via port 1/1 via a DHCP port for setup purposes aka modem to
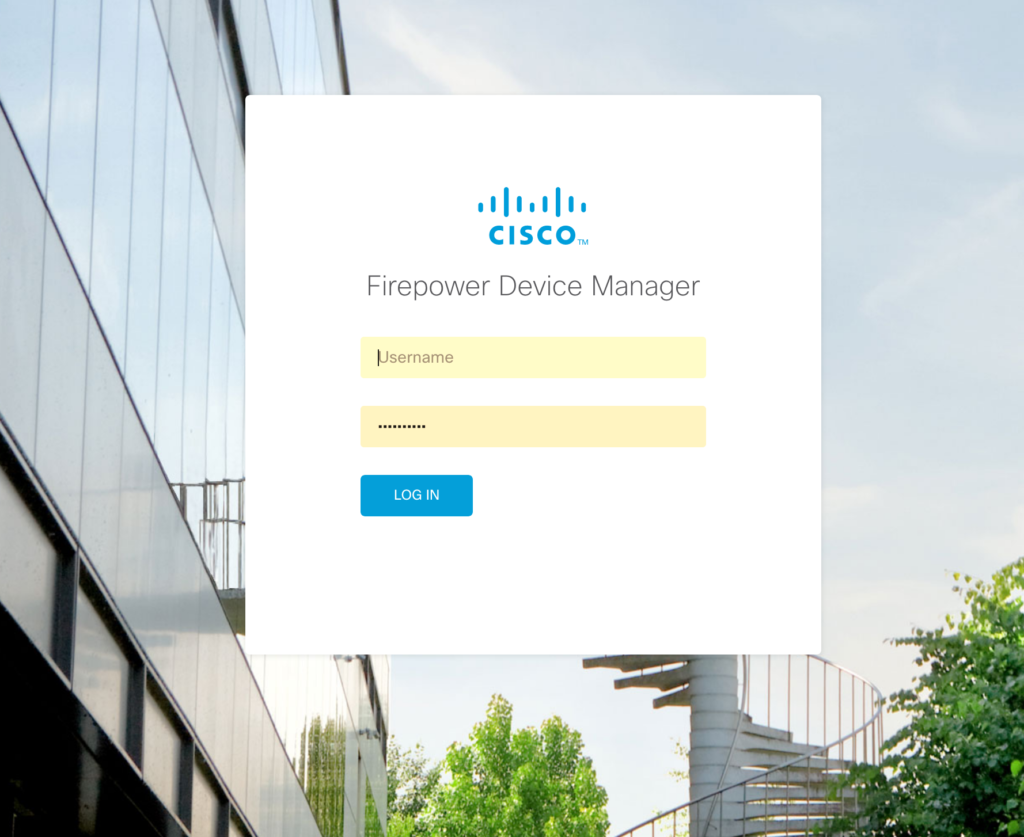
The default login in admin Admin123. I put that in and was asked for a few things following the Device Setup script as shown.
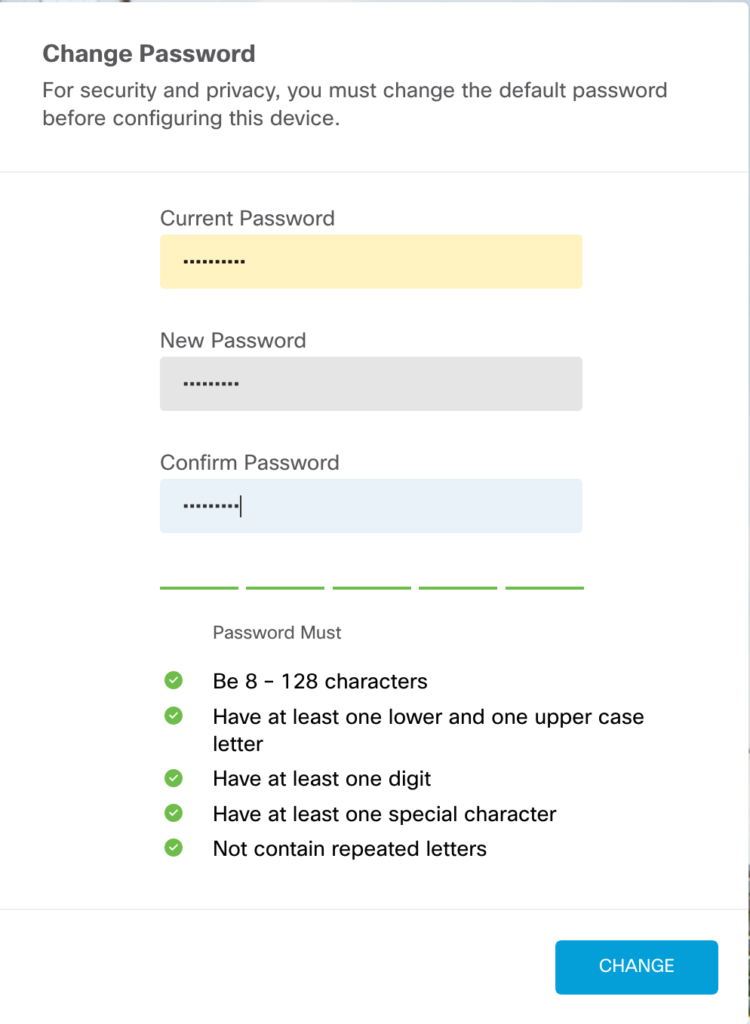
First, I had to change the password, which had some pain in the A#$# criteria but the right thing for security purposes. Then I changed the NTP.
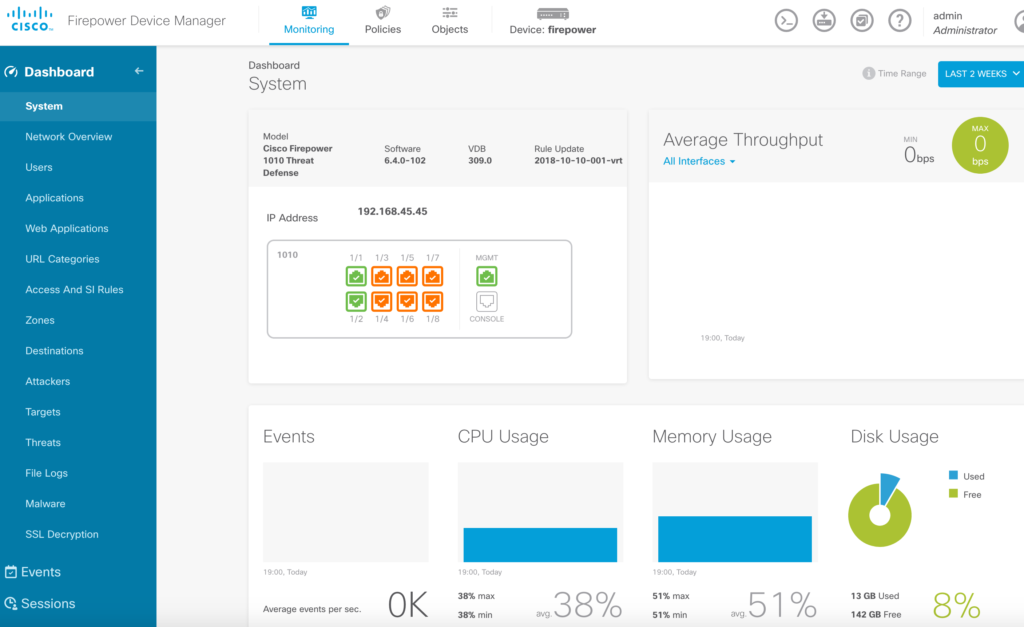
After answering the startup questions, I had to choose my license. I selected the 90 day demo so I could try everytihng out. Once licensed, a ton of things opened up on the dashboard as shown.
At this point, I was ready to configure my Firepower. The first step was looking at what type of access I should permit and deny. By default, I had NAT setup to permit everything from the inside out. The next image represents this basic policy.
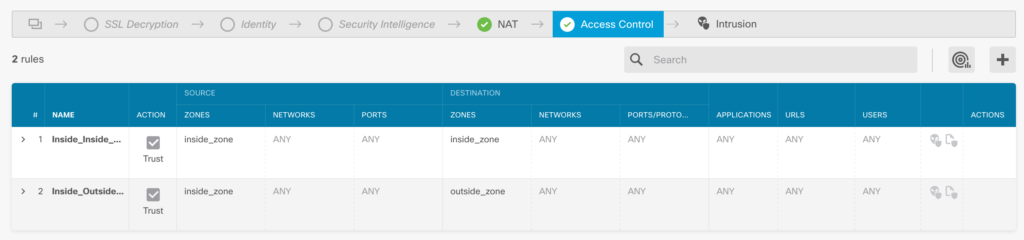
Here I could apply any personal policy filtering such as denying adult material as well as security filtering such as preventing a fake website that is known for provisioning malware. Stats such as how long the website has been online, where its
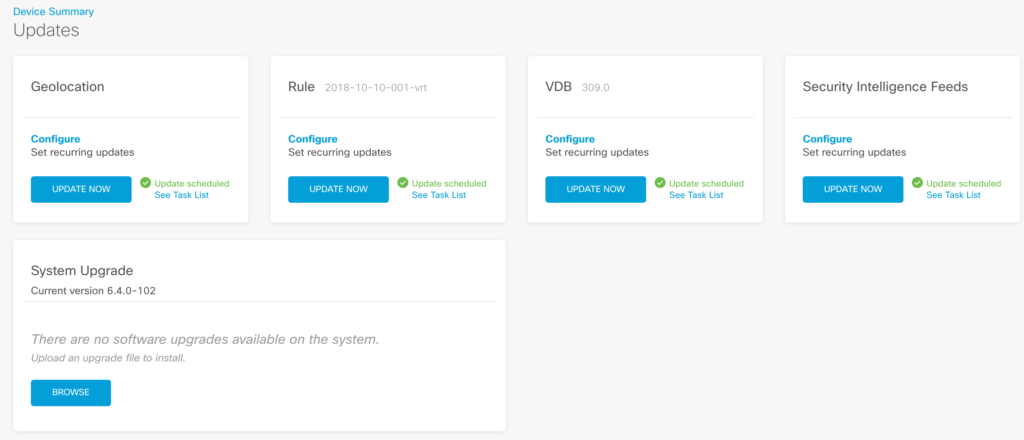
Next, I wanted to add IPS and Breach / File analysis. Before doing so, it made sense to update all subscriptions to ensure I have the latest threat intelligence. I was surprised by the number of updates that were available as shown.
Regarding IPS, I had some default categories to use, which I went with connectivity over security. My goal would be to tune this at a later time once my Firepower 1010 learns more about my network through application visibility.
I didn’t tackle
My malware policy was pretty straight forward. I chose to have files evaluated regardless of type. I plan to go back later this week and break down my malware policy into local and cloud evaluation of specific file types. I’ll post both about the SSL setup and Malware configuration for a part 2 of this post. Look out for that next week.
Do you know which software version will enable the poe+ feature on ports 7/8 (and erase the false advertisement of the FP1010)?
“The assumption is I’m using the cloud management option for this appliance. I could also use a local manager (Firepower manager) however, I want to keep things simple and check out the newer cloud management interface for this post known as Firepower Device Manager (FDM).”
FDM is an onbox application – running locally. It is not a cloud service. The only cloud service is what is called Cisco Defense Orchestrator or (CDO). Both FMC and FDM are both local Managers.
Good catch. Updating post. Thanks
how is the GUI performance after enabling IDS/IPS ?
I’ve configured 2100 and 4000 series with FMC at work. Well, that was about a year a ago since i left the company. This new nex- things are so amazing that don’t want to lose that skill which is why im considering one for home use