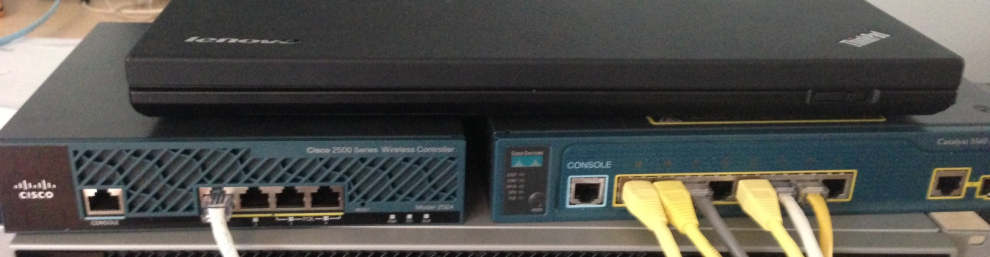
My Lab – ASA5515, w520 (hosting ISE, NCS, Lancope, WSA and ESA), 3560 8 port switch, 2504 Controller + AP
I recently picked up an ASA5515 with Solid State Drive to support the next generation firewall features also known as ASA CX. This post will explain how to build a ASA CX home lab. I found limited troubleshooting documentation so hopefully my lessons learned would help you avoid my mistakes. I will stop once I can access the ASA and CX via direct GUIs and ASDM management. I will do another post on adding ASA/ASACX to PRSM and features overview as a Part 2 post.
There are a few things you will need to build a ASA CX lab. You will need to download from cisco.com the latest ASA and ASADM code versions (I’m using ASA 9.1.2 and ASADM 7.1.3). You will also need the ASA 5500-X security service processor .img and ASA-CX system software .pkg to enable CX on the SSD.
NOTE: As of today, you can NOT run ASA CX and IDS/IPS on the same box however this will change with the next release. You must disable the IDS/IPS function to enable CX as of this code version.
NOTE: If the system software doesn’t match the ASA or other management tool versions such as PRSM, you will get error messages when adding to management tools. For example, my PRSM was at 9.1.2 and CX software was at 9.1.1. PRSM would not add my ASA based on the CX having a older code version.

Error message adding CX to PRSM using different versions
ASA Basic Setup:
The first step is providing basic configuration for your ASA firewall. Place the firewall in transparent mode, set the management interface to security-level 100 and provide basic IP. The CX will use this interface so it is important to leverage this interface. Other basic configuration to perform are as follow:
- no dhcpd enable management
- sysopt noproxyarp management
- dns domain-lookup management
- dns server-group DefaultDNS
- name-server <Name-server IP>
- enable password cisco
- http server enable
- http 0.0.0.0 0.0.0.0 management
- ntp server <NTP IP>
- route management 0 0 <GW IP>
Make sure you can ping thesecurityblogger.com from your ASA. Now configure SSH:
- username cisco password cisco privilege 15
- aaa authentication ssh console LOCAL
- ssh 0.0.0.0 0.0.0.0 management
- ssh timeout 60
- crypto key generate rsa general-key
At this point, you should be able to access your ASA via ASDM via the IP address of the management interface. You can use the ASDM GUI or CLI to upgrade both your ASA and ASDM code. I like the GUI wizard.
CX Basic Setup:
The first step is checking the state of your CX module. Use “show inventory” to verify the SSD is functioning properly (you will see Storage Device 1 with stats on it). If the SSD is not recognized, make sure the drive is pushed all the way into the front of the ASA and verify your ASA code upgrades have been completed (IE make sure you are at 9.1 or beyond).
Now you need to install the .img.
TIP: You can get the .img on your ASA by accessing ASDM, selecting Tools, Upgrade software from local computer and selecting the .img file as a ASA image. It will upload the file and state “File uploaded but this is not a ASA image”. You can verify its there via viewing the installed files.
Back to the ASA CLL. Log into the ASA CX inside the ASA by using the “session cxsc console” command (you are accessing a separate system when logging into CX). The user name is admin and password is Admin123. Type the following commands to put the CX in recovery mode (note the image must match what you are installing. Verify by using a ? after disk0:/ to see what images are on your ASA).
- sw-module module cxsc recover configure image disk0:/asacx-5500x-boot-9.1.2-46.img
- sw-module module cxsc recover boot
This will take a few minutes to complete. You should be able to access the CX CLI again once it is done using the “session cxsc console” command. To get out of the CX CLI, you might have to either use CTRL ^ followed by x or CTRL ^ or CTRL ^ ^ x. My MACBOOK pro uses CTRL ^^ X.

CX Command line Login – Note the image versionOnce inside the CX CLI, use the “partition” command to wipe it. After that finishes, use the “setup” command. Make sure to give it a IP and DNS that gets it out to the internet. If you don’t have a NTP server, use the “config time” command to manually set the time.
NOTE: TIME IS CRITICAL. If the time is off between the ASA, CX and management systems such as PRSM, it will give a invalid cert error.

PRSM error message when time is off between devices
Try pinging thesecuirtyblogger.com from the CX CLI. If that works, its time to install the software .pkg. If you don’t complete the software install, you will have to start over via the CX steps above.
You must use FTP, HTTP or HTTPS to install the software. I tried uploading the .pkg using the ASDM method and accessing it locally however it fails. The only method I got to work was HTTPS. I used www.dropbox.com and selecting “copy public link” to host the .pkg file. Dropbox gave me issues coping the file over so I had to use the dropbox client to get it up on the cloud. The command install the CX software via CLI in the CX module is
- System install https://<dropbox link/asacx-sys-9.1.2-46.pkg (or whatever version you are installing)
You should see “verifying” followed by “downloading”. If you don’t see this (IE its hanging), most likely it can’t access the file and will hang forever. If that happens, log out of the CX module and start the whole CX process over again.
Once the installation is complete, verify the CX is functioning by typing “show module cxsc detail | include status”. If you don’t see Normal Operations, you need to do the process again. I kept having “recovery” when not successfully installing the .pkg file. At this point, you should be able to see a new CX Tab in ASDM and you can access CX directly by putting in the IP address in a web browser.
CX GUI login when accessing directly
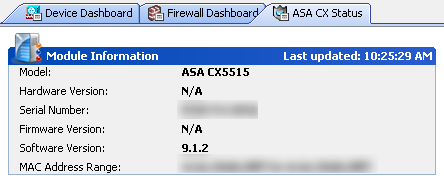
ASDM GUI showing the new CX tab once it is configured
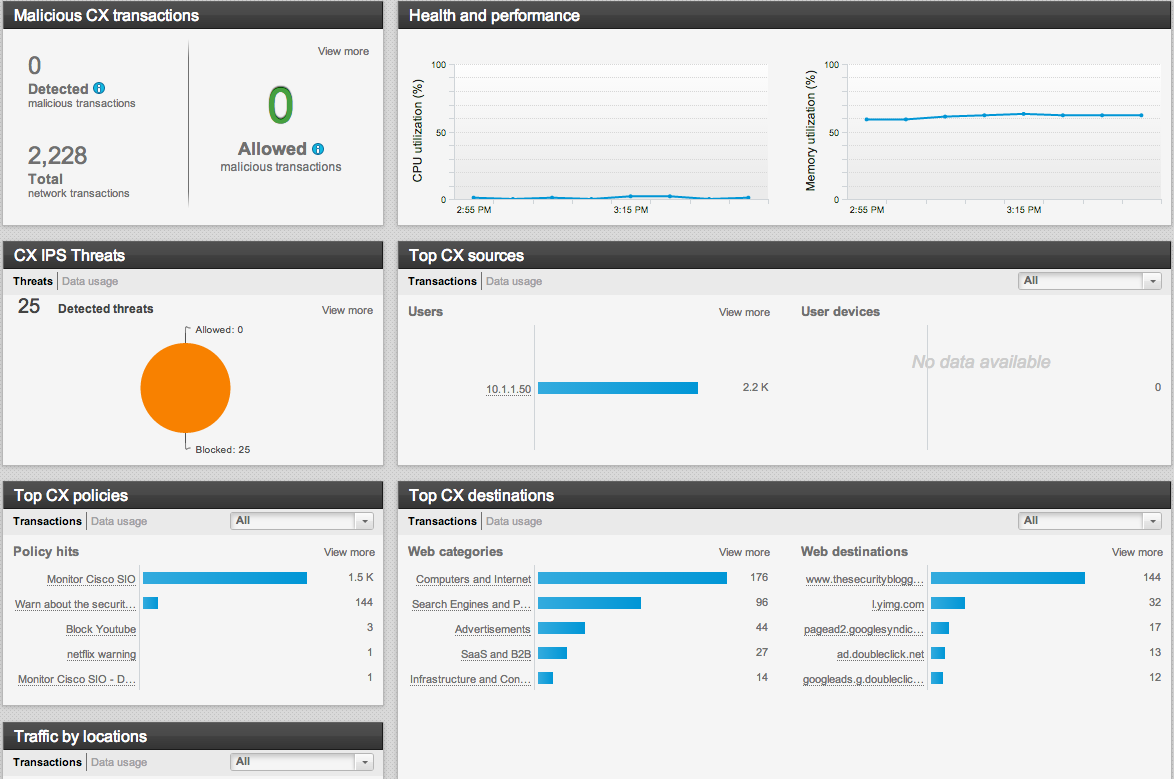


NOTE: As of October 2013, ASA CX now has IPS along with visibility and reputation security.
Excellent guide. Very helpfull.
PS: There is a typo on the website = Make sure you can ping thesecuirtyblogger.com from your ASA. Now configure SSH:
Hi security blogger!
first of all, thank you for all the usefull blogs you’ve been posting. They are very resourcefull.
My question:
Could you use this same approach to upgrade from PRIME to FirePower software with the correct licenses? Or does’nt FirePower work at all on a ASA5525-X with a previously installed PRIME?