The Internet is not a safe place. Best practice is protecting users with a Web Security solution. The ideal solution should be able to identify the attackers meaning verifying the source of the threat along with various methods to look for attacks. Cisco accomplishes this through a combination of global correlation (IE verifying if the source is malicious based on things like location, time the source has ben active, reputation, content, etc.), malware scanning and traffic monitoring.
The flagship web security solution from cisco is the Web Security Appliance (WSA) coming from the 2007 Ironport acquisition. Other web security options are a cloud offering and next generation firewall addition to the ASA firewall known as CX. More on Cisco’s Web Security options can be found HERE.
The most recent update of WSA now includes a virtualized offering. This post will cover the steps to setup a Cisco virtual Web Security Appliance (vWSA) home lab. My lab includes a 3560 8-port switch, laptop hosting ESXI 5.0 and macbook laptop as the user. The most common way to deploy the vWSA is to route all traffic through it using WCCP however my lab will use the host proxy method meaning I must set my end user’s laptop browser to proxy through the vWSA.

The first thing you must do is download the vWSA software from cisco.com. The file will be an .ova file. To install, simply select “Deploy OVA” from vSphere and it will build the virtual appliance. When you connect to the vWSA via the console, log in with the default user: admin password: ironport.
You will see a banner to install a vWSA license. You can obtain a license from your Cisco solution provider (Note: without a license, vWSA will not work). The license file will be a .zip containing an .xml key tied to your Virtual Device Identifier.
The vWSA requires installing license files using the console port. A summery of the steps to do this are:
- Log into the command line of vWSA (admin / ironport)
- Set the time via “settime” command
- FTP the license to your vWSA (I used filezilla to do this). Paste the .xml license files in the configuration folder
- Inside command line, load the license using the” loadlicense” command. I used option 2 to select license I FTPed over.
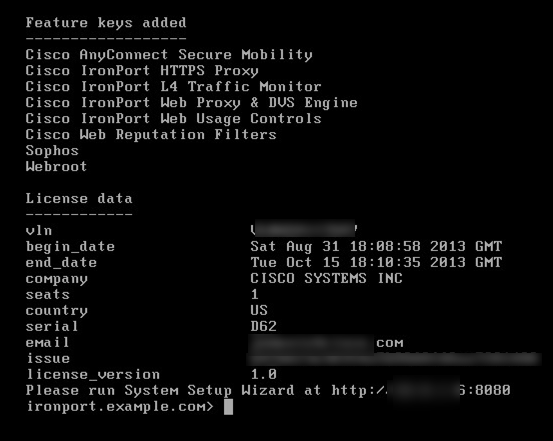
License loaded successfully via command line
Access the vWSA via a web browser as directed when you logged into the command line to run the setup wizard. The next image shows the command line explaining where to access the GUI. Make sure to add :8080 to the default IP vWSA pulled.
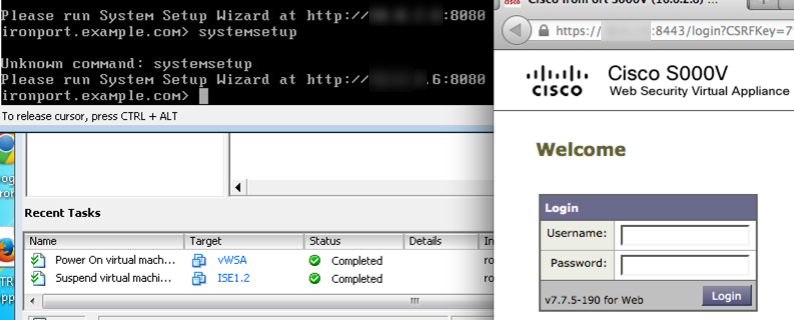
Screenshot showing command line stating GUI login info. On right is the GUI
NOTE: I found I had to wait a day or two after a license was issued for it to work. I kept getting “license not valid yet” when trying to upload a new license via command line the day of receiving a new license.
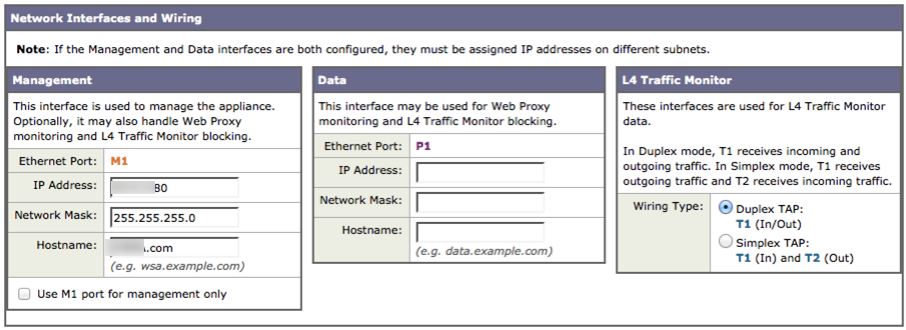
When you first log in, you will want to verify your licenses are installed by going to System Administration and Feature Keys. You can also check for updates by going to System Administration and System Upgrade. To setup the vWSA solution, go to System Administration and access the setup wizard. The things you will be asked to do are as follow:
- Create a server name, DNS, NTP and Time zone information.
- Enter any other proxies
- Configuring IP addresses as well as determining the type of vWSA deployment. I went with sharing the same IP for management and proxy as shown in the image.

- Default Gateway and any additional static routes
- Routing traffic aka WCCP or flat design. My lab is a flat design as explained earlier.
- New admin password and email for alerts
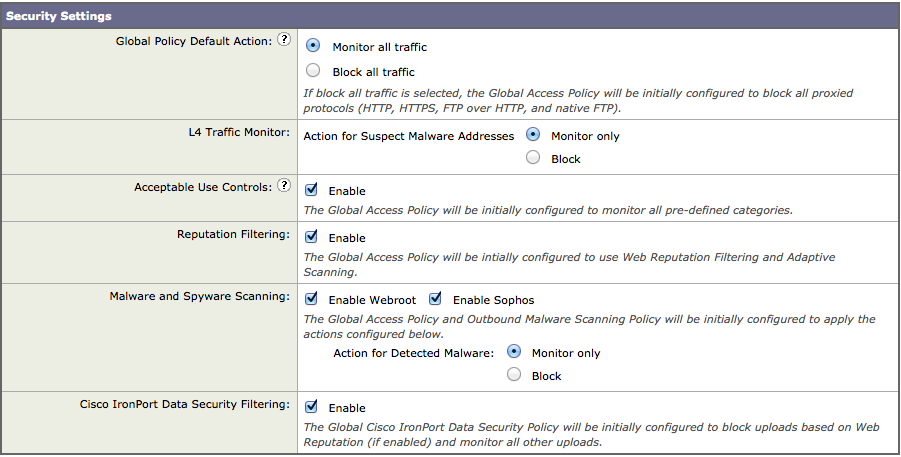
- Default security settings (block or monitor all). I suggest monitor until the vWSA is configured.
Once ready, you set the configuration and log back in using the new ip address followed by :8080. To test, I must set my macbook’s safari proxy to point to the vWSA. The steps to enable a proxy vary depending on browser.

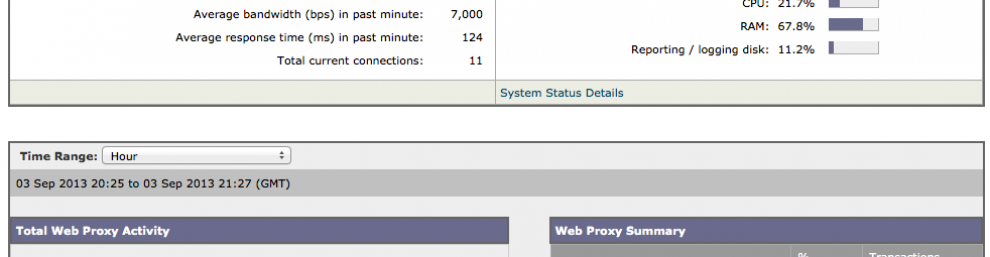
To verify vWSA is receiving traffic, click on the reporting tab and look for capture data as you surf the web with your browser set to proxy to vWSA.
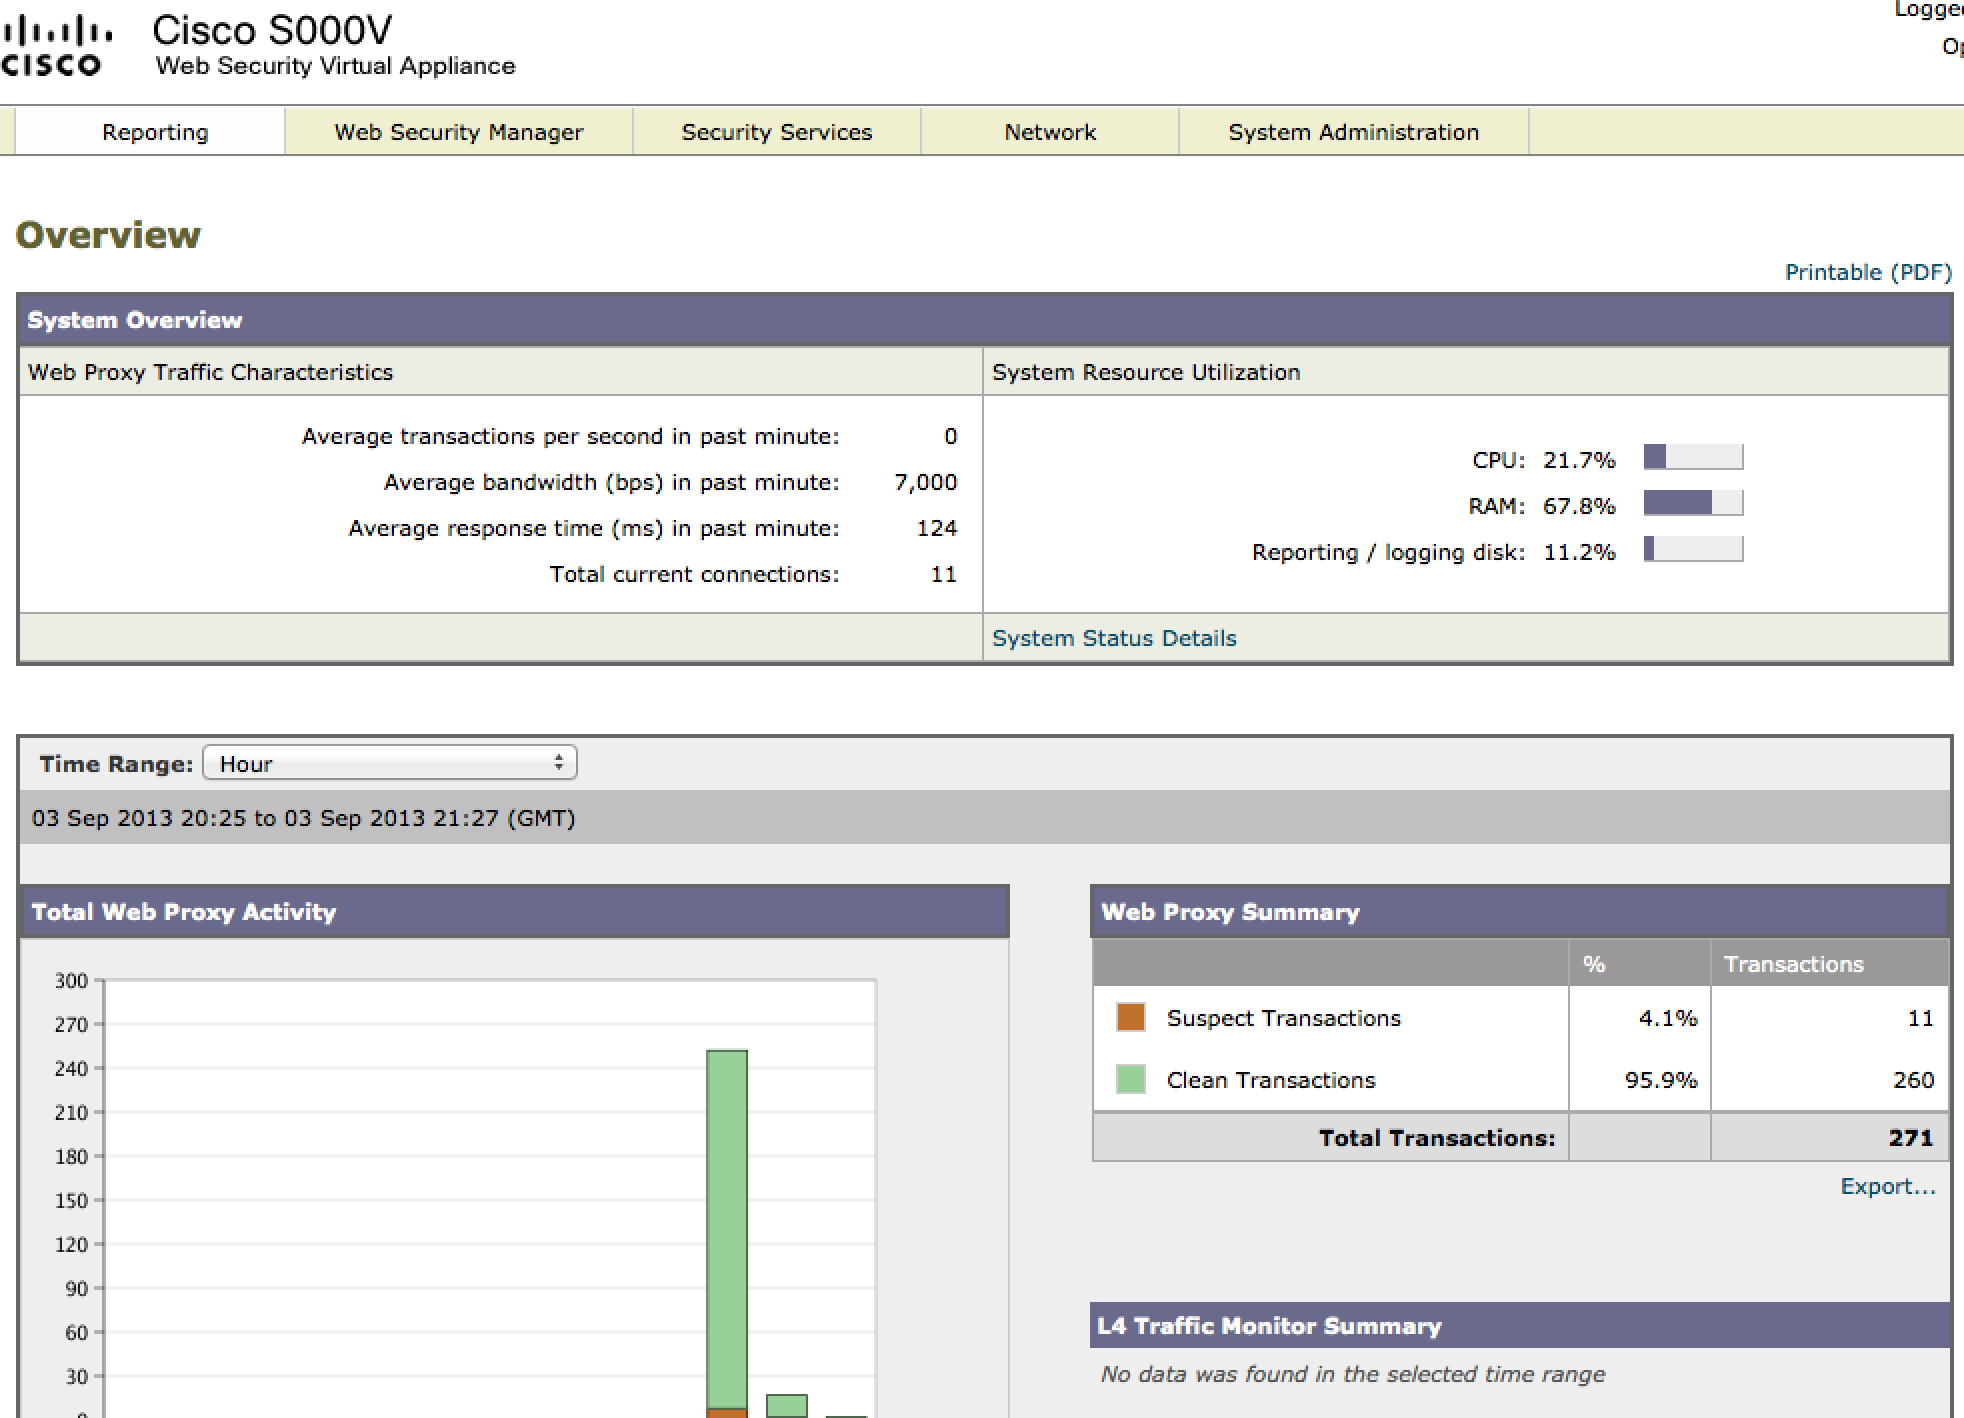
Reporting dashboard showing user traffic
An easy first security test is policy enforcement. You can modify this by going to web security manager and select access policies. Next select the URL filtering area to edit which categories you want to monitor, warn or block. In my lab, I selected gambling to warn and adult to block. Here is an example of blocking pokerstars.com. This warning can be modified as you see fit.
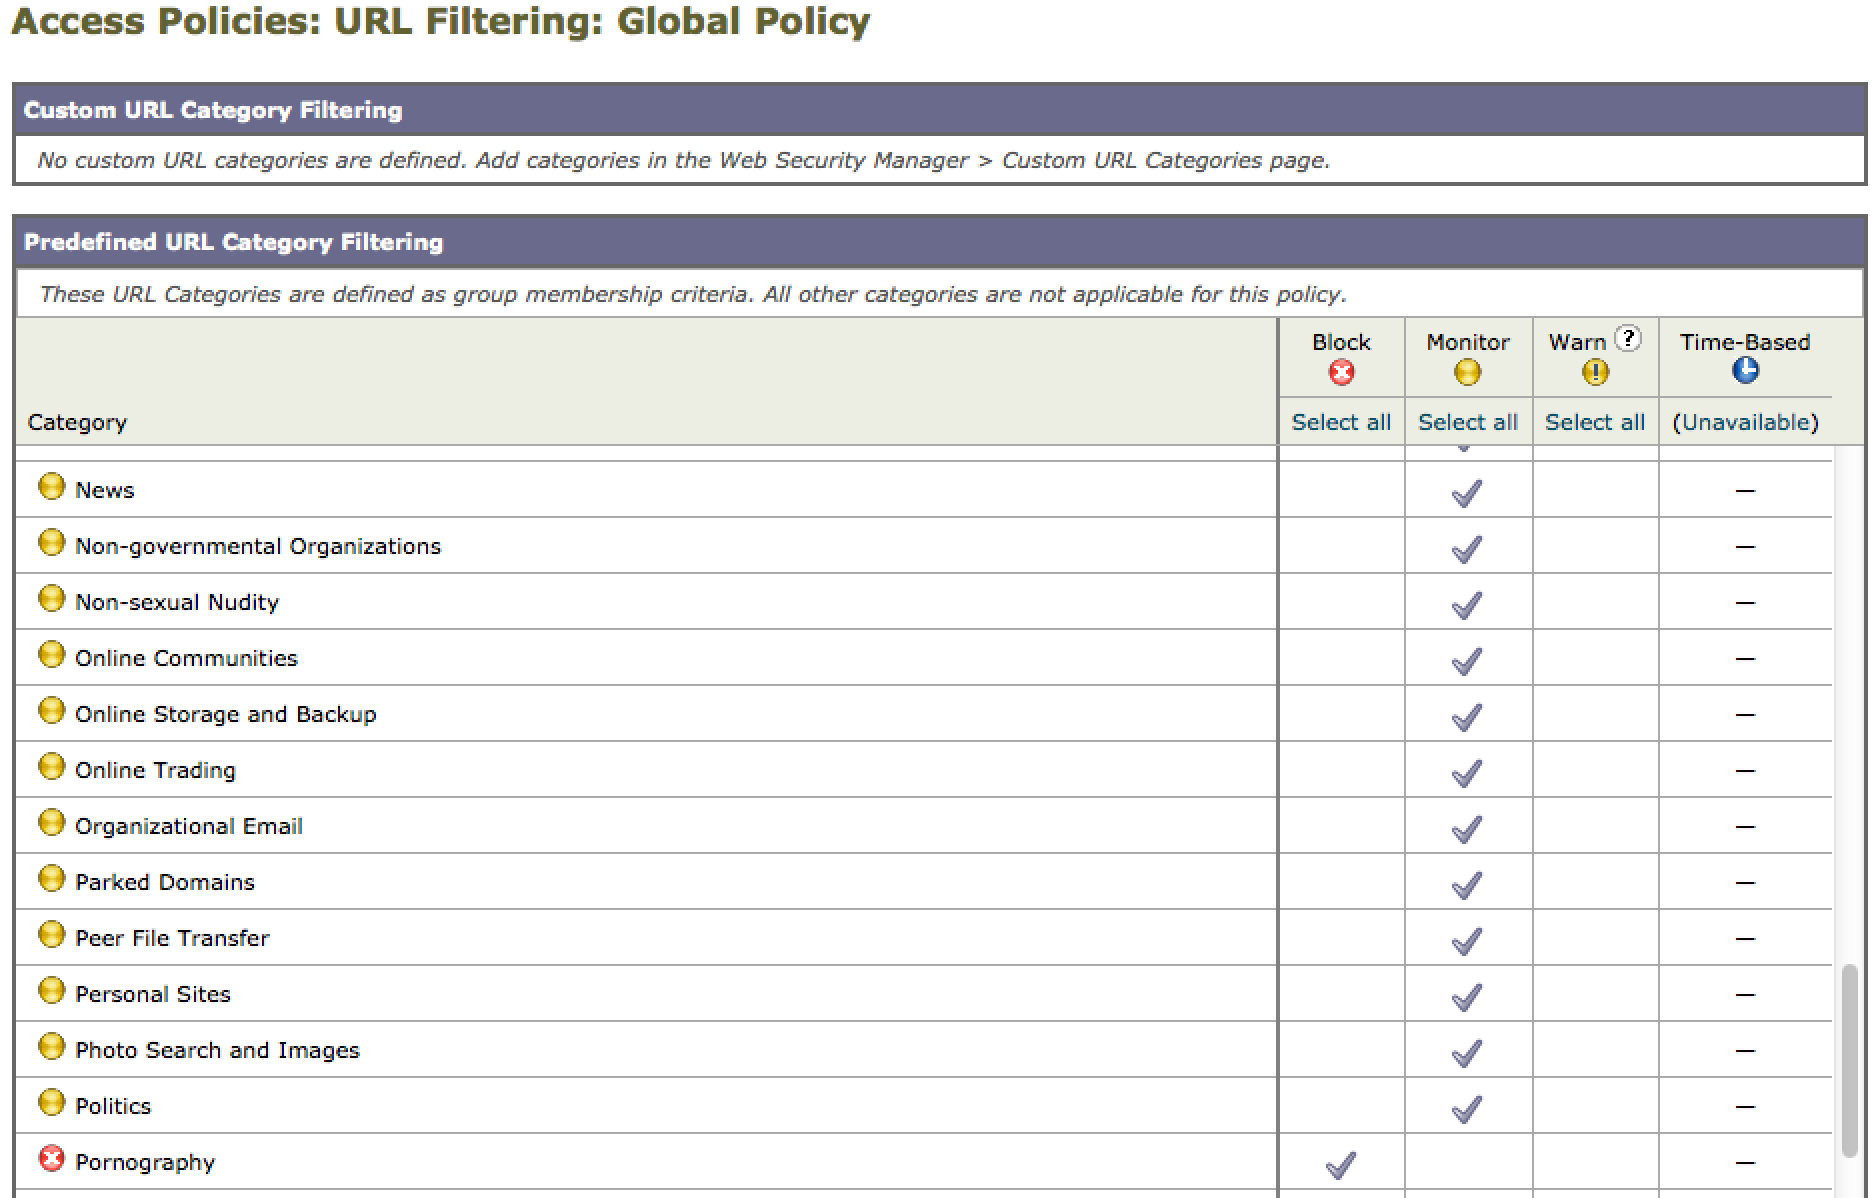
Some policy options
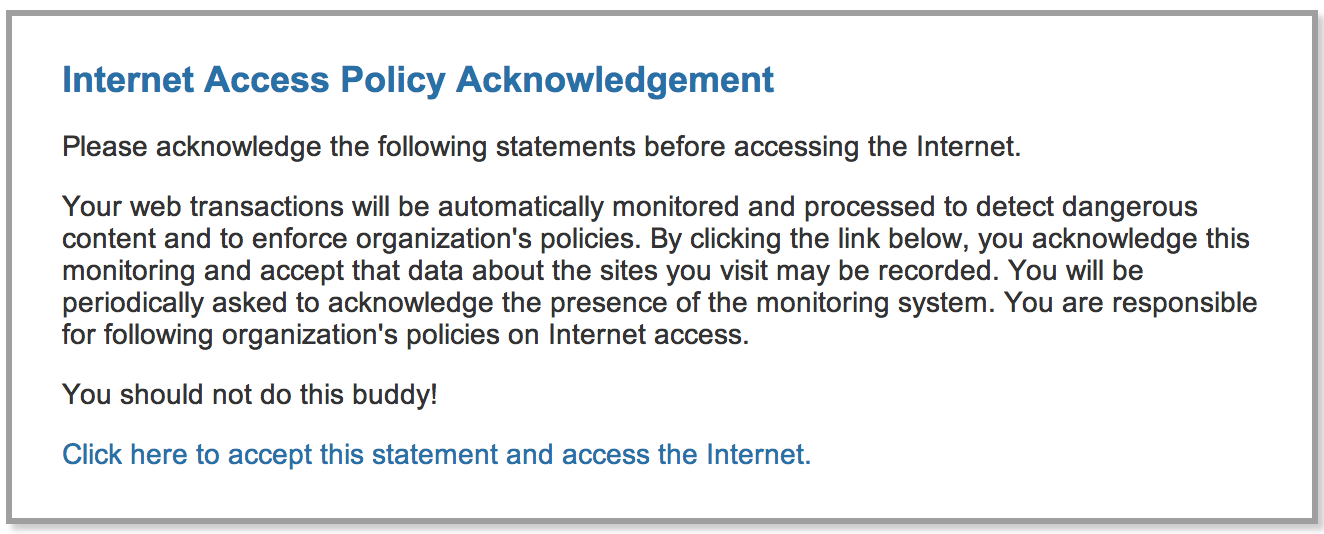
Example of warning for a risky site. I added the last sentence.
To add the Layer4 botnet scanner, you must configure a SPAN port for the vWSA to listen. Once setup, the vWSA will show phone home botnet activity and either block or monitor depending on your configuration. Here is an example configuation to enable a SPAN port on my 3560 switch.
![]()
Enabling SPAN port on my lab 3560 switch
There are many other features such as global correlation, virus / malware scanning, https, data loss prevention, etc. that you can test. A list of all the vWSA features can be found HERE. Hopefully this servers as a guide to get your WSA/vWSA lab operational.
Related posts:
 Internet Defense Technology : Web Proxy / Content Filter / Application Firewalls
 Enforcing Network Policy Internally, Remotely And To Mobile Devices
 Cisco’s Cyber Solutions – What Is Happening In Your Network
Amazing tips for security…..
Nowadays, security of any type is very important . And your post clear all doubts related to security concerns.
Thanks for post!!!!!
Many thanks for your work <3
I also build a vWSA on my own. However, I am stuck on the step of accessing to the GUI. I use the default parameter login as "admin" and "iron****" but the login button cannot be clicked. I mean the login button is there but somehow I click on it and there is nothing happen then.
Is it a bug or error on the image or installation file? please give any advise.
Thanks.
Are you using Chrome? Switch to Firefox or IE.