My Buddy Aamir Lakhani wrote a awesome Installation guide for kali Linux. This is a updated version of what is available in our book. Check out the original post HERE via www.drchaos.com
Introducing kali Linux
The creators of BackTrack have released a new, advanced penetration testing Linux distribution named kali Linux. BackTrack 5 was the last major version of the BackTrack distribution. The creators of BackTrack decided that to move forward with the challenges of cyber security and modern testing a new foundation was needed. Kali Linux was born and released March 13th 2013. Kali Linux is based on Debian and an FHS-Compliant file system.
Kali has many advantages over the BackTrack. It comes with many more updated tools. The tools and streamlined with Debian repositories and synchronized four times a day. That means users have the latest package updates and security fixes. The new compliant file systems translate into running most tools from anywhere on the system. Kali has also made customization, unattended installation, and flexible desktop environments and strong feature in Kali Linux.
Kali Linux is available for download at (http://www.kali.org/).
Kali Linux Setup
Kali Linux can be downloaded in a few different ways. One of the most popular ways to get Kali Linux is to download the ISO image. The ISO image is available in 32-bit and 64-bit images.
If you plan on using Kali Linux on a virtual machine such as VMware, there is a VM image prebuilt. The advantage of downloading the VM image is that is comes preloaded with VMware tools. The VM image is a 32-bit PAE. In theory, a PAE kernel allows the system to access more system memory than a traditional 32-bit operating system. There have been some well-known personalities in the world of operating systems that have argued for and against the usefulness of PAE kernel. However, the authors of this book suggest using the VM image of Kali Linux if you plan on using it in a virtual environment.
Running Kali Linux from External Media
Kali Linux can be ran without installing software on a host hard drive by accessing it from a external media source such as USB drive or DVD. This method is simple to enable however has performance and operational implementations. Kali Linux having to load programs from a remote source would impact performance and some applications or hardware settings may not operate properly. Using a read only storage media does not permit saving custom settings that may be required to make Kali Linux operate correctly. It’s highly recommended to install Kali Linux on a host hard drive.
Installing Kali Linux
Installing Kali Linux on your computer is straightforward and similar to installing other operating systems. First, you’ll need compatible computer hardware. Kali is supported on i386, amd64, and ARM (both armel and armhf) platforms. The hardware requirements are listed below, although we suggest exceeding the minimum amount by at least 3 times. The better hardware Kali Linux runs on, the better the performance and user experience will be. Download Kali Linux and either burn the ISO to DVD, or prepare a USB stick with Kali Linux Live as the installation medium. If you do not have a DVD drive or USB port on your computer, check out the Kali Linux Network Install.
Installation Minimum requirements:
· A minimum of 8 GB disk space for the Kali Linux install.
· For i386 and amd64 architectures, a minimum of 512MB RAM.
· CD-DVD Drive / USB boot support
· You will also need an active Internet connection before installation. This is very important or you will not be able to configure and repositories during installation.
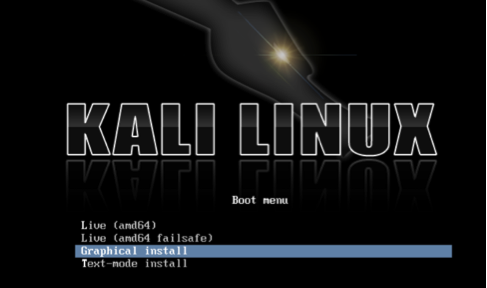
When you start Kali you will be presented with a Boot Install screen. You may choose what type of installation (GUI based or Text Based) you would like to perform.
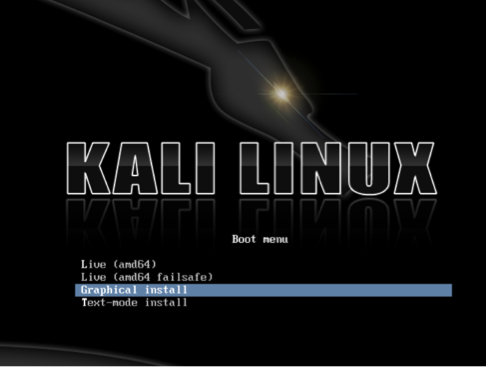
Kali Linux Boot Screen
Select the local language preference, country, and keyboard preferences.

Language Preference
Select a hostname for the Kali Linux host. The default hostname is Kali.
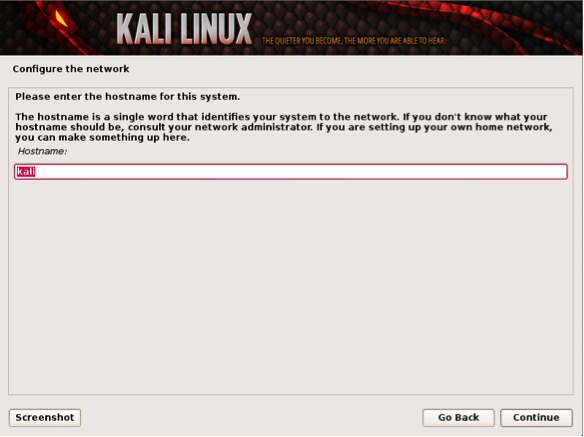
Hostname
Select a password.
Simple passwords may not work so chose something that has some degree of complexity.
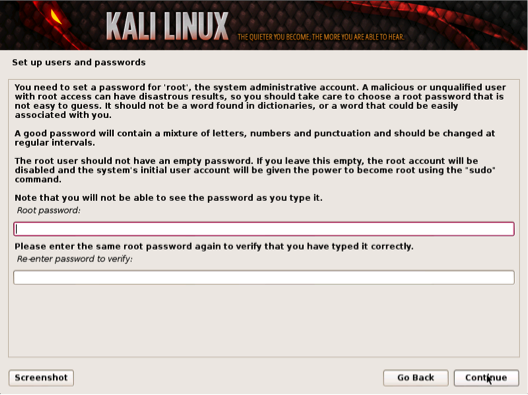
Selecting a Password
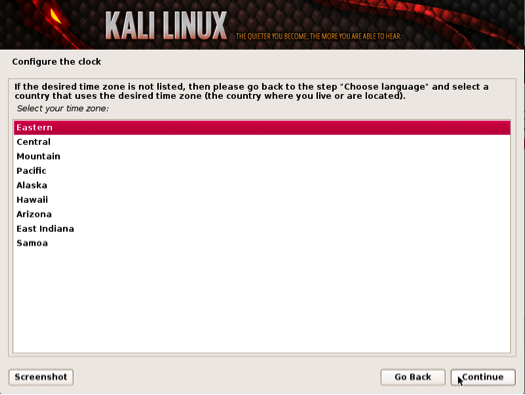
The next prompt asks for your time zone. Modify accordingly and select continue. The next example shows selecting Eastern Standard time.
The installer will ask to setup your partitions. If you are installing Kali on a virtual image, select Guided Install – Whole Disk. This will destroy all data on the disk and install Kali Linux. Keep in mind on a virtual machine, only the virtual disk is getting destroyed.

Setting time zones
Advanced users can select manual configurations to customize partitions.
Kali also offers the option of using LVM, logical volume manager. LVM allows you to manage and resize partitions after installation. In theory, it is supposed to allow flexibility when storage needs change from initial installation. However, unless your Kali Linux needs are extremely complex, you most likely will not need to use it.
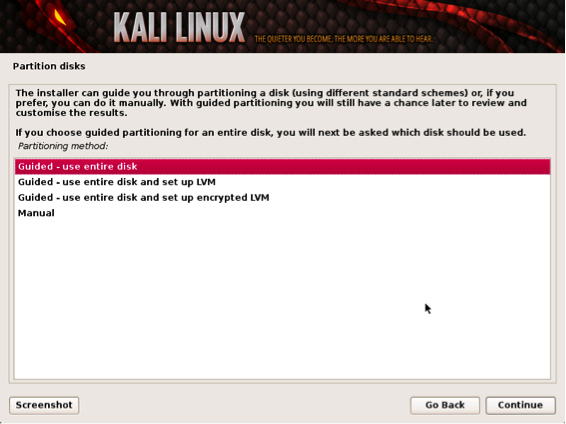
Partitioning your system
The last window displays a review of the installation settings. If everything looks correct, select yes to continue the process as shown in the next screenshot.
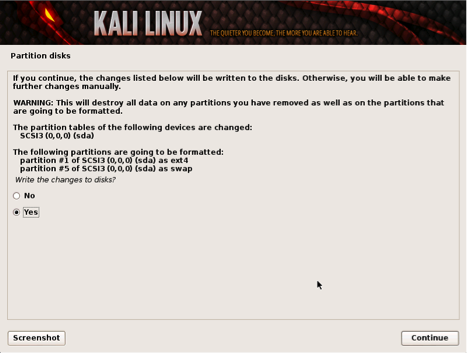
Partition Details
Kali Linux using central repositories to distribute application packages. If you would like to install these packages, you need to use a network mirror. The packages are downloaded via HTTP protocol. If your network uses a proxy server, you will also need to configure the proxy settings for you network.
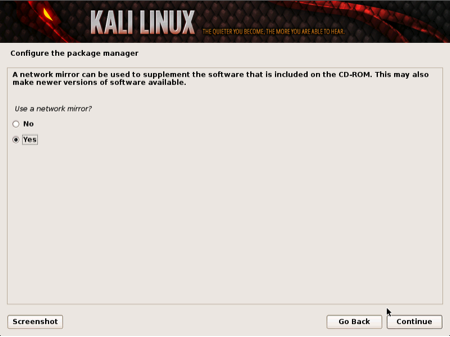
Configuring a Network Mirror
Kali will be prompt to install GRUB. GRUB is a multi-bootlader that gives the user the ability to pick and bootup to multiple operating systems. In almost all cases, you should select to install GRUB. If you are configuring your system to duel boot, you will want to make sure GRUB recognizes the other operating systems in order for it to give users the options to boot into an alternative operating system. If it does not detect any other operating systems, the machine will automatically boot into Kali Linux.
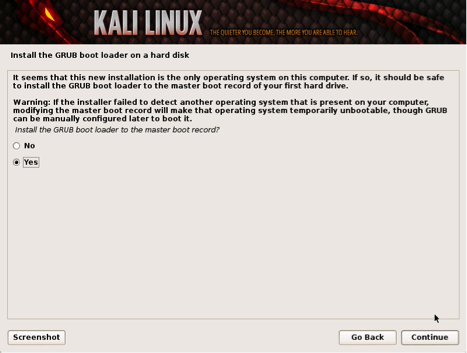
Installing Grub
Congratulations! You have finished installing Kali Linux. You will want to remove all media (physical or virtual) and select continue to reboot your system.
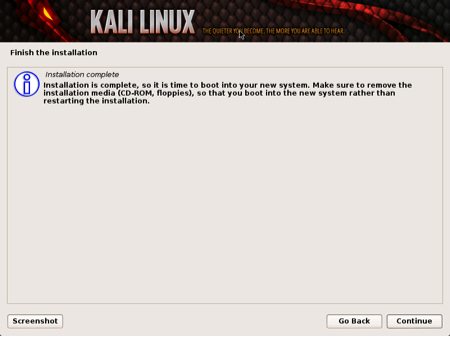
Finish Installation
Kali Linux and VM Image First Run
On some Kali installation methods, you will be asked to set the root password. When Kali Linux boots up, enter the root username and the password you selected. If you downloaded a VM image of Kali, you will need the root password. The default user name is root and password is: toor.
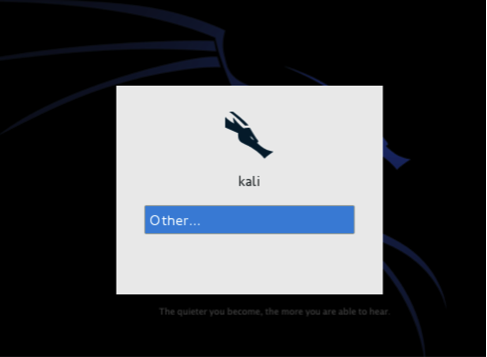
Logging into Kali
The first thing you need to do on Kali Linux is prep the system for VM Tools. You do so by issuing the following commands:
Note: all commands are typed in the terminal
echo cups enabled >> /usr/sbin/update-rc.d
echo vmware-tools enabled >> /usr/sbin/update-rc.d
apt-get install gcc make linux-headers-$(uname -r)
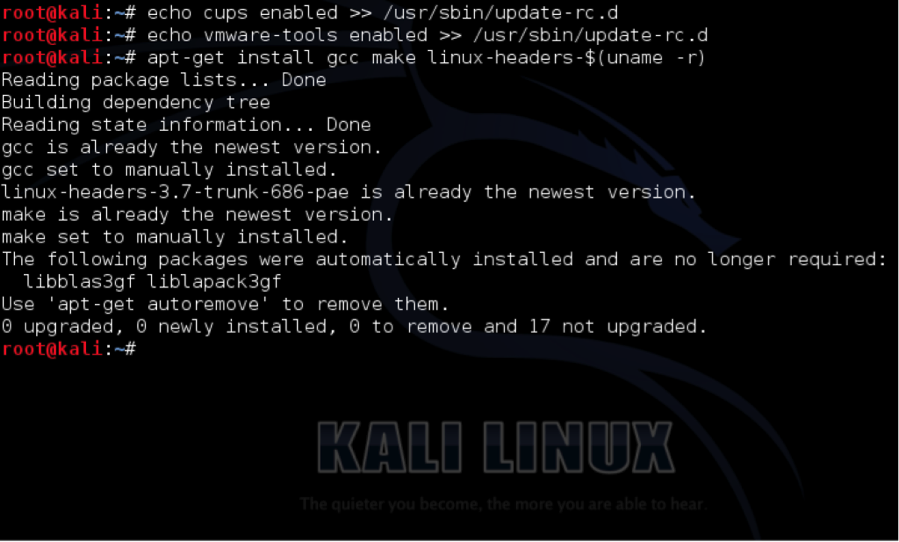
Prepping Kali for VM Tools
Note: This is typed as one line
ln -s /usr/src/linux-headers-$(uname -r)/include/generated/uapi/linux/version.h /usr/src/linux-headers-$(uname -r)/include/linux

Prepping Kali for VMWare Tools Install
Now you are ready to mount the VM Tools CD. Simply go to the menu in VMWare and install VM Tools. NOTE: I did this from VMWare Fusion, but the process will be the same regardless of VMWare platform.
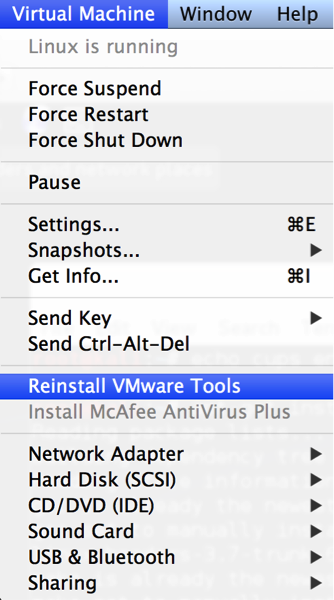
Loading VMWare Tools
Now go back to Kali Linux and use the following commands:
mkdir /mnt/vmware
mount /dev/cdrom /mnt/vmware/
cp -rf /mnt/vmware/VMwareTools* /tmp/

Copy VMWare Tools to temporary folder
Next, you will change to the /tmp directory and run the VM Tools installation script.
cd /tmp/
tar zxpf VMwareTools-*.tar.gz
cd vmware-tools-distrib/
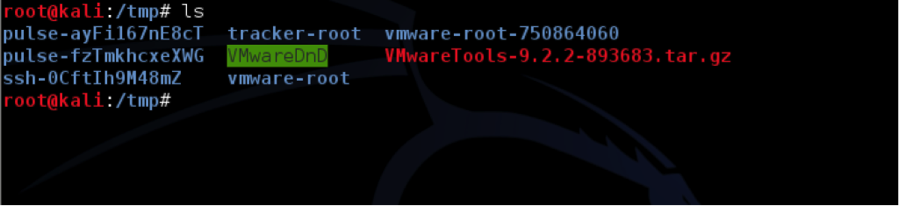
Unpacking VMWare Tools and Listing in directory
Lastly type: “ ./vmware-tools-install.pl” to run the VM Tools installation script. Follow the onscreen instructions when you run the script.
Kali Linux Toolset Overview
Kali Linux offers a number of customized tools designed for penetration testing. Tools are categorized in the following groups as seen in dropdown menu shown below.
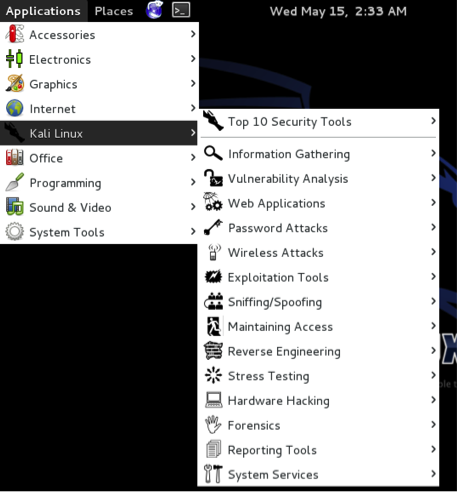
Kali Menu
Information Gathering – These are reconnaissance tools used to gather data on your target network and devices. Tools range from identifying devices to protocols used.
Vulnerability Analysis – Tools from this section focus on evaluating systems for Vulnerabilities. Typically, these are run against systems found using the Information Gathering reconnaissance tools.
Web Applications – These are tools used to audit and exploit vulnerabilities in web servers. Many of the audit tools we will refer to in this book come directly from this category. Although web applications do not always refer to attacks against web servers, they can simply be web-based tools for networking services. For example web proxies will be found under this section.
Password Attacks – This section of tools primarily deals with brute force or the offline computation of password or shared keys used for authentication.
Wireless Attacks – These are tools used to exploit vulnerabilities found wireless protocols. 802.11 tools will be found here, including tools such as aircrack, airmon and wireless password cracking tools. In addition, this section has tools related to RFID and Bluetooth vulnerabilities as well. In many cases, the tools in this section will need to be used with a wireless adapter that can be configured by Kali to be put in promiscuous mode.
Exploitation Tools – These are tools used to exploit vulnerabilities found in systems. Usually vulnerability is identified during a Vulnerability Assessment of a target.
Sniffing and Spoofing – These are tools used for network packet captures, network packet manipulators, packet crafting applications and web spoofing. There are also a few VoIP reconstruction applications.
Maintaining Access – Maintaining Access tools are used once a foothold is established into a target system or network. It is common to find compromised systems having multiple hooks back to the attacker to provide alternative routes in the event a vulnerability that is used by the attacker is found and remediated.
Reverse Engineering – These tools are used to disable an executable and debug programs. The purpose of reverse engineering is analyzing how a program was developed so it can be copied, modified or lead to development of other programs. Reverse Engineering is also used for malware analysis to determine what an executable does or by researchers to attempt to find vulnerabilities in software applications.
Stress Testing – Stress Testing tools are used to evaluate how much data a system can handle. Undesired outcomes could be obtained from overloading systems such as causing a device controlling network communication to open all communication channels or a system shutting down (also known as a Denial of Service attack).
Hardware Hacking – This section contains Android tools, which could be classified as mobile, and Ardunio tools that are used for programming and controlling other small electronic devices.
Forensics – Forensics tools are used to monitor and analyze computer network traffic and applications.
Reporting Tools – Reporting tools are methods to deliver information found during a penetration exercise.
System Services – This is where you can enable and disable Kali services. Services are grouped into BeEF, Dradis, HTTP, Metasploit, MySQL and SSH.

Updating Kali Linux
After you have Kali Linux setup, you will want to update the packages. You do so my issuing the apt-get update command.
![]()
Next, issue the apt-get upgrade command. You may be asked to confirm disk space and other warning messages. Type Y to continue.
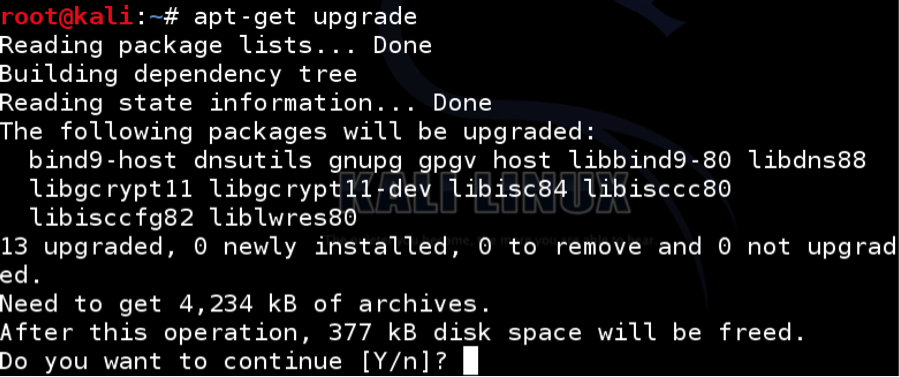
Finally the updatedb command from a terminal window. This command will ensure the applications are in the Kali database and can be found when a user executes the locate command.

Summary
Congratulations, you have successfully installed and updated Kali Linux. Kali is a powerful penetration platform. I recommend that you play around with Kali. You will find some key differences between Backtrack and Kali and some of these differences take time to learn. However, I am sure you will appreciate the power and flexibility of platform. Happy hacking!
These concepts and much more can be found in Aamir Lakhani and Joseph Muniz’s book Web Penetration Testing with Kali Linux.


THANKS BUT DOES THIS MEAN THAT THE OLD OPERATING SYSTEM IS UNISTALLED AND DELETED? IF YES HOW CAN I REINSTALL MY WINDOWS AND UNSTALL KALI LINUX? IF NO HOW DO I GET TO BOOT FROM WINDOWS? THANKS
the old os is still there it will be shown in the drop down menu in kali but you may have a prob when uninstalling kali so u have to keep it
THANK YOU. I can’t Unpacking VMWare Tools and Listing in directory. I’m using Vmware workstation pro 12. Kali-Linux-2016.1-vm-amd64.
I don’t want to continue installation with image 64 bit. After click set up, now system is ready to restart to proceed installation which is what I’m tying to avoid. Any help will be grateful.
Like all good projects, ethical hacking too has a set of distinct phases. It helps hackers to make a structured ethical hacking attack.
Different security training manuals explain the process of ethical hacking in different ways, but for me as a Certified Ethical Hacker, the entire process can be categorized into the following six phases. Professional Ethical Hacking Course
visit here if you really want to learn about hacking
http://www.junaidmugloo.blogspot.com
program + for hacking viber – download program + for hacking viber, tracking viber users