This post will cover how to install Cisco Sourcefire FireSIGHT / Defense Center on a environment aka a virtualized FireSIGHT manager. The purpose is to setup the management system for central management of ASAx series appliances running the FirePOWER services. For more information on how to use Cisco Soucefire FireSIGHT and FirePOWER services go HERE. For more information on licensing go HERE. For more information on setting up the ASAx with FirePOWER services go HERE.
Step 1: Obtaining FireSIGHT
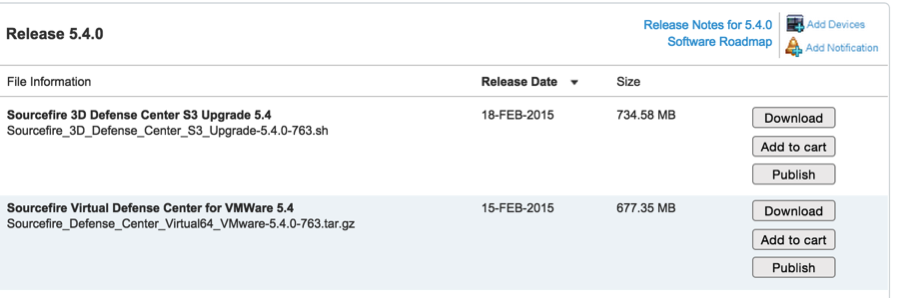
Download the virtualize management from Cisco (HERE) and click download software for this product. Select FireSIGHT virtualize management and downloading the latest version. We will go with 5.4 for this guide.
NOTE: If your CCO login doesn’t have the rights to download the software, contact your Cisco support rep and ask him/her to “publish” the software to your account. The next image shows the download link for 5.4.
Step 2: Deploying FireSIGHT
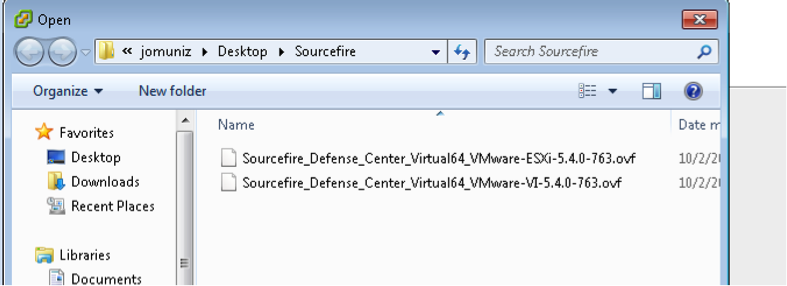
The file downloaded from Cisco is compressed. You will need to uncompress it to get the .ova file. Open ESXI and select to deploy a ova file. Select your .ova file and use the default settings.
Step 3: Setup Basic Networking
After 30-60 minutes, you will see a command line prompt in the console window. Log in with user admin password Sourcefire.
Next setup the network by using the command sudo /usr/local/sf/bin/configure-network and you will see a warning message.
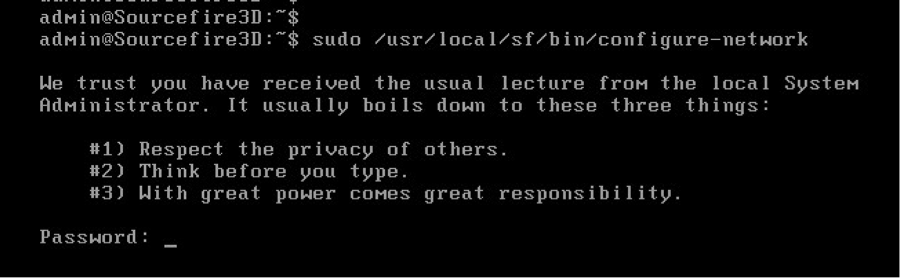
Login with Sourcefire. You will have to answer the following questions:
- IPv4 and/or IPv6
- IP address for Defense Center
- Network Mask
- Default Gateway
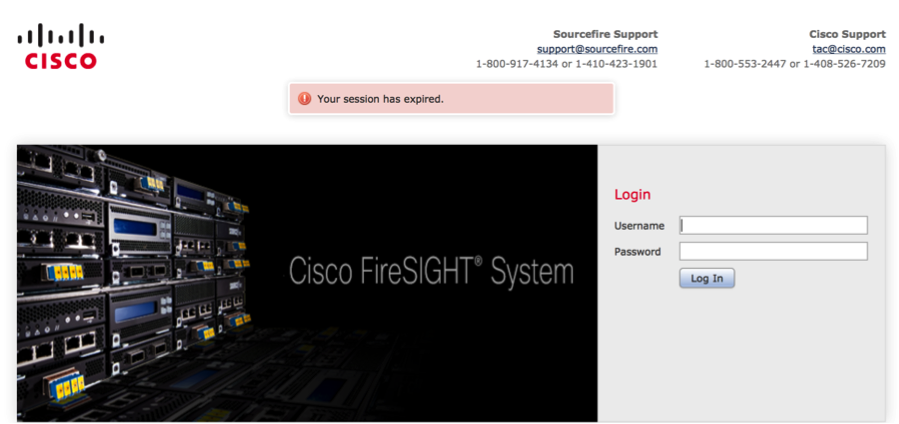
At this point, you are done with using the command line. Log out of the command line and open a web browser. Access the GUI management at https://IP_OF-SYSTEM so for example use https://192.168.40.5. Login with user admin password Sourcefire.
When you log in you will be asked to enter a new password and basic information such as DNS and updates. In my example, I put in a 10.0.2.160 address and about to fill out DNS info.
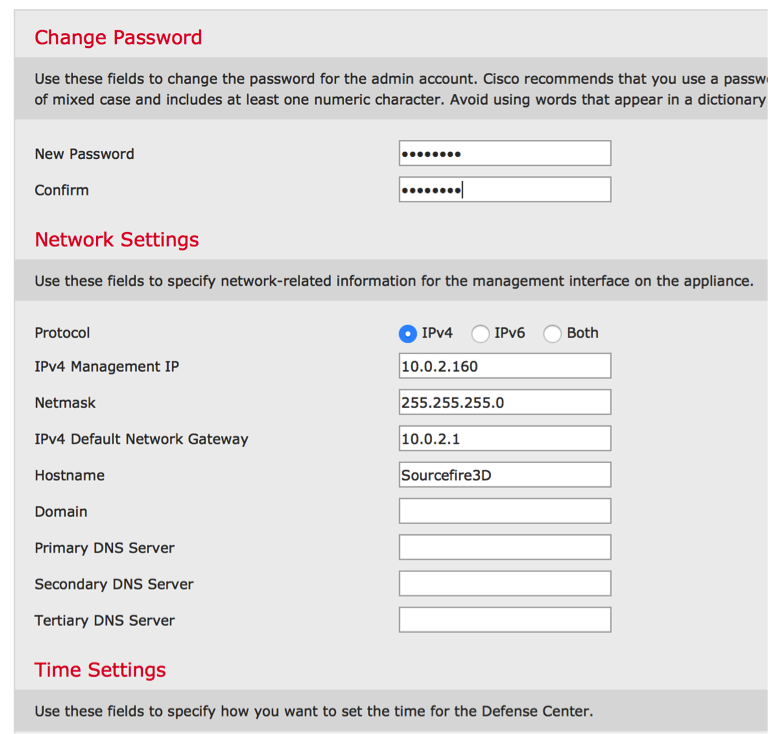
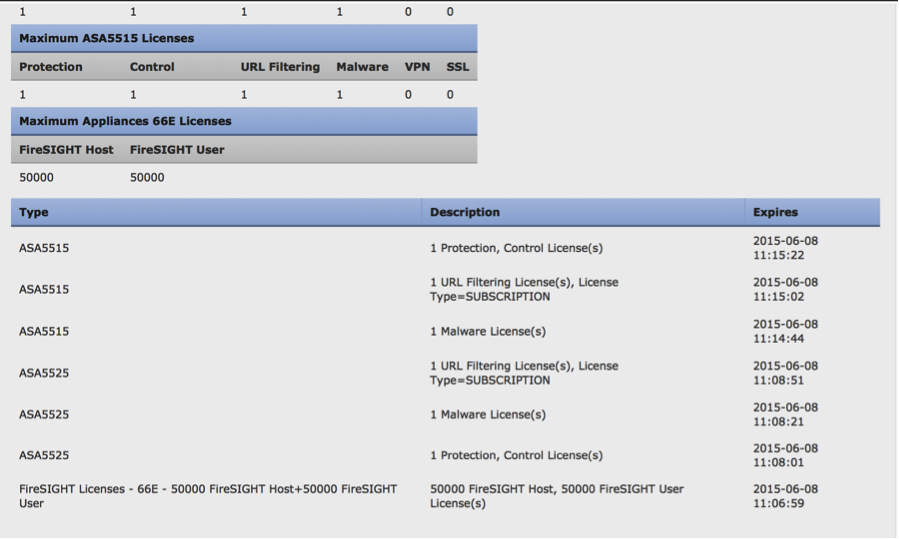
Create a new password, verify the IP address settings, add DNS, setup the NTP and so on. You will also see the license section around the bottom of this page. This is where you need to install the licenses for the Sourcefire FireSIGHT manager and the ASAx. Keys are generated based on a License Key unique to your manager. You will need two things when requesting keys. 1) The Manager’s License Key as shown in the next screenshot and 2) The model of ASAx. For more information on Licensing, go HERE.
License key options that can be requested are as follow
- Sourcefire FireSIGHT VM license
- ASAx Controller License
- ASAx AMP license
- ASAx URL license
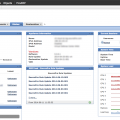
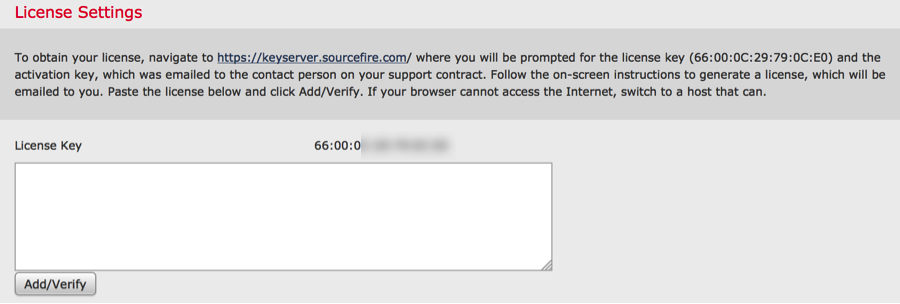 You will need to either use your purchased keys or request a demo key(s) to add here. As you add keys, they will populate showing what is active. In the next example, I have licensed a FireSIGHT manager, ASA5515x and ASA5525x.
Apply settings. It may take a few minutes and you will see the login screen after being logged out. Log in again with your new password. Go to System -> Updates and click the download updates button. Apply any available updates. Do the same for Rule Updates and Geolocation Updates. To check the status for updates, click System-> Task Status. You will see any running operations here.
NOTE: with 5.4.0, there is a 5.4.1 patch that takes around an hour to fully deliver. You can select multiple updates however they will sit in the “waiting” area as each running update completes.
Step 4: Setup The ASAx with Sourcefire
I covered this process in THIS post.
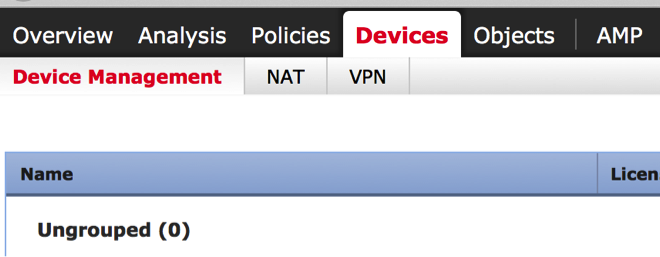
Step 5: Add The ASA to FireSIGHT
Once your ASA is setup with Sourcefire, go to the FireSIGHT management GUI. Go to Devices -> Device Management.
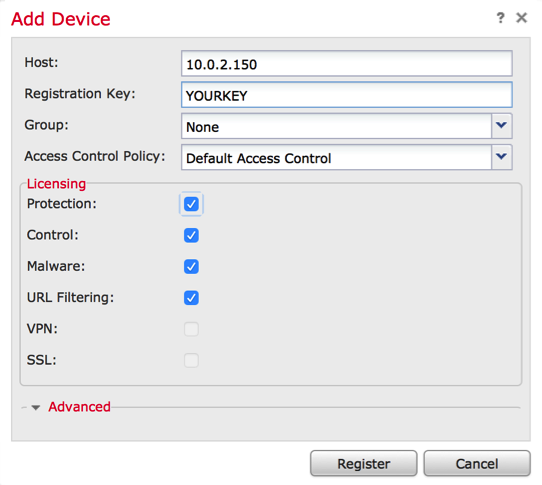
Click the Add button and Add Device. Put in the IP address of the Sourcefire module configured along with the Registration Key (NOTE this is the Sourcefire IP within the ASA and not actual ASA IP address). The Registration key was made up during the setup process of the Sourcefire software inside the ASA (my post used thesecurityblogger for that example key). Select all the licenses you created and select add.
It should take a few minutes and if all works, you will see your ASA is added. Now you have a basic FireSIGHT vm setup managing a ASAx series appliance. You can learn more at www.cisco.com or other posts in this blog.

What is the difference between the Sourcefire Virtual Defense Center
and FireSIGHT Management Center Virtual Appliance ?
The difference is branding. Defense Center is what the centralized management platform was called before Cisco acquired Sourcefire. Now its called FireSIGHT Management. This goes for all physical and virtual options.
What are the requirements for FireSIGHT Management Center Virtual Appliance on esxi (cpu / memory /hd) ?
From the config guide:
The computer that serves as the ESXi host must meet the following requirements:
• It must have a 64-bit CPU that provides virtualization support, either Intel® Virtualization
Technology (VT) or AMD Virtualization™ (AMD-V™) technology.
• Virtualization must be enabled in the BIOS settings
• To host virtual devices, the computer must have network interfaces compatible with Intel e1000
drivers (such as PRO 1000MT dual port server adapters or PRO 1000GT desktop adapters).
The complete guide can be found here http://www.cisco.com/c/en/us/td/docs/security/firesight/541/virtual-install-guide/FireSIGHT-Virtual-Installation-Guide.pdf
i have cisco account but i can not find the software of virtual sourcefire defens center in products downloads in cisco website
can you send me the direct link of the software ?
Go here http://www.cisco.com/c/en/us/products/security/firesight-management-center/index.html and on the right you will see “download software for this product”. You will see “firesight management center virtual appliance” as one of the options. Select that. Let me know if you don’t have access rights to down it. We may need to publish it to your account.
Are the virtual CPU requirements GHz or MHz?
I would think GHz
Hi,
Can you use Virtual Box for the VM file? Is there a free VM client I can use to get this up and running?
Thanks,
Ross.
Hi Ross. Today it is just available using VMware as shown in the datasheet here http://www.cisco.com/c/en/us/products/collateral/security/firesight-management-center/datasheet-c78-732251.html. There are three flavors … one for managing two devices, one for 10 devices and one for “unlimited”, which today is 25 devices. This may change in the future and yes, there is a license cost to use it. I believe if you use the smart licensing, you get 90 days for free to try it out. Just download the manager, click licensing and select smart licensing. I’m 100% that will work without certain CCO privileges so your best bet is to speak to your Cisco solution provide about obtaining demo keys. Hope this helps.
Hi,
Is there any ways to check how many devices can one existing FireSight manage ( 2, 10, or 25) ?
Thanks,
Roy