
One really cool concept is integrating a vulnerability scanner with a access control technology. The value of access control is to automate enforcing policy for what should be on the network. Typically, policies include having the latest operating system updates (example WSUS updates) as well as updated security tools such as Antivirus. That’s great but many security tools are hyper-focused on detecting threats vs looking for real weaknesses. That’s where a vulnerability scanner comes in.
Testing hosts for vulnerabilities along with posture could detect things like a host with out of data software that could be abused (flash / java, etc). These devices are just as risky as something not meeting policy and therefore should also be handled in a similar manner. The automation of performing this test at the doorway limits the exposure of permitting vulnerable devices on the network. This is much better than the common practice of randomly scanning the network for vulnerable systems and hoping that an administrators tends to the risk once identified.
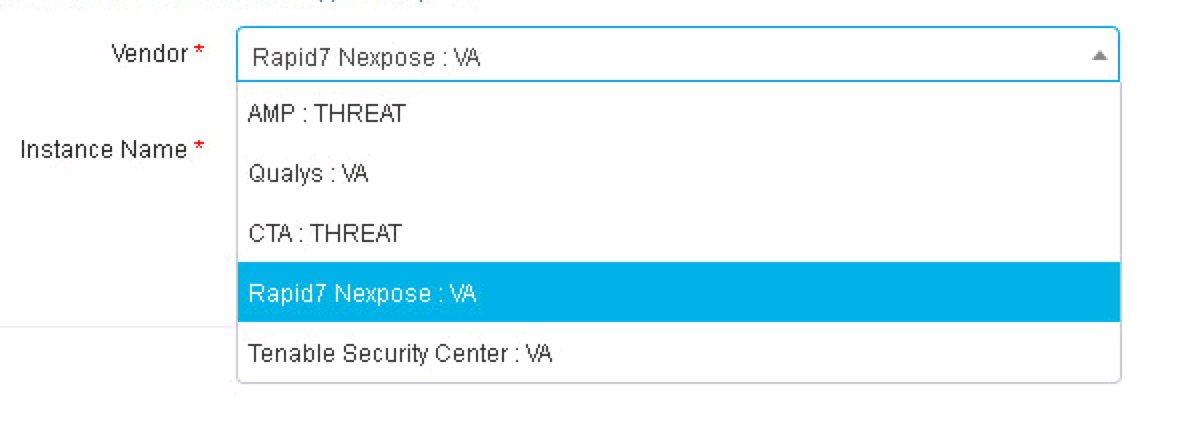
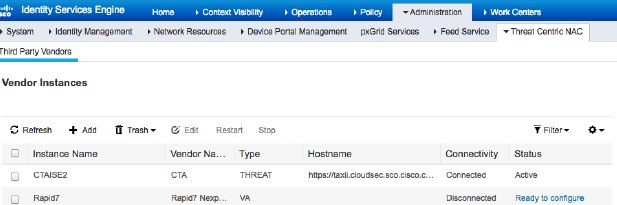
Today, Cisco ISE can integrate with a handful of commercial scanners as shown in the following screenshot. Note this is showing version ISE 2.3. The value is to automatically scan and quarantine any device that is found to be vulnerable.
 Here are the steps to configure Cisco ISE 2.3 with Rapid 7 Nexpose Vulnerability scanner. Similar steps would be performed for any of the other options shown such as Qualys or Tenable Security Center (Nessus). For this integration, we will be leveraging Nexpose’s Common Vulnerability Scoring System (CVSS) to determine the actions of ISE (IE moderate, server and critical based on breaking up scoring between 1-10).
Step 1: Generating a certificate and trust between systems:
The first step is to establish trust between Cisco ISE and Rapid 7 Nexpose. If you are using self-signed certificates, you can export the Nexpose certificate from your browser using Firefox and import that into the ISE trusted certificate store. Next, export the ISE identity certificate to the Nexpose CA store. If you are using a external Certificate Authorty (CA) Server, you will need to import the CA root certificate into Nexpose. You will also need to import the CA root certificate into the ISE trusted certificate store. Lets go through this in more detail.
To use self-signed certificates, first log into Nexpose and go to Home-> Administration-> Global and Console Settings-> Console-> Administer-> Web Server->Manage Certificates. You should see the following screen as a pop up.
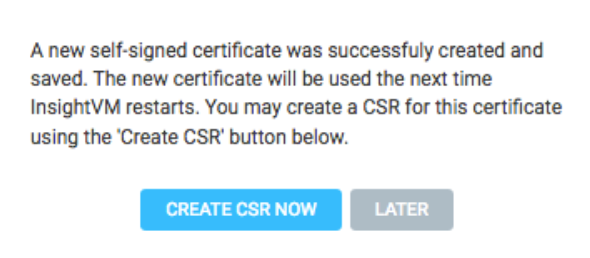
 Choose new certificate to generate a new self-signed certificate. Give it a name and fill out the blank panels. Click Create. You should see the following, which you can click Later for now.
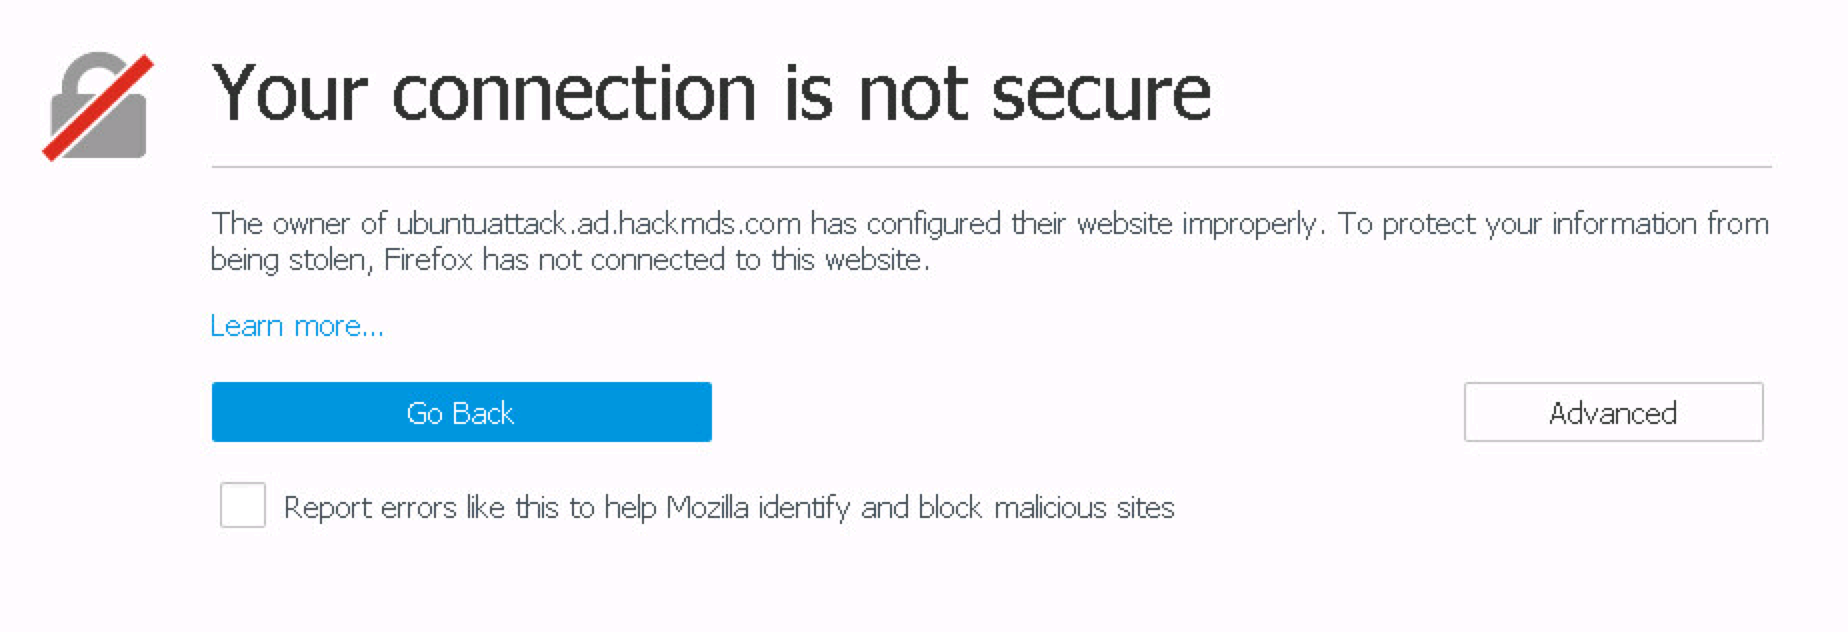
 You can export the self-signed certificate by opening Firefox and accessing the Nexpose address you used for your certificate. For example, open Firefox and go to the name used in the certificate you just used. You should see the following warning. My example, I went to https://<NAME I USED>.com:3780.
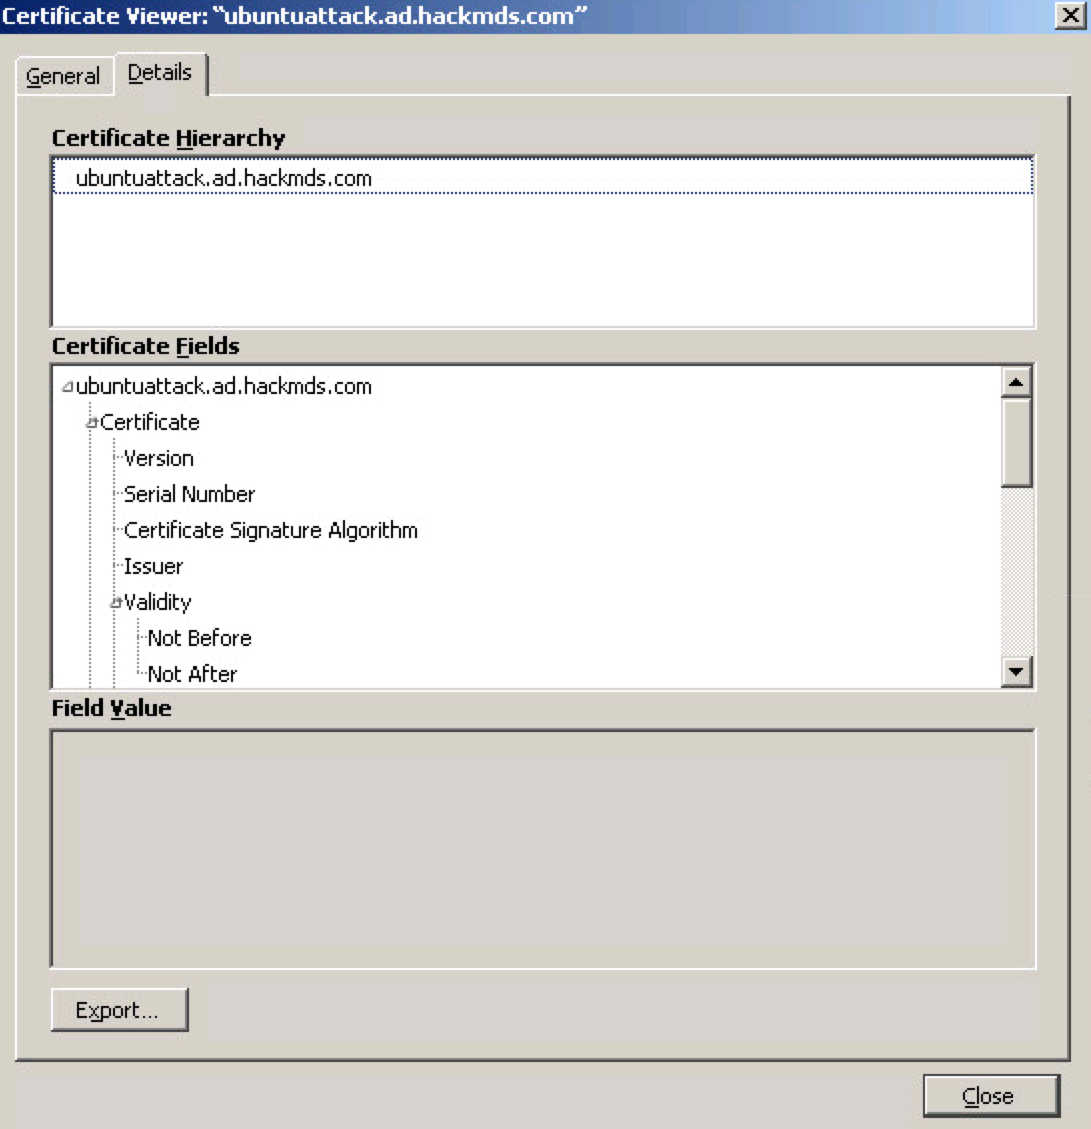
 Select Advanced->Add Exception. Then select VIEW and choose DETAILS. You should see the option to export as shown.
 Now you can click continue, which should show the Nexpose login screen since you accepted the exception.
Next you need to import that cert you just exported into ISE. Log into ISE and go to Administration -> System -> Certificates -> Trusted Certificates -> Import as shown.
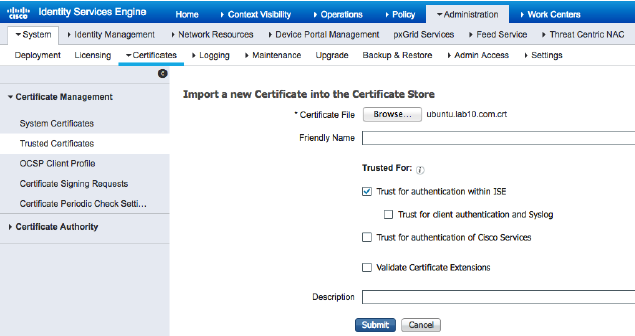 Select your cert and make sure the checkbox is there for Trust for authentication within ISE. Submit that and you should have trust between the systems using self signed certificates.
External CA server:
If you are using a external CA server, you will want to download the root certificate from the external CA server in 64 base encoded format. You will want to paste that into Nexpose via Administration -> Scan Options -> Root Certificates -> Manage -> Import Certificates -> paste root certificate. I recommend using the web gui meaning going to your ad IP address/certsrv and follow the steps to export.
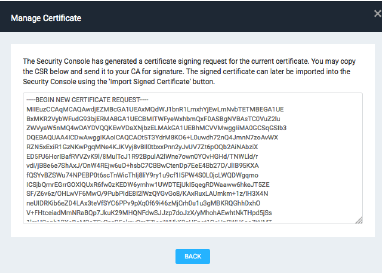
Next create a new certificate in Rapid 7 just like how we did with the self signed certificate. After that, select NEW CSR and copy that. The following is an example.
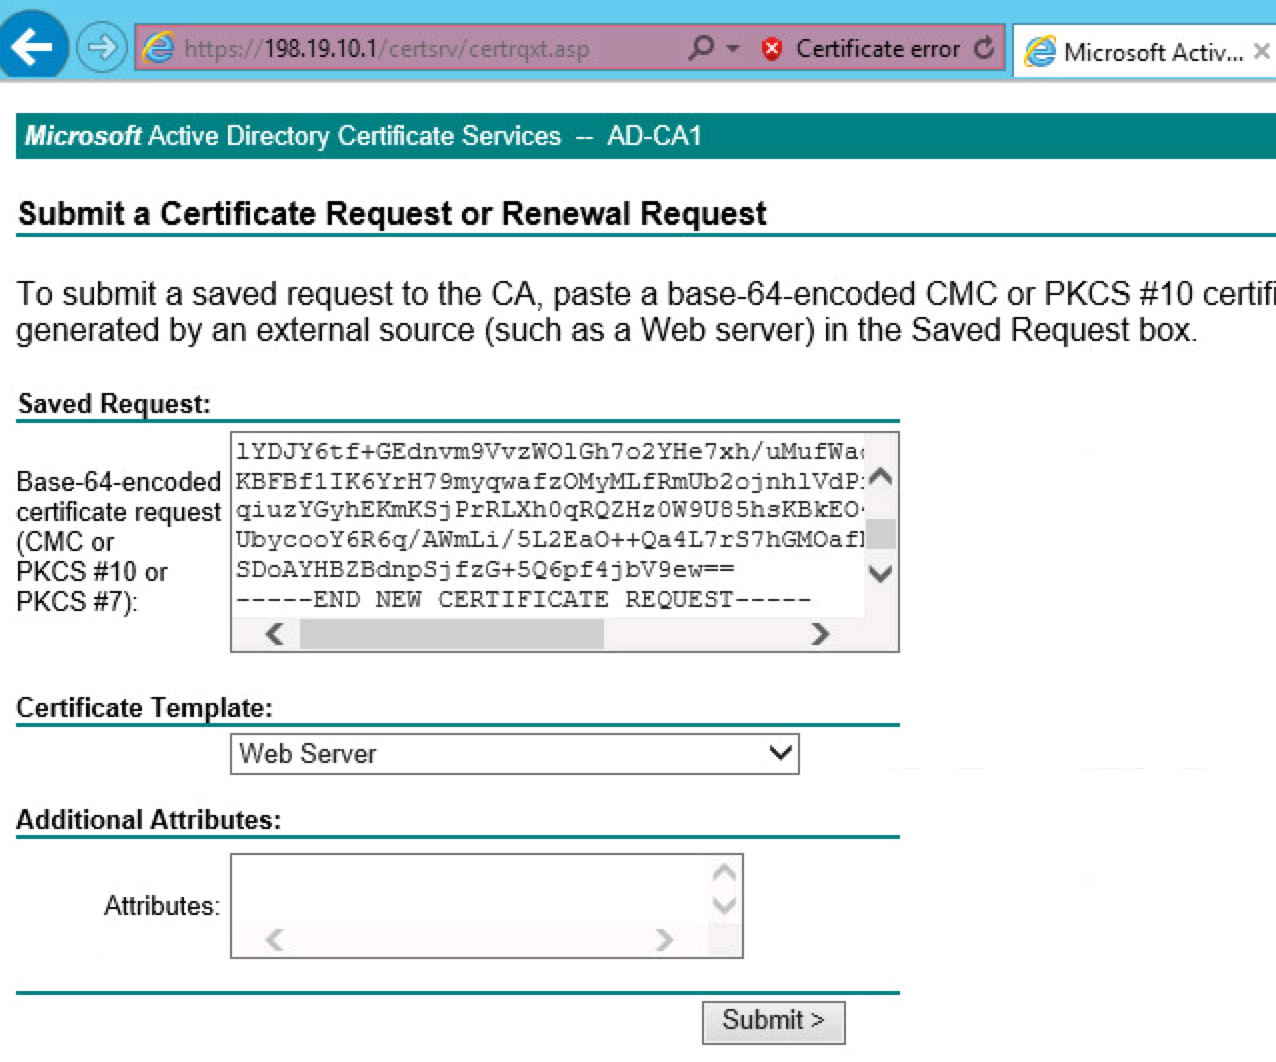
 You will want to paste this into your AD server. I’m showing an example of doing this using the GUI via https://<yourADserver>/certsrv and selecting Request a certificate -> Advanced Certificate Request Window
 Now select use based64 encoded for download format and download that certificate. Next go back to Nexpose and go to Administration -> Global and Console Settings -> Console -> Administrator -> Web Server -> Manage Certificate -> Import. Open the cert you downloaded from your centralized AD, copy the text and paste it here.
You will need to establish trust to ISE as well, which should be done if you are using a centralized AD deployed correctly.
Step 2: Nexpose Define Site and Assets to Scan
In Nexpose, create a new site. Give it a name such as ISE1. Select Assets and provide the IP address or range of IP Addresses for scanned assets. Save that. This will be the IP addresses that will be evaluated by Nexpose. Consider these the “results” networks you use in ISE.
Step 3: Setting Up Cisco ISE
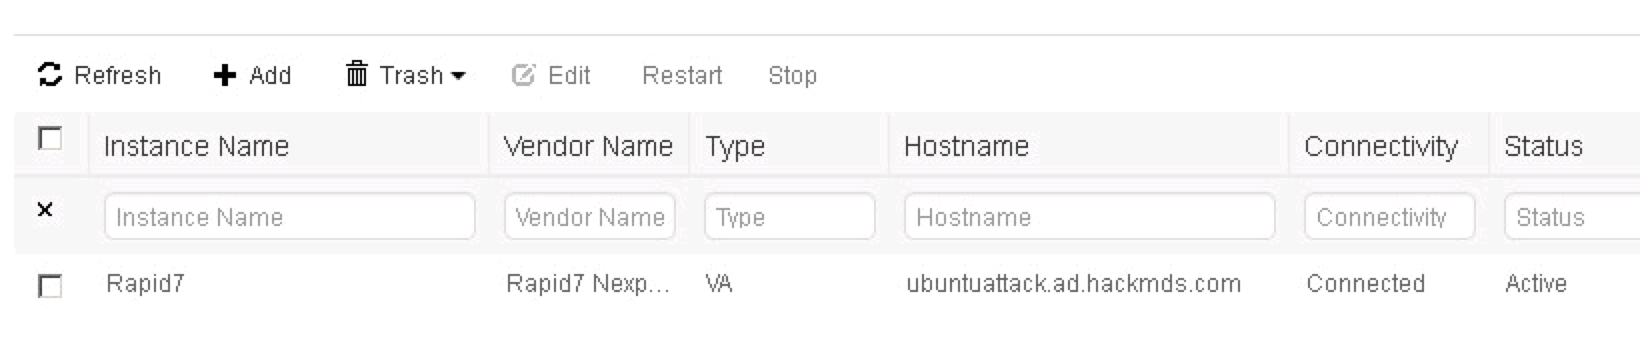
Now lets configure Nexpose within Cisco ISE. Go to Administration -> Threat Centric NAC -> Third Party Vendors -> Add -> Rapid7 Nexpose VA as shown in the first picture in this post. Click Save. After a minute or so, you should see “Ready to configure” by the status as shown. Click that once you see it.
Note, if Threat Centric NAC isn’t enabled, you will need to go to administration, select your ISE server and check the Threat Centric Box.
 This is the moment of truth. You need to fill in with the name you used for the cert trusted by ISE that represents Nexpose and click next. If trust is there, you should be able to add it. If there is an issue between communication and trust between systems, you will likely see an error. For my lab, I had errors because I forgot to add a name server within ISE so it couldn’t find my Nexpose. In another lab, I forgot to import the root cert into Nexpose. Make sure to perform the certificate steps properly and test there is communication between AD, ISE and Nexpose.
If things are good, you will see one last page to set the timing of scans. Make adjustments and you should see Nexpose is now active meaning connected with ISE.
 Step 4: Setting Up Cisco ISE Authorization and Authorization Profiles
Now lets configure ISE. In ISE, go to Policy -> Policy Elements -> Results -> Authorization -> Authorization Profiles -> Add. Give it a name like Rapid7_Trigger_Scan and under Common Tasks, enable Assess Vulnerabilities and select Rapid 7. Note you may have to go to the right of the GUI to find a scroll bar to see all of the common tasks options.
 Step 5: ISE Authorization Profiles for Nexpose via Security Group Tags (SGT).
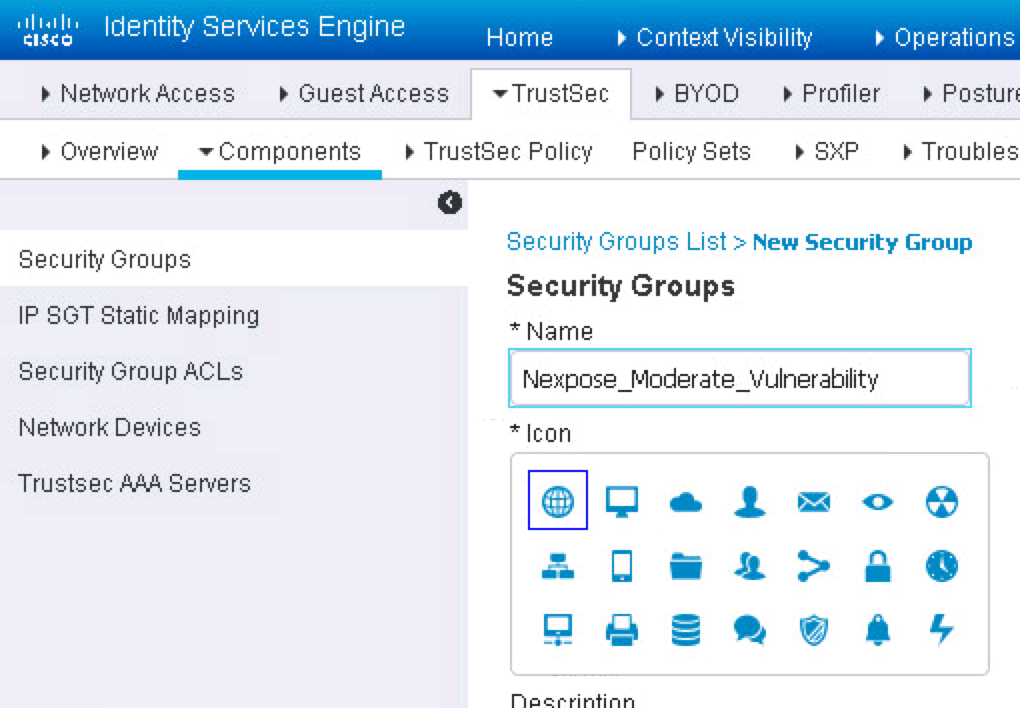
Now we will create checks for three different levels of vulnerabilities. You could adjust this to more or less profiles depending on how granular you want to go. Go to Work Centers -> TrustSEc -> Components -> Add and give it a name such as Nexpose_Moderate_Vulnerability. Do the same for two more called Nexpose_Severe_Vulnerabilities and Nexpose_Critical_Vulnerabilities.
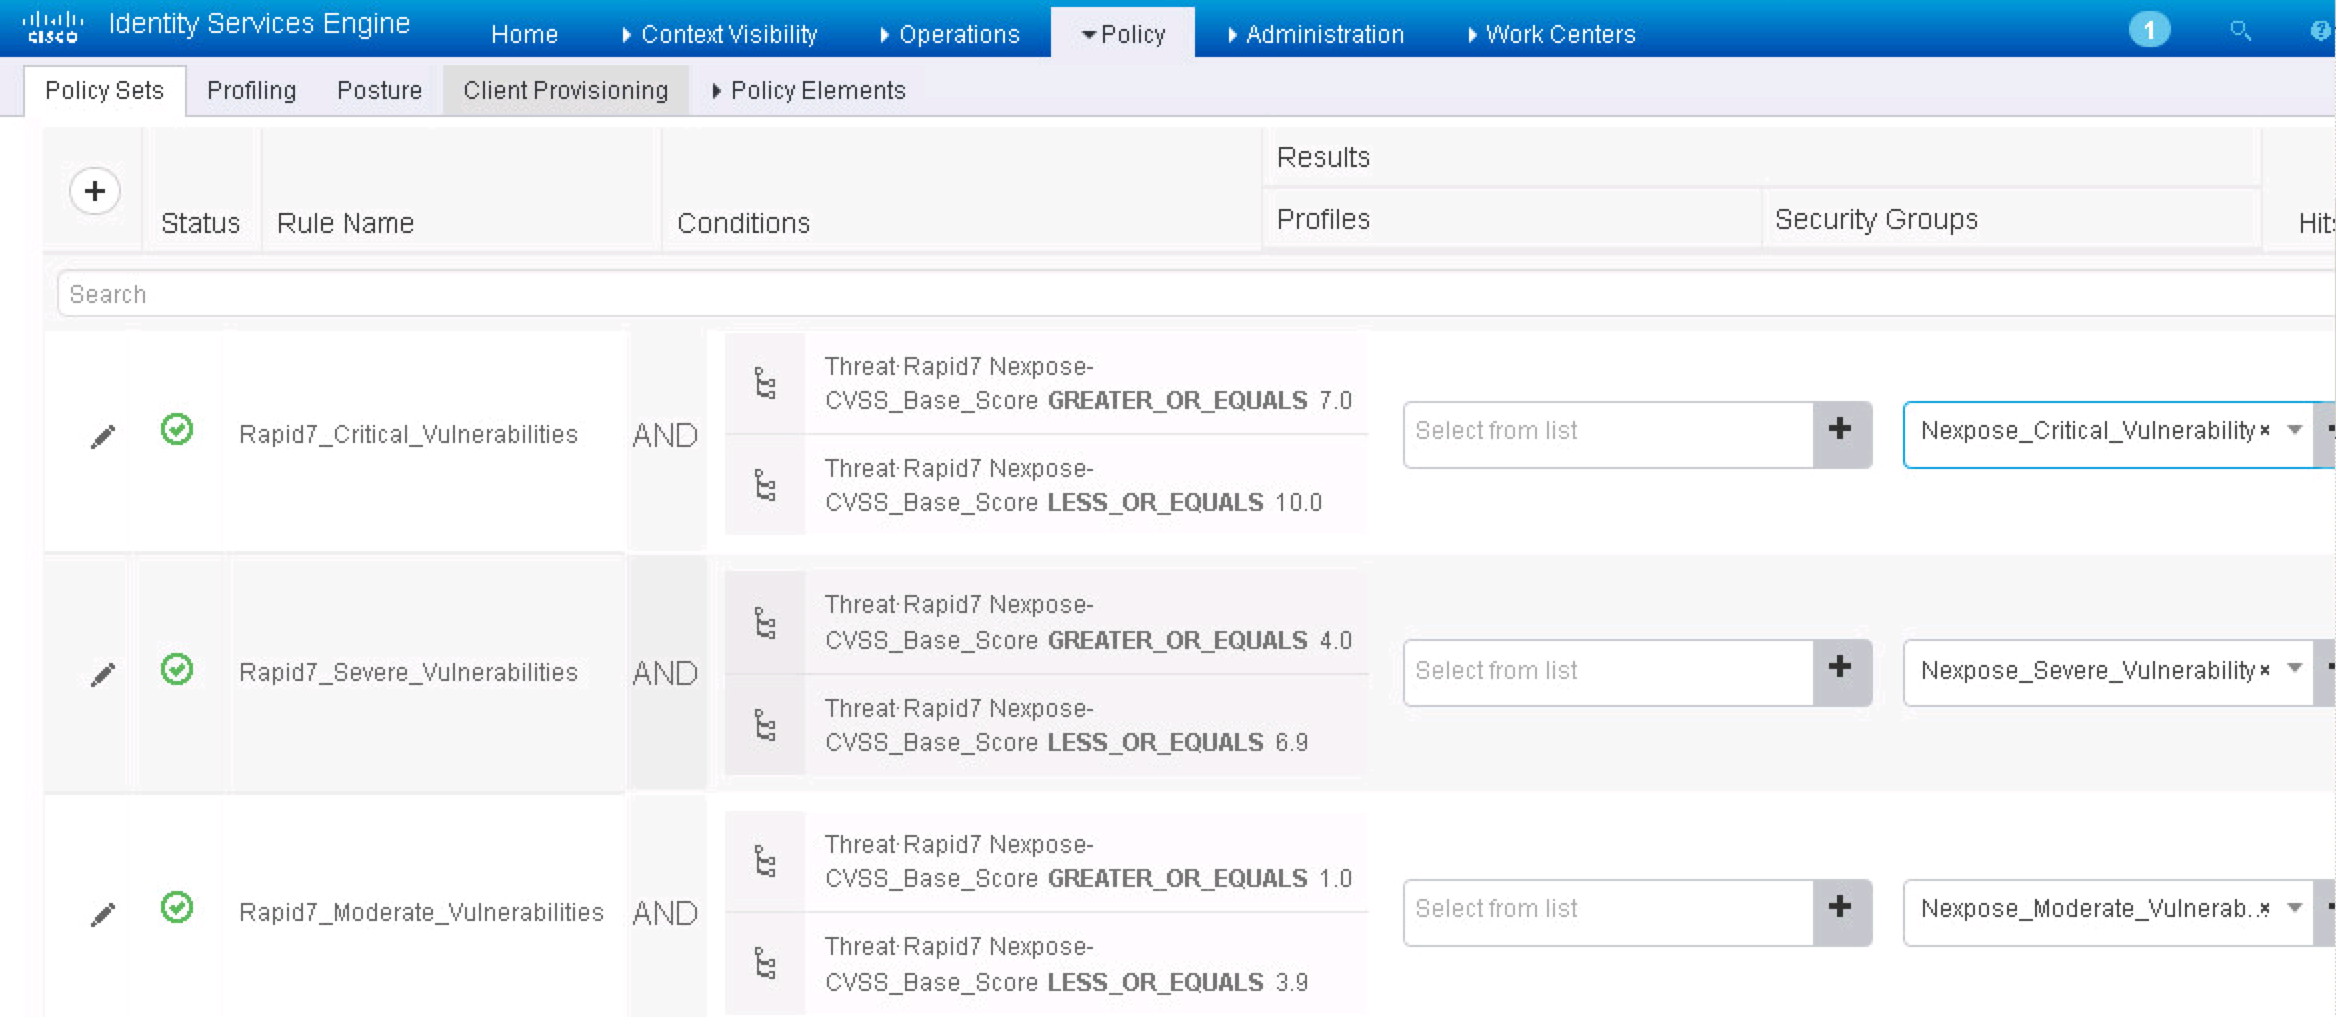
 Now select Policy -> Authorization -> Exceptions -> Create New Rule. You want to create three policy sets (assuming you are using policy sets) that match the Tags you just created. For my example, I’m using 1-3.9 for Moderate, 4.0-6.9 for severe and 7-10 for critical. The next screenshot for an example of how to do this.
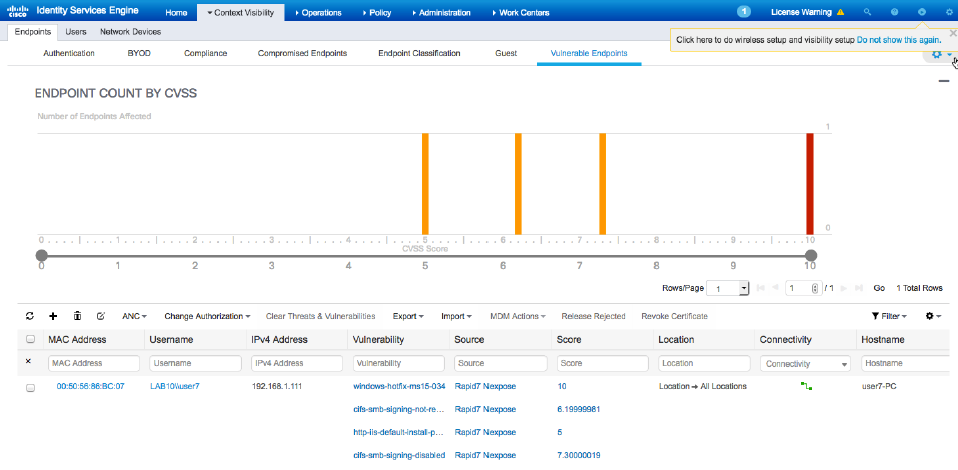
 Save that and now you can test. Testing works by having systems connected based on the IP range you had included in Nexpose. In Nexpose, the home page should show scans that were triggered. Within ISE, you can view if systems are vulnerable under Context Visbility -> Endpoints -> Vulnerable Endpoints as shown.
 Pretty cool stuff!

Pretty cool article!
I have used the receipt in my own lab in order to make it sure inside the corporate infrastructure.
Thanks!