For those interested in researching malware using cloud services, this post will walk you through how to set up the T-POT honeypot platform on amazon web services and google cloud. I found older posts covering installing T-POT on ubuntu 16.04 however the latest version requires Debian. There wasn’t much out there covering the latest version of T POT so here is what I did to get my honeypot running within AWS and google cloud.
Amazon Web Services
Create Virtual Server
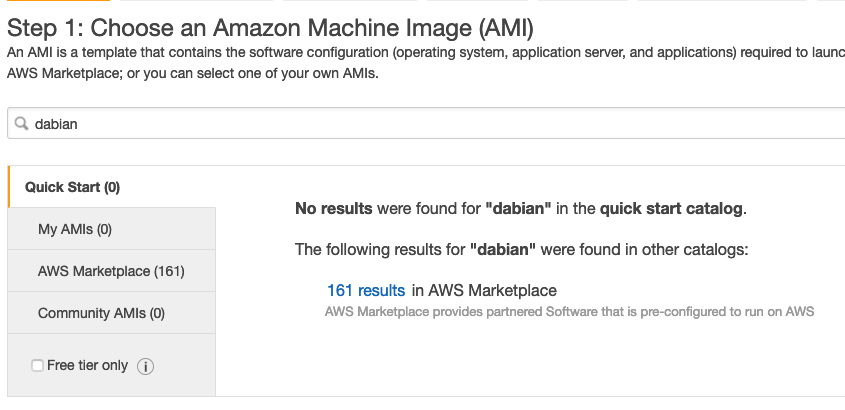
As previously stated, you must use Debian for the latest version of T-POT. Click to launch a new server but instead of choosing a template, search for Debian. You will find there are not results but 161 results within AWS marketplace. Click the 161 results
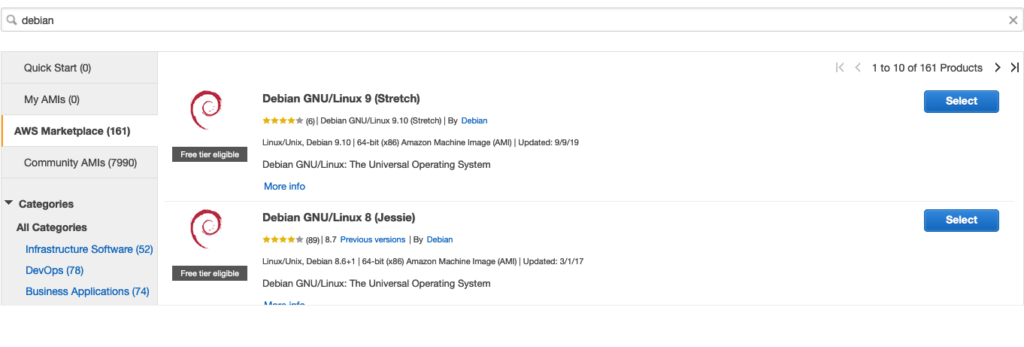
Choose the first one “Debian GNU/Linux 9 (Stretch) and click continue. You will want to use at least 4-8 CPUs. I tried using the free tier stuff and it would only run for a few minutes before crashing. Yes, the cost goes up but if you don’t provide enough power, I found it to have issues.
You will be prompted for settings. Here is what I did
- I left the network default
- For storage, I went with 60 GB. I found going light causes some issues
- I left the security tags alone
- For the Security Group, you should use a source via your own IP or you could be unsecure and just leave the SSH open to everybody. Later we will come back and change this after the T POT install.
Click Review and Launch. It will ask about the key, which you will want to create. Do NOT go forward without a key or you will not be able to SSH to your server.
You could always create a key prior to building your server via going to the Network and Security tab on the left panel and choosing Key Pairs. Within Key Pairs, you can create a new key, which you can select as your key prior to launching your server when you see the question about your public/private key. Either way, make sure you have the key. For my example, its called “key”.
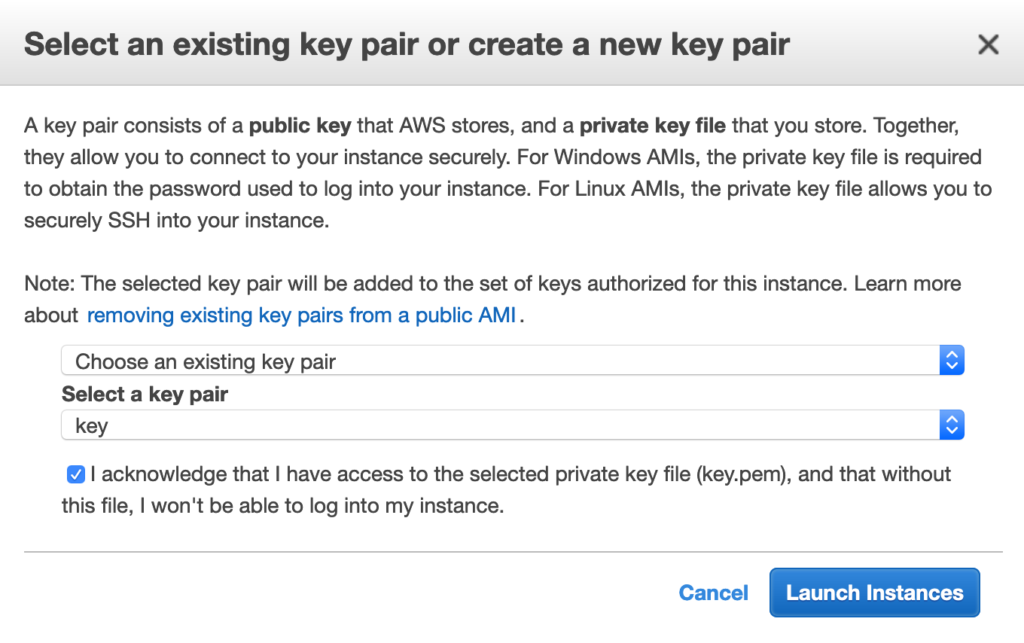
Launch Instances.
2) Installing T POTS
Once your server is up, you need to SSH to it. If you are on a MAC, you will first need to change the permission of the key you downloaded. If you didn’t download a key, go back and create a new key. Then rebuild your server and choose that key before launching.
The command you use is chmod 400 “yourkey.pem” where “yourkey.pem” is the key you created and downloaded.
You can also use a tool like Putty to SSH to your server.
To SSH to your server, use the command “ssh -i ‘/yourkey.pem’ admin@’thepublicDNSaddress” where yourkey is your key file that you downloaded and thepubDNSaddress is copied from your server. You will find the public DNS on your AWS page here.
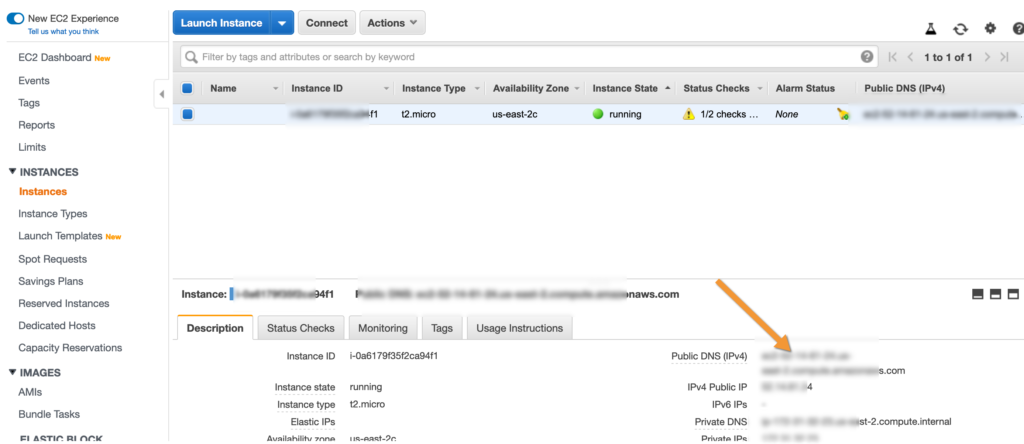
An example of running this could be the following assuming you are in the directory of your key. If not, include the entire path to the key.
“ssh -i key.perm admin@ ec2-15-246-45-56.us-east-2.compute.amazonaws.com”.

You will be asked if you want to add the key, which you select yes and you should gain access to your server.
Now you need to update your server via “sudo apt-get update” and “sudo apt-get upgrade”. This is administration best practices.
You will need to also run” sudo apt install git -y” so you can get the get repository.
Now you are ready to copy T POT into your server. See this website for the latest version information via https://github.com/dtag-dev-sec/tpotce. You will find it under the clone or download button. To install it, simply run “git clone https://github.com/dtag-dev-sec/tpotce.git“
Now type ls to verify you have downloaded T POT. CD to the folder and type LS to see what you have downloaded.

You should see the install.sh file. Let’s run that as sudo. You also need to include the –type=user command at the end. So to run type “sudo ./install.sh –type=user”
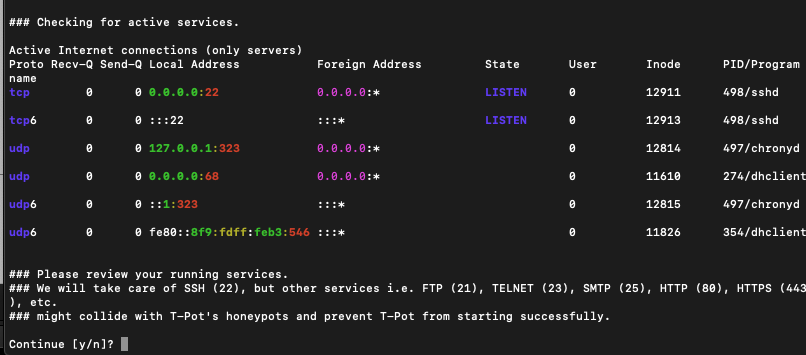
This will kick off the install, which will take 10-15 minutes. The first prompt you will see is the program verifying network connections and changes. Say yes to continue.
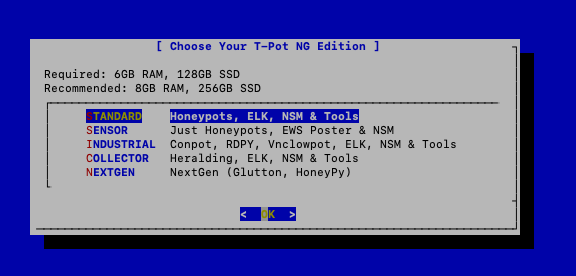
For the install type, I went with the standard
You will be asked to enter a user name and password so you can log in later. Do that and go take a coffee break while T POTs installs.
You will see when it’s done when the REBOOTING banner appears and your SSH session is terminated.

I found the system needed some time to reboot and function properly. If it doesn’t come up after a while, try rebooting it. To see if it’s up, you will need to connect via SSH or via the web. The problem is T-POT has changed things up. SSH using port 22 is now fake and used for a honeypot. You will need to go back to AWS and adjust the firewall rules.
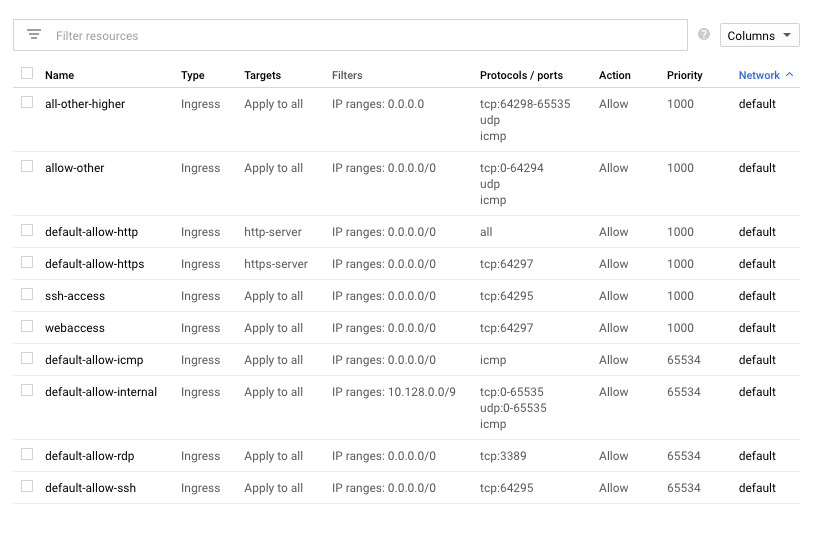
The more secure method is to only allow SSH and Web access to your system. To do this, you can go to whatismyip.com and only provide access to your IP. SSH will have to be switched to 64295 and web should be 64295. Since this is a honeypot, you could just open up everything as well. The key is you need to at least update the SSH and Web ports or you won’t be able to access T-POT. Here is an example of just opening up everything.

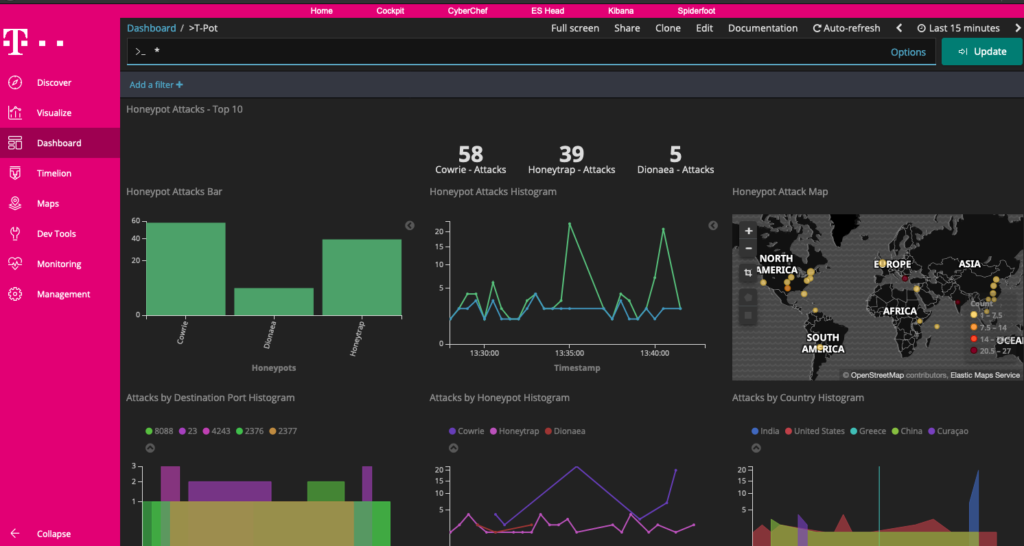
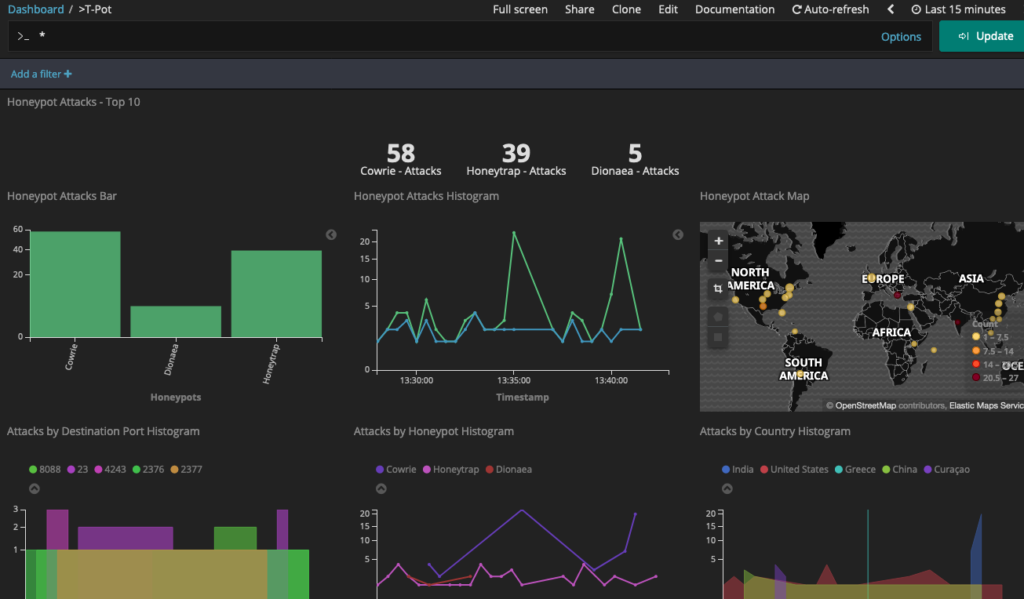
Now go to https://<your pubic IP>:64297 and you should be asked to access a unsafe location. Agree and you will be prompted with the login you used when you performed the T-POT install. Login and you will see the T-POT GUI. You should also see attack behavior within a few minutes.
Google Cloud
Setting Up The Server
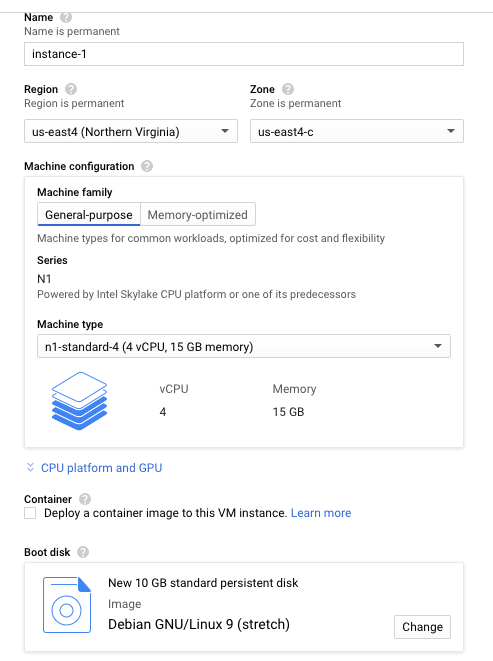
The process is similar in Google Cloud to install T-POT. First, you need to create a Debian server. Go to create VM instance. I went with a Debian stretch and 4 vCPU. Looks like it will run me around 50 bucks a month US. Make sure to check on the Firewall to allow HTTP and HTTPS traffic. Click Create
Now SSH to your system. Google Cloud has the built-in SSH option. Once you access your server, do the same upgrades as I covered with AWS along with installing git. Next, you will want to create a user using “sudo adduser”. Fill out the questions for your new user.

Next, update access rights and log into your new user account via “usermod -aG sudo john” and “su – <your user>”. As your user, you will need to generate a SSH Key. Use the command “ssh-keygen”.
Now you need to copy this into the authorized keys. Use the command “touch authorized_keys”, use cd .ssh to access the key file and add your key via the command “cat id_rsa.pub >> authorized_keys”.
At this point, its the same process to install T-POT. Follow the same steps until T-POT reboots. Once it does, now you need to do the same Firewall updates in Google Cloud as you did with AWS. As I covered earlier, its best to limit access to only your IP address but you can also be lazy and do it like this. What is key is you update SSH to 64295, web to 64297 and allow all so malicious parties can access the Honey Pots.
And thats it. After two hours, I found the following stats. Hopefully, this helps you buy your T-POT honeypot and saves you tons of troubleshooting hours.




Hello, for all time i used to check web site posts here in the
early hours in the break of day, as i enjoy to
find out more and more.